
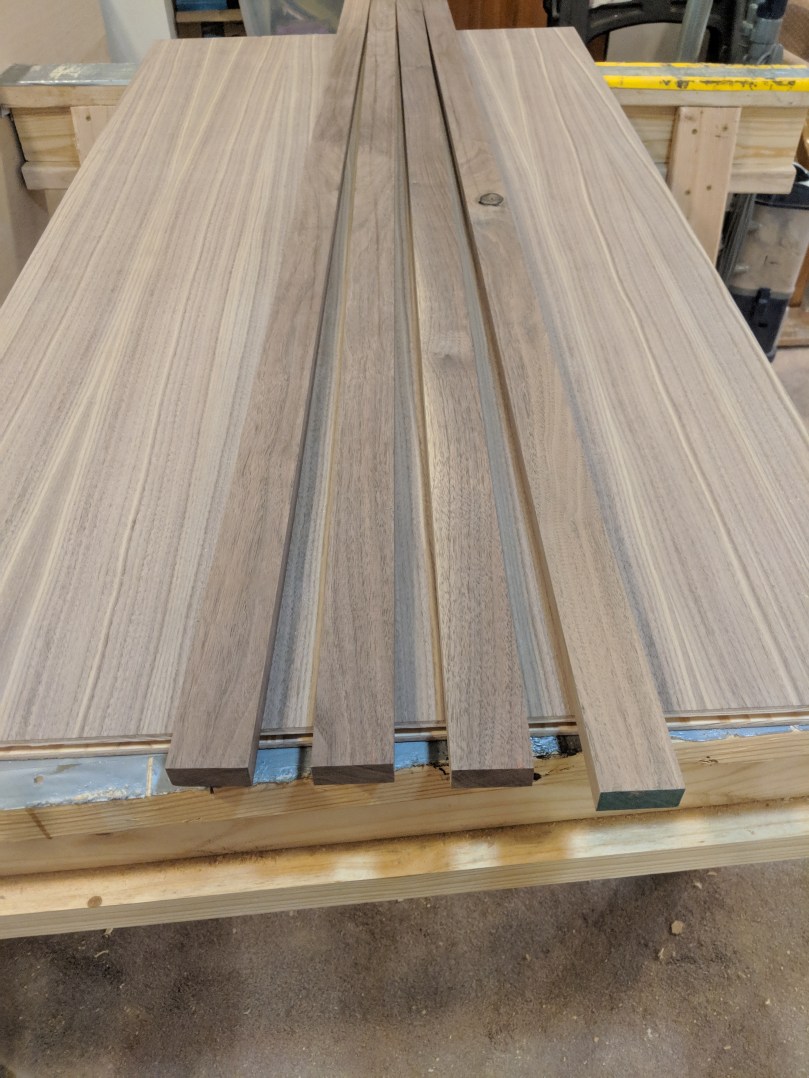
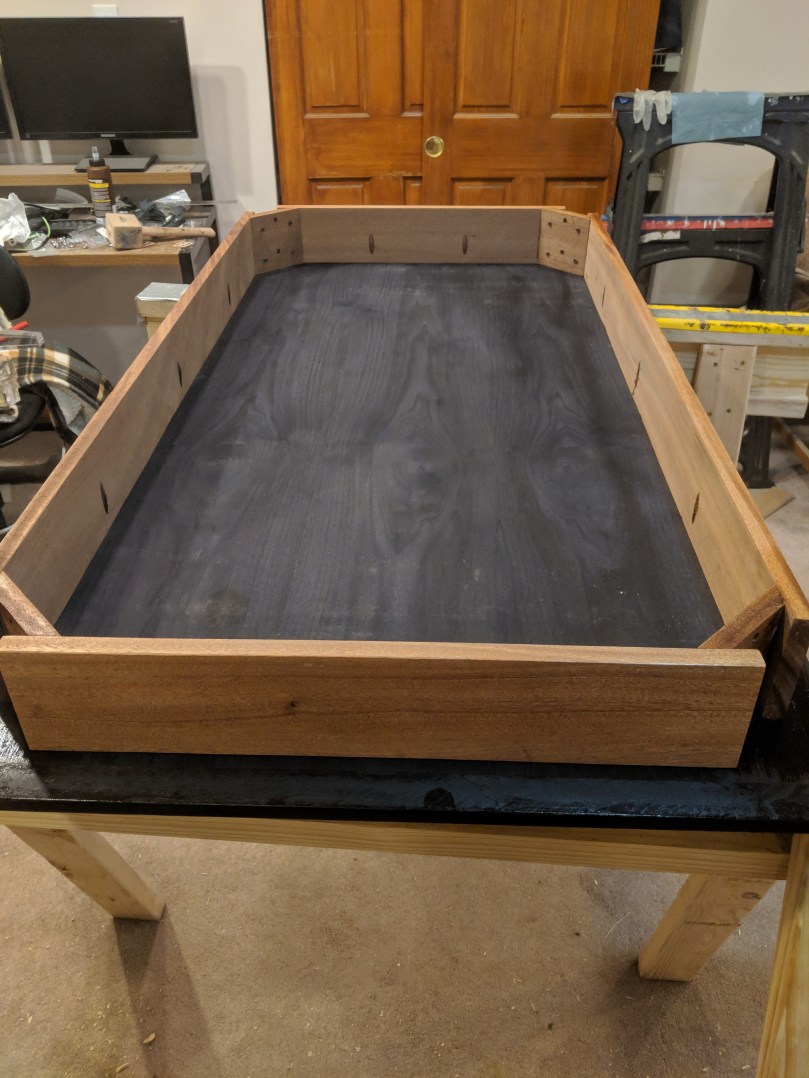
It’s time for the exciting conclusion to this coffee table build: the ebonized walnut top with inlay banding. I know, it sounds complicated! It really isn’t though; you can do all of this build with a circular saw and a router, if that’s all you had.Start by ripping some 4/4 walnut into strips that are 1 5/8″ wide. This will allow for a 3/8″ deep tongue that will go into the plywood, and a 1.25″ solid frame for the plywood. The plywood piece should be 50″ long by 27″ wide. You’ll note that this is a bit different from the measurements I put in the last part for the total dimensions. It’s going to actually be 52.5 x 29.5″ wide. I was originally planning on a 1″ board but 1.25″ looked better. Plane it to be exactly as thick as the plywood.
Using a slot cutting bit with a 1/4″ tall cutter, cut a groove on every edge of the plywood that is centered. Try to get as close to centered as you can when adjusting the bit depth; my plywood had a 1/4″ thick MDF core I used to line everything up. To ensure it’s dead centered, flip the plywood and route again from that side.


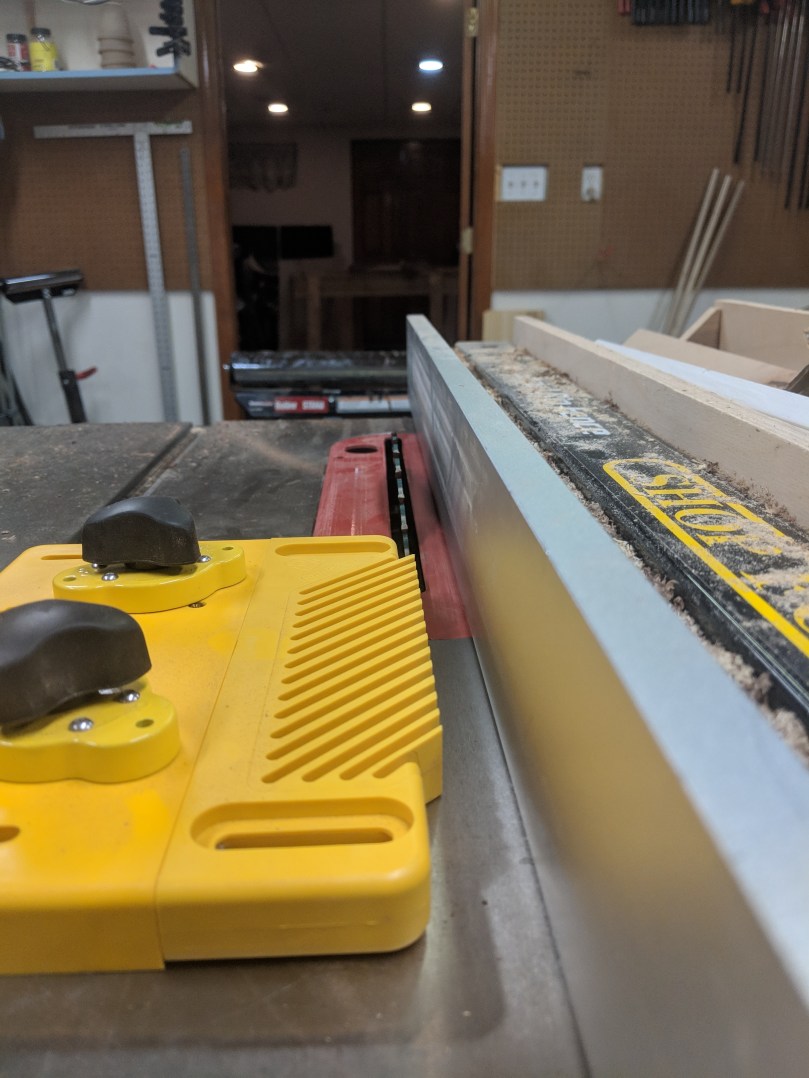
Now, create a matching, centered tongue on the walnut lumber that is 3/8″ deep. You can use a router table; I used a dado on my table saw. You could also use the same slot cutting bit, using the bearing to guide it. You have options!

I decided to add a really, really subtle to the bottom of the walnut frame. The legs have a 4 degree slope on them, so I added a 4 degree chamfer to the underside. I used a featherboard to hold it tight, and put that slight chamfer on with the table saw. Barely noticeable, but trying to pull elements together on this design.
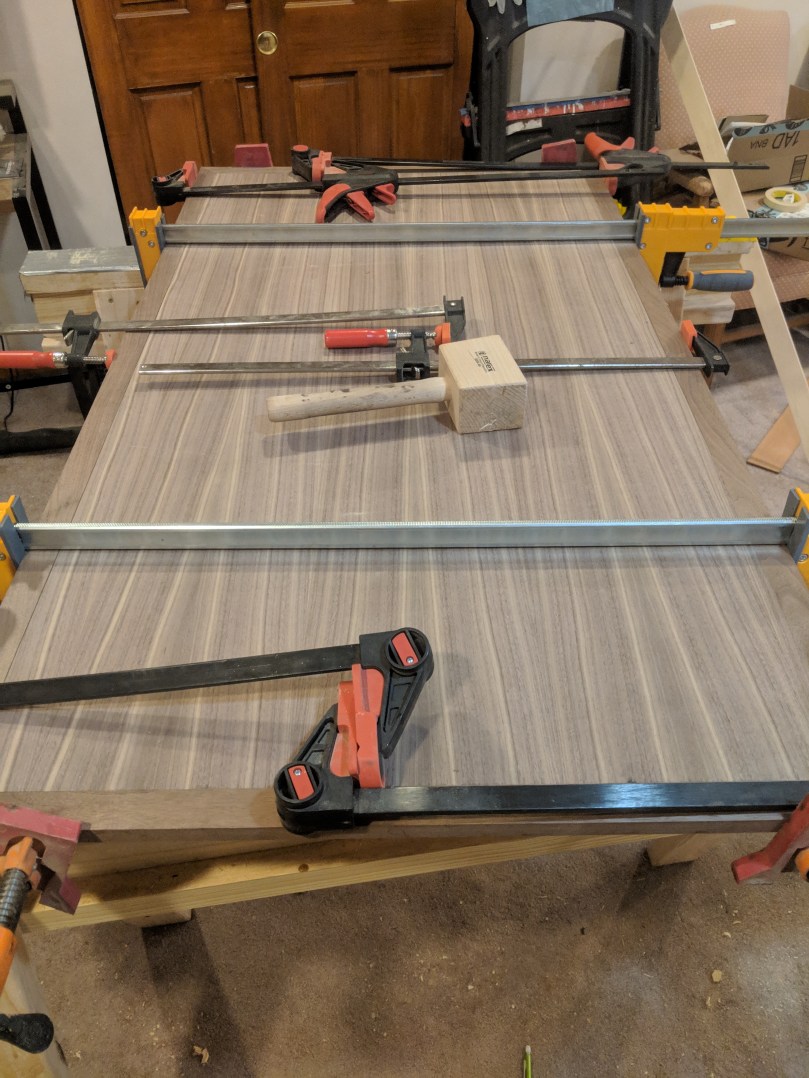
Using the miter sled on your table saw, cut mitered corners on everything. Make sure they’re as tight as you can get them and dry fit everything together. Once it looks good, place some Titebond Dark glue in the groove, put everything together, and clamp.
I like to put a spline on all my mitered corners to reinforce them. Miters are mostly end-grain joints, so by adding a spline you add a method to connect them with long-grain, which glues better. The easiest way I’ve found to do this on a large piece is use two cutoffs to create a flat reference edge. Then use the slot bit.


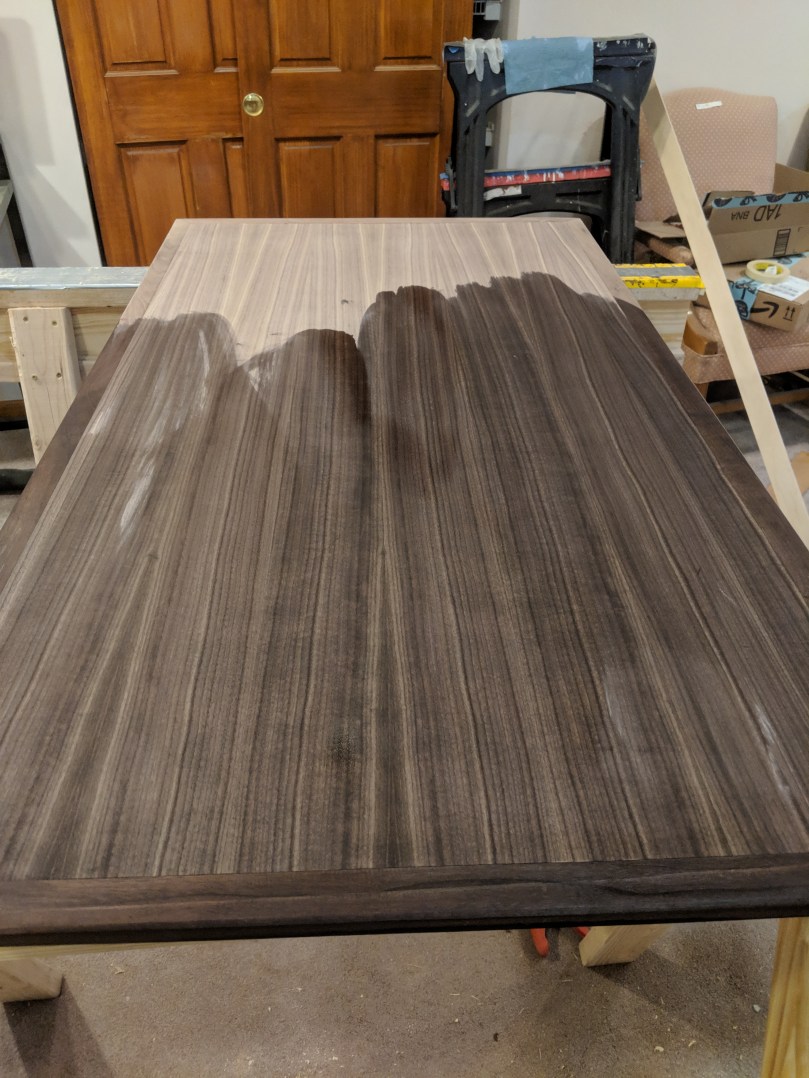
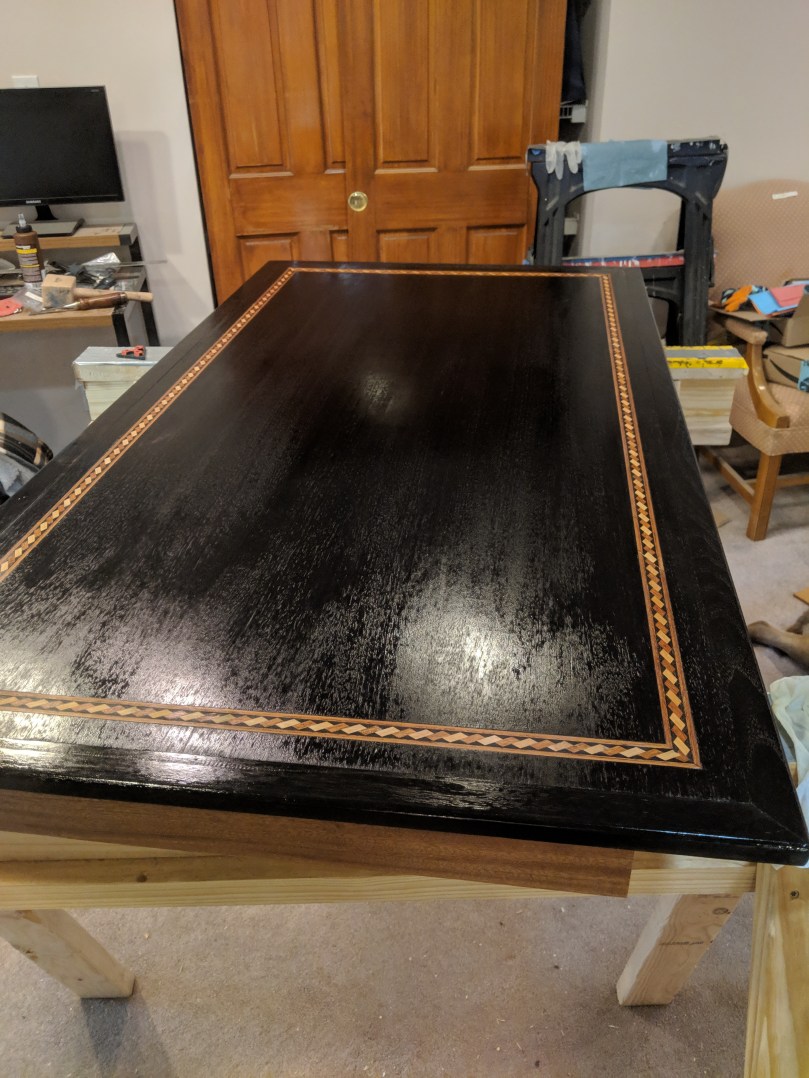
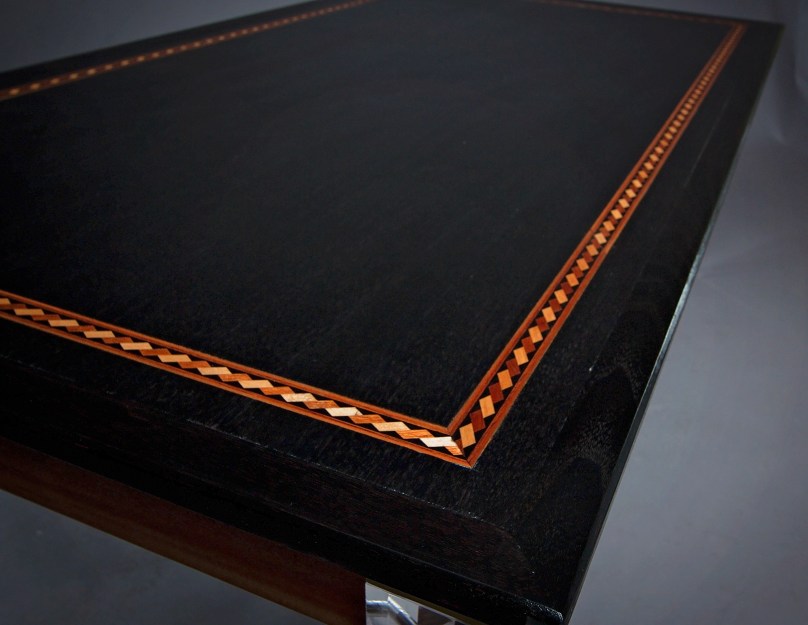
Now comes the truly magical part: ebonizing! Take that solution we set aside a week ago, and strain it through a coffee filter. I tried a few different dilution rates, and I settled on 50% of the mixture plus 50% more vinegar. This gave it a deep, rich black color but allowed some of the grain to still show through.
The reason this works is the mixture we created is actually iron-acetate. It’s a chemical that, when it reacts with tannins in wood, turns the wood black. Any wood with a high tannin content will work; oak, cherry, or walnut. Since walnut is already pretty dark, you may have better results. The grain is also more subtle than oak.
Apply it with a clean soft rag, making sure the walnut is uniformly damp, but not soaking wet. Here’s a video showing me applying some!
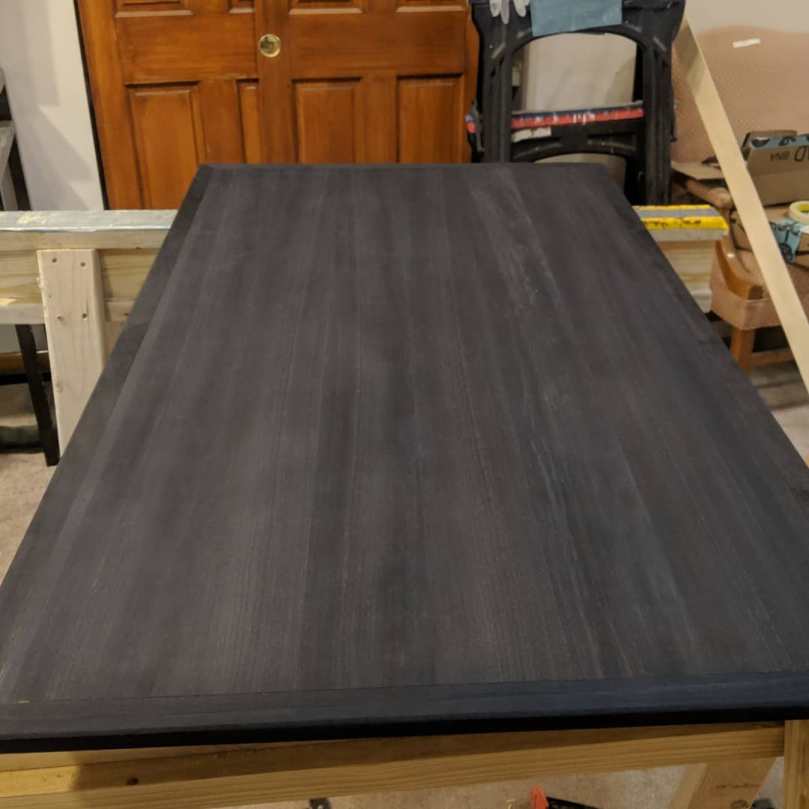
To protect the thin veneer on the plywood for the next stage, coat the top with two coats of a dewaxed shellac sanding sealer. This will keep the ebony from being removed as well.
Mark out your corners. I decided to use 1 inch in from the edge of the walnut plywood. These lines are there to tell you when to stop your router; you’ll use a sharp chisel to clean up the corners.
The inlay banding comes in 40 inch sections. We will use four of them for this table, using a scarf joint to create the longer sections. It’s 13/16ths of an inch wide. You’ll need a straight cutting router bit and a router with a guide fence to route the channel. My router came with a guide, but you may need to buy one depending on your model. You can also clamp a straight edge to the table and use that to guide your router. Make sure you check the depth of cut on a scrap before attempting it on the table.


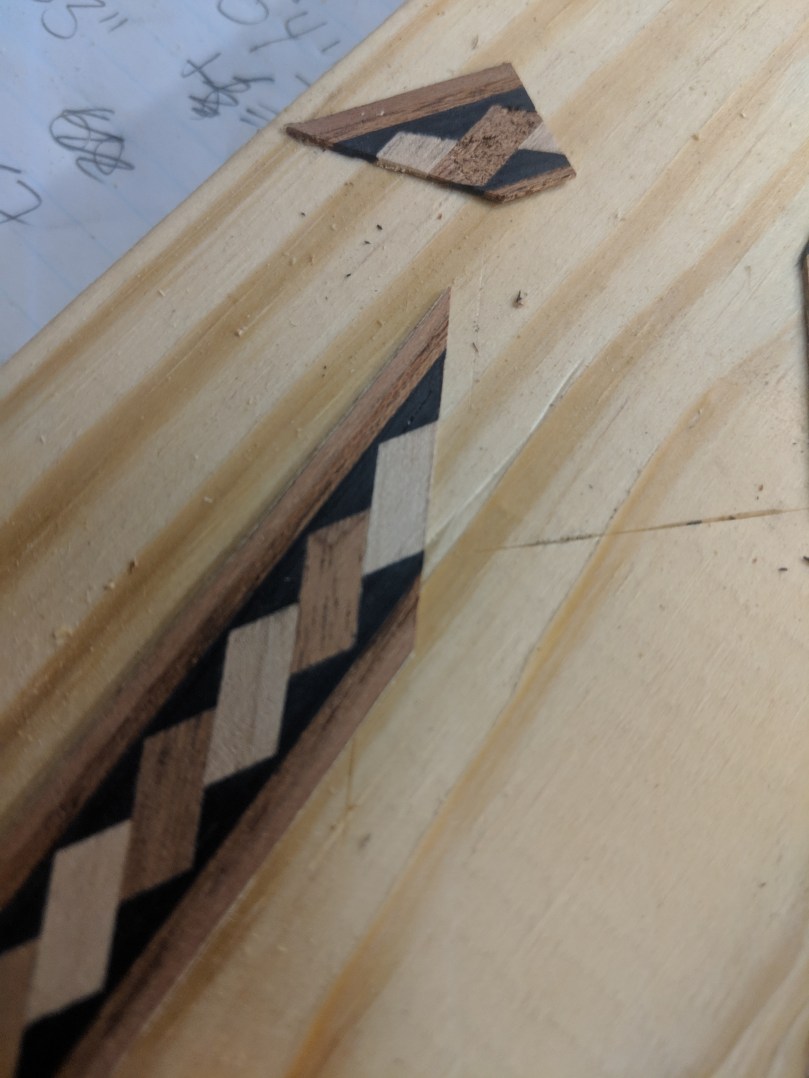
The only tools you need for cutting the inlay are a sharp knife and a straight edge. In theory, they should be 45 degree angles on each corner. I found the fit turned out better if I used the knife to mark the inside and outside corners, then connected them with the straight edge.
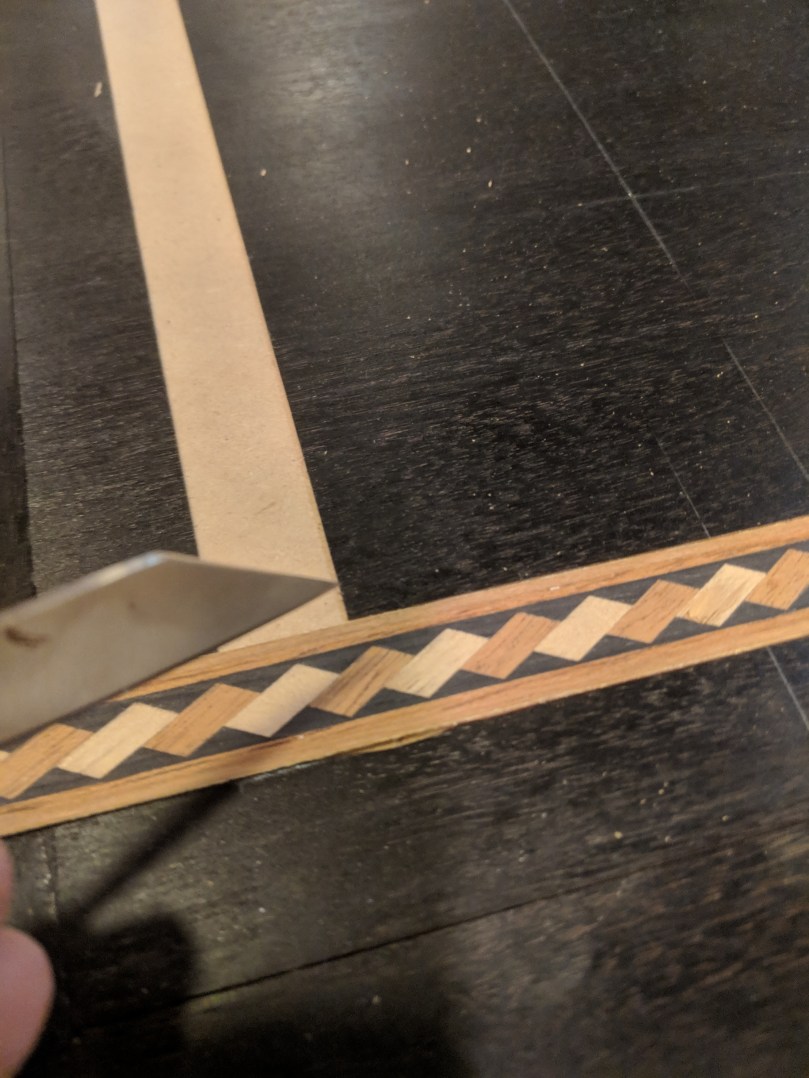
With a funky pattern like this, you’re shooting more for a close match on the miters; it’s very difficult to get an exact pattern match. I was happy with the results. Glue them in using Titebond liquid hide glue. It is urea based, not water based, meaning it won’t swell the inlay and make it warp. Put a straight piece of wood with painters tape on top and clamp it down to hold everything flat.
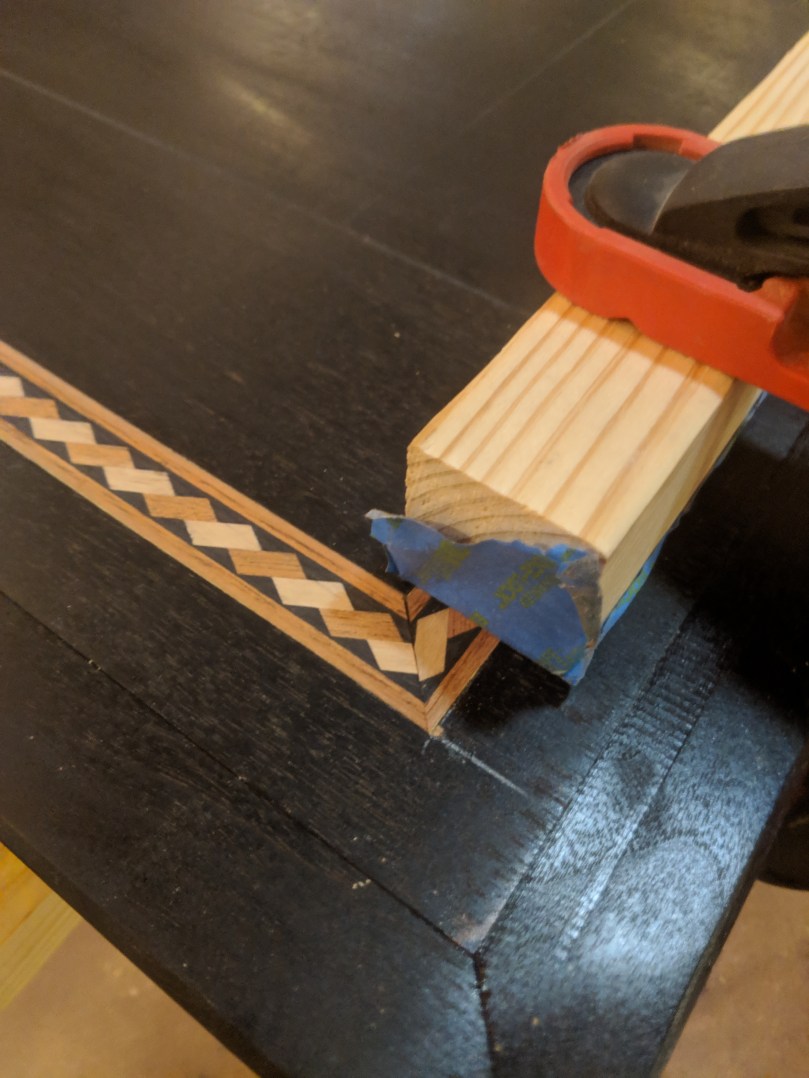
On the two long sides you’ll need to splice a small strip of veneer in to get the length we need. This is a good place for a scarf joint. The pattern lends well to it as well. Cut a line along the slope of one of the shapes, match it to the other piece, glue in tight for an almost invisible seam.


This is a good time to attach the frame. Use 1″ pocket screws. The guide on my kit says I can use 1.25″ but I found they almost punch through.
Sand, very lightly, with 220 by hand to remove the router marks. Then apply topcoat as usual. I did 3-4 coats of General Finishes Arm-r-Seal in Semi-gloss.
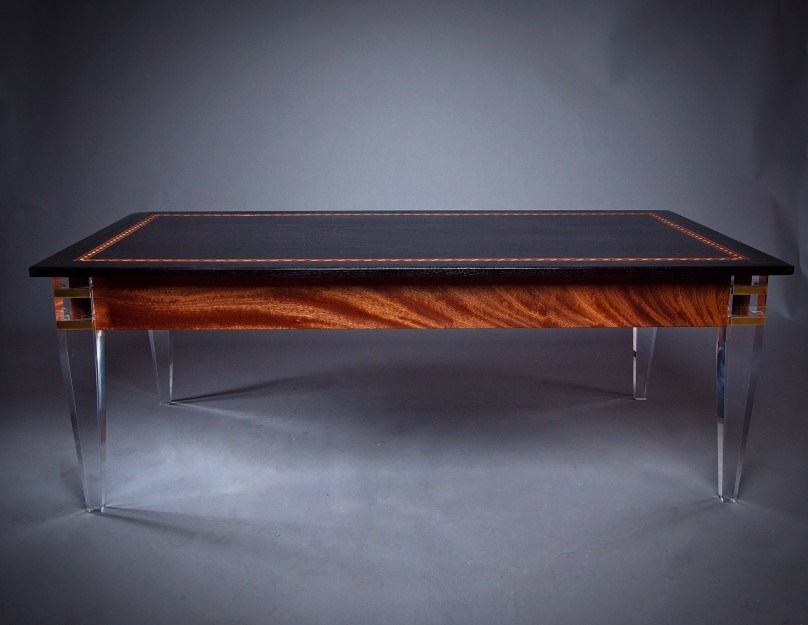
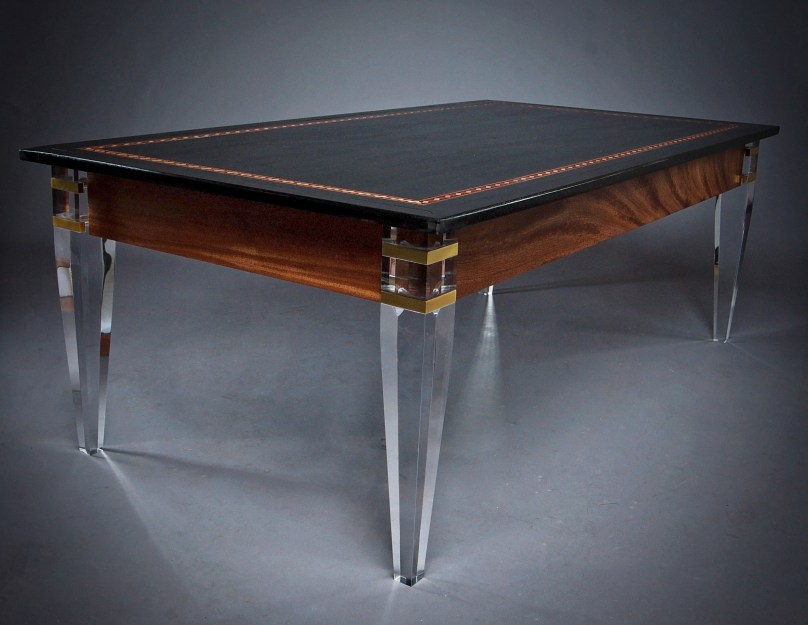
And here’s the finished product!!!
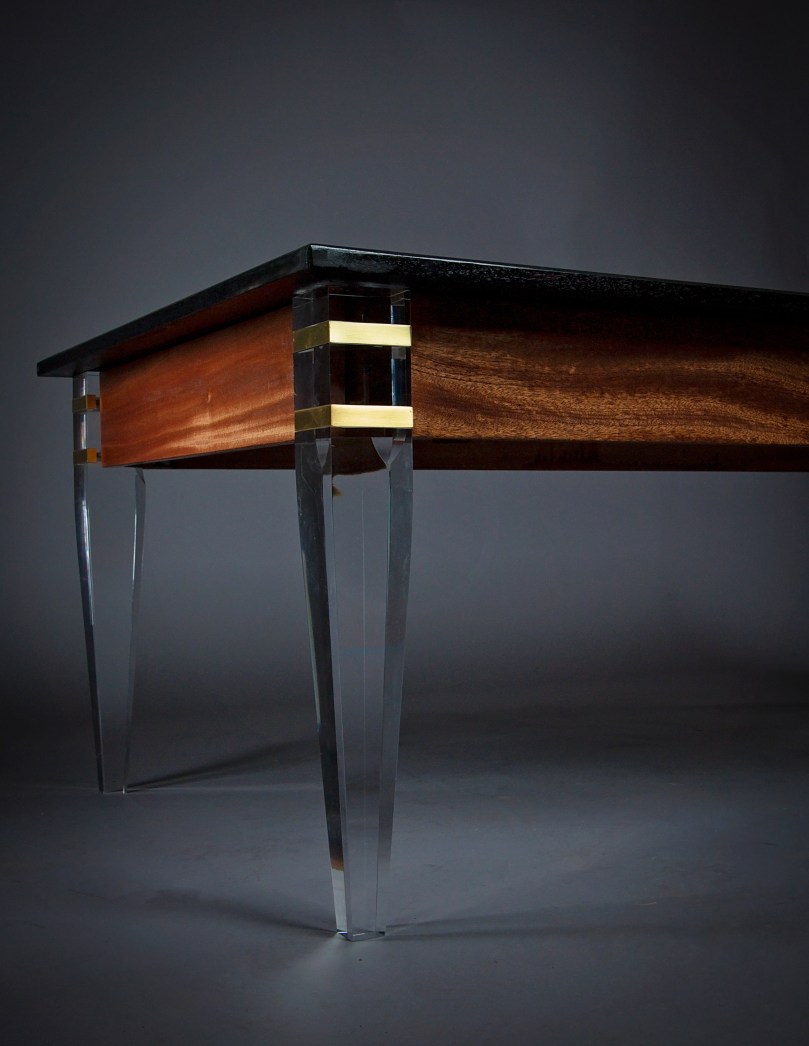

The overall quality is good for these furniture legs. I replaced the legs on a Z Gallerie sectional we bought a few years back (still currently sold by them), they look great. Overall, I’m pleased with the purchase but a few things keeps them from perfect.
– There is nothing on the bottom of the legs, just bare acrylic. To prevent visible scratching and movement, I had to buy clear rubber pads for the bottom of the legs.
– The screws are somewhat shorter than the original legs. One of the legs was giving me trouble but I was able to back the threaded bolt out some on one that was loose. Luckily avoided having to replace the bolt with a longer one.
– Shape is slightly odd. Please note that the bottom of the leg is square but the upper portion is rectangular. You’re going to want to have the legs oriented in the same direction to avoid having them look inconsistent.
LikeLike