
Wow, it has been forever since I’ve posted on here, sorry about that! Life happens, but I haven’t stopped woodworking.
In fact, I’m excited to finally share a step-by-step process on how to build a kitchen pedestal table using the Osborne Wood Products Transitional Style pedestal base. As before, Osborne graciously sent me the base in exchange for me writing this instructional post.
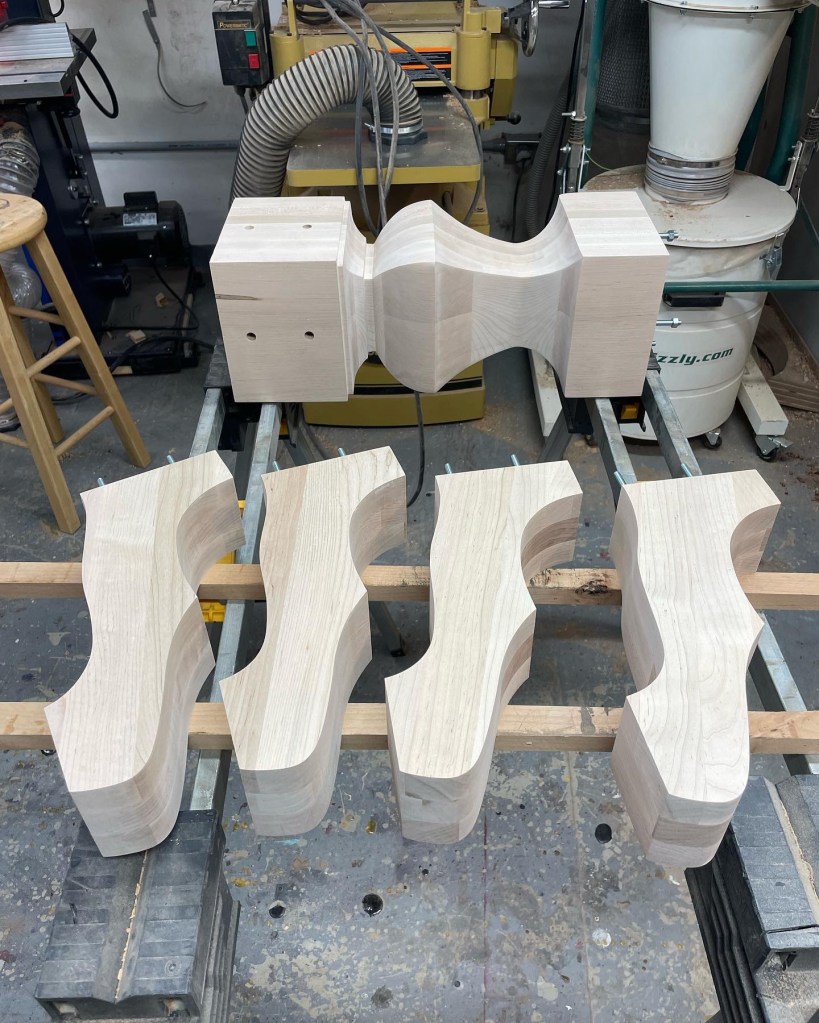
This single base is actually the same style as the double base I used in my dining table build, but with an extra leg where the stretcher would be. I have everything I would need to make these bases myself; bandsaw, lathe, spindle sanders, etc. So, why did I decide to get a pre-fab one?
First, I’ve been consistently happy with the quality of the Osborne bases I’ve used. Second, it’s a huge time saver and (if I had paid for the base) only marginally more expensive than the time and materials it would take me to build a similar base. I actually tend to steer my clients to Osborne table legs and pedestals whenever possible because it decreases build time with very little added cost.
The bases come pre-sanded to 150 grit and assemble with threaded bolts. The only thing they don’t come with is the table top and the frame structure to support the top.
My goal when I create these builds is to make them so even a beginner can replicate the results; I try to use wood in dimensions you could easily find in a Home Depot or Lowes, and use tools that are also easily sourced.
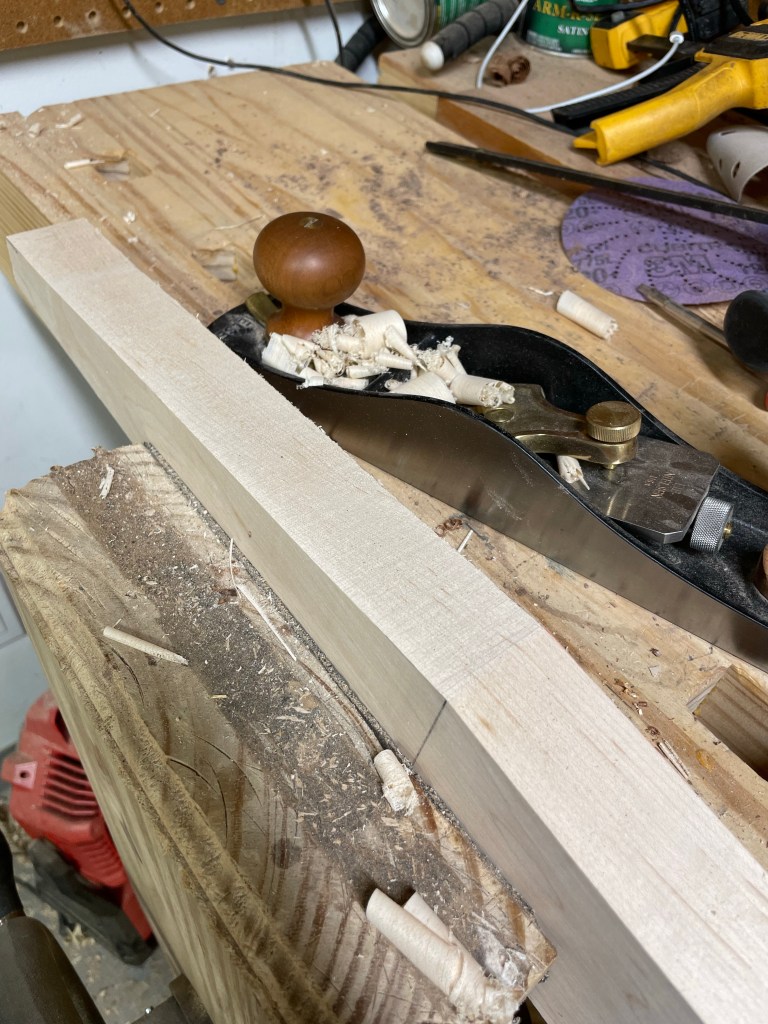
The first step was to apply the finish to the pedestal. Since I wanted to paint our base, I chose a soft maple pedestal. They offer them in different hardwoods as well.
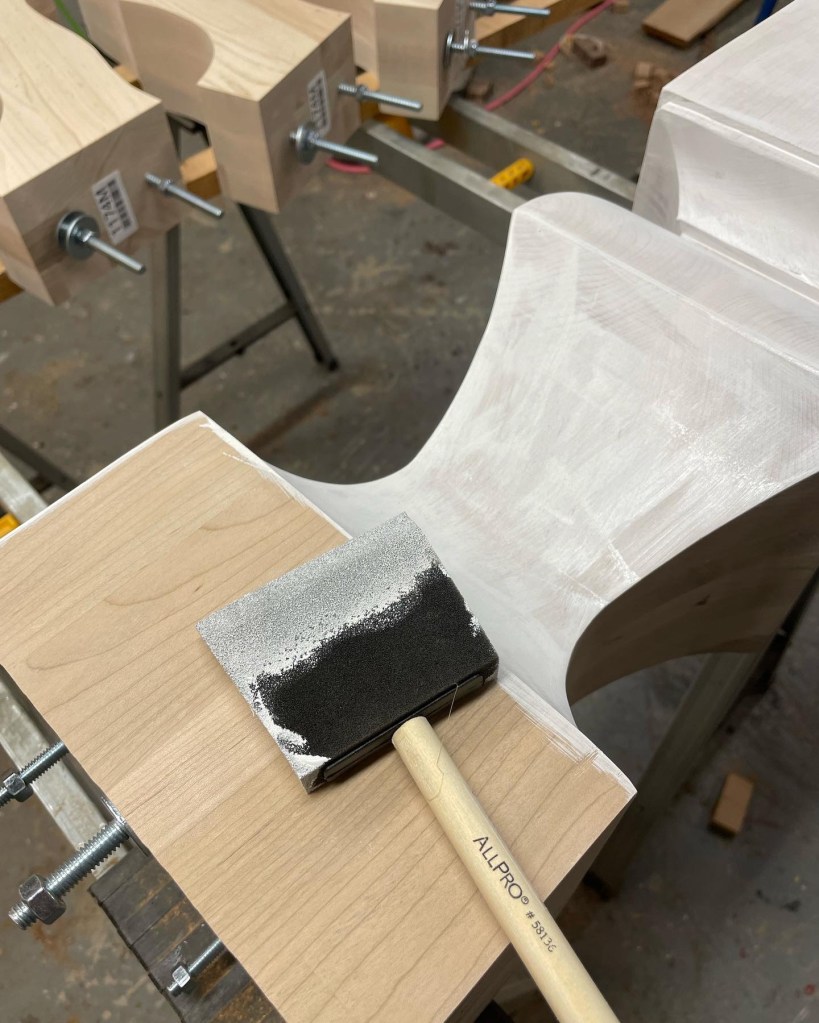
If you want to spray the finish, you certainly could. I have been able to get a nice, smooth finish on their pedestals using foam brushes and light sanding between coats.
Two coats of primer are ideal; you’re going to need 4 coats of paint total anyway, and I find a 2/2 for primer and top coat works better than a 1/3 split. Apply coats lightly and let them fully dry before lightly sanding with 240 and then 320 grit paper. These Festool sandpaper pads are amazing, and probably the only affordable product they actually make at 50 cents per pad when you buy them individually at Woodcraft.
Light, meticulous coats are key to a smooth finish. I use General Finished milk paint in Antique White. Paint the pieces disassembled and then assemble before spraying a coat of water based poly on top. Why water based? It won’t yellow like an oil based one will. For paint, this is ideal. If you decide to stain or leave a natural wood color, use an oil based finish for deeper color. Lacquer and shellac also give nice depth over raw wood or stain.

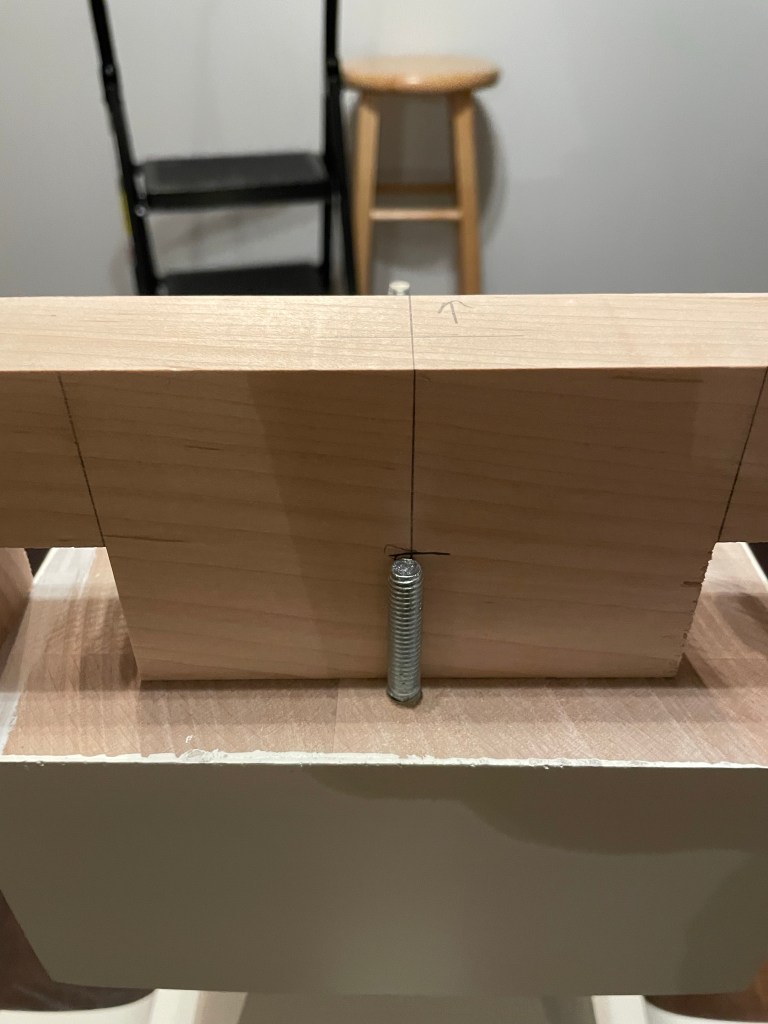
Bolting the base together is both extremely simple and unfortunately tedious. It’s a tight space, and you need patience. I find a low-profile ratcheting wrench with a very fine tooth count is the only practical way. Make sure you use a square to keep the legs plumb and align them with the bottom of the base. I also like to put these 3M furniture pads on the feet if the base is going directly on a hard surface.

The assembled base should come in right at 25″ tall. A standard table should be around 30″ tall. How do we make up the 5″ difference? For my previous dining table, I opted for wood over 1.25″ thick for the top and a frame around 3″ thick. This time, I wanted to use some riftsawn white oak I had on hand for the top, but it would only end up 1″ thick. Actually, this worked really well because I could make the frame 3.5″ tall (the same width as a standard 2×4) and a 1″ thick top can be made of 5/4 material, which is easily purchased at home improvement centers. That leaves just a half inch of difference, of which the padded feet make up some of the difference.
Building the frame is relatively straightforward, and again very similar to how I built the frame on the full dining table. You’ll want to finish your stock down to 1.5″ thick and 3.5″ wide (nominal 2×4 dimensions). I chose to go with hard maple because it’s strong, paints well, and it’s what I had on hand; for the purposes of this build, you could easily just use 2×4 pine from HD or Lowes. Just make sure you buy dry, dead-straight wood with as few knots as possible.

How long your frame supports are depends on how wide you’d like your table to be. I made my table 48″ in diameter, so I chose to go with 30″ long supports; the extra 18″ of overhand leaves room for chairs and, coupled with the bevel I put on it will avoid hitting anyone’s legs.
Cut 4 boards to identical lengths, and then mark the center of each one across all 4 faces of the board. This way, we will know where to locate the bolt holes and have a uniform center.
The base was 8″ square at the top; verify this in your own case as a 1/16″ difference can make the joints difficult to fit. What we want to do is mark 4″ off the center mark in each direction, giving us the outside edge of our lap joint. Then, taking a piece of our wood, trace the 1.5″ width toward the center mark. We now know where we need to cut to make the joint work. Repeat on all 4 boards.

You could accomplish the half lap joint in multiple ways; I chose to use my dado stack. Simply set the blade to exactly half the width of the board (1.75″ in this case) and remove all the material between each of the two spaces we just marked on each board. You could also use a bandsaw, jigsaw, or miter saw to accomplish this. Just make sure to test the fit so that you cut exactly half the width on each one.
(Note: my photos and instructions are a bit backward. I cut my bevels first and then did the joinery, and it was much more complicated because I didn’t have as much flat surface to work with)
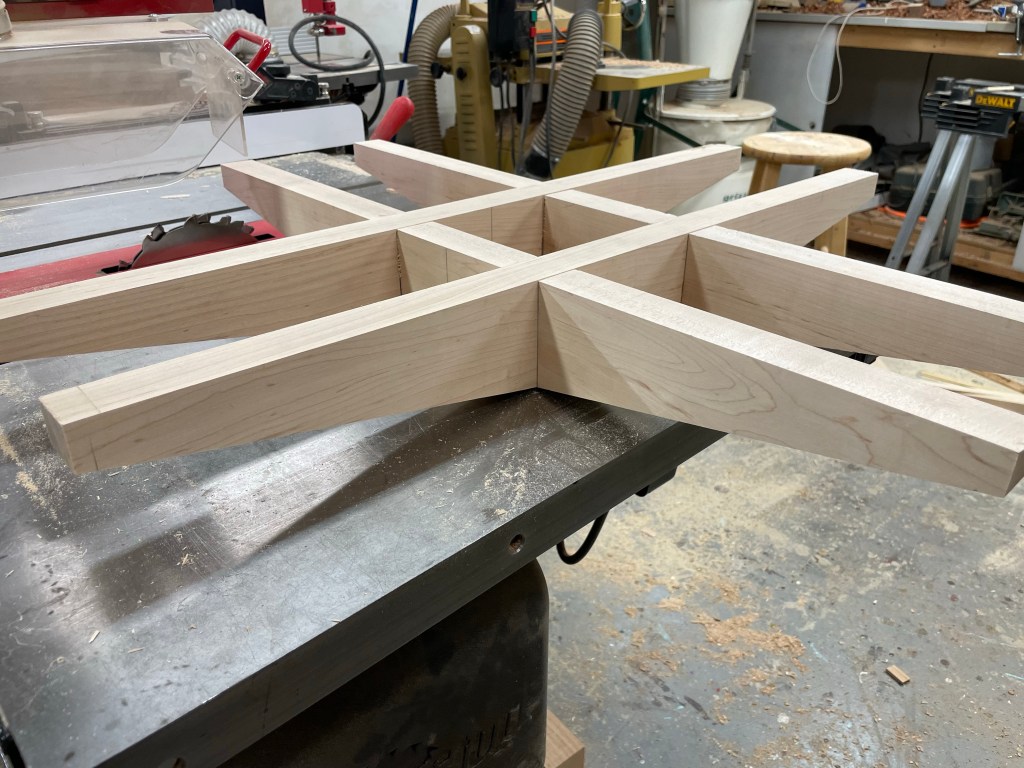
With the lap joints cut, assemble the overlaps together and mark which side of each board is the “top.” This way, you won’t accidentally cut your bevel on the wrong side.
Before cutting the bevel, drill the holes for the bolts. You need to drill a 3/8 inch hole all the way through, and then a 1″ hole from the top side to countersink where the wash and nut go in. Before you drill the hole, take note: it will be off center! The center of the bolts is actually about an inch from the edge of the pedestal top; make sure you measure and mark it out properly.

Dry fit all the pieces together and place it on the base; if everything fits well, mark out the bevel on the underside of the frame. I chose to have the bevel start right at the edge of the pedestal and extend to the end of the frame, leaving 1″ of thickness. Cut this using a bandsaw or jigsaw, and then clean up the edge with a block plane or sander to make it smooth.
Once you’re happy with the frame, paint it just as you did the base.
Assembling the top is actually a rather simple affair, and your success comes down to two things; straight edges and flat boards. Ideally, you would dimension your own 5/4 rough lumber to get perfectly flat, parallel faces with nice clean perpendicular/square edges. With proper edges, you don’t really need biscuits, dominoes, or dowels to join the boards. I actually discourage using those when you’re doing a round table top; it’s too easy to lay out the biscuits in the wrong place and find one peeking out when you cut the circle out. Glue and clamps are all you need.
If you decide to use 5/4 lumber from the hardware store, make sure to get the flattest boards you can. You really need a straight edge for gluing; a circular saw with a straight guide would suffice in a pinch.

Glue the panels together until you get a square that just barely exceeds the diameter of the top you need; in my case, I went with 50″ to cut a 48″ top out. I actually did mine in two pieces so I could flatten them on my drum sander and get an even flatter surface. I then glued those two pieces together. Not everyone has this luxury.
Rough sand the surfaces flat and smooth to 80 grit, If you have uneven glue joints, it will make it hard to cut a perfect circle top out.
There are a ton of ways to cut a circle top; some people make jigs for bandsaws, some people use a jigsaw, and I’ve even seen it done on table saws. My favorite, by far, is to use a router. You can buy a commercial center cutting jig like I did, or make one from plywood that you attach your router to. Either way, the principle is the same; fasten a single point in the center, set the router half your diameter away from the center point on the jig, and slowly move around in a circle to cut it. A spiral bit works wonders here. Take small bites, especially in a wood like white oak that will want to tear out when you go against the grain.

When you have only about 1/8 of an inch of wood left, take a jigsaw and cut the waste out, leaving some of the waste right at the edge intact. Come back with a template bit on your router to remove that last 1/8″. Then, simply round over or chamfer the edges and sand to final grit. I chose to use a General Finishes Waterbased Stain in Antique Oak on mine, and finish with two coats of Osmo Polyx oil.

Attaching the top is easy, and something we’ve talked about many times. I like these skirt connectors from FastCap LLC. I use a router with a 3/4 inch straight bit to cut the recess in the top of the frame. Drill a small pilot hole and use a countersunk head screw to attach. Set the torque on your drill so that it snugs down the fastener but it can still be moved slightly by hand; this allows the top to expand and contract over time. Then, place the top on, center it, and attach with pan headed screws. Again, make sure the torque is not too tight.


And there you have it! A complete dining table that will last generations and look beautiful in your home. We’re already putting ours to good use; next I need to make the chairs (a blog post for another day).


[…] top. You can see below the beautiful support arms that hold the round top in place. Check out his blog post where he describes in detail how he did […]
LikeLike