If you’ve been following my blog, you likely saw my post a few months back about the collaboration I did with Osborne Woodworking on their new acrylic leg line. If you didn’t, here’s a link!
They’ve asked me to do another write up, and I am incredibly thrilled to do so! In the interest of unbiased disclosure, I am making $0 on this project. Osborne provides me with the legs and inlay, but the table is going to a friend’s home. The friend paid only for the additional materials, and I make nothing for my time!
Now that we’ve gotten THAT out of the way, let’s talk about the project. Osborne asked me if I could incorporate inlay strips into a project, and I requested these acrylic legs as well; I’d had a design for those legs marinading in my mind, and I thought these inlay strips would be a perfect fit.
This is the table that was my beginning inspiration. There really aren’t a lot of examples of acrylic legged coffee tables out there. What I liked about this table was the way it uses the acrylic legs to elevate the beautiful wood and granite on top.

Now, I have no idea how to cut or process granite. And while I COULD get zebrawood, it seemed a little busy, especially with the brass that would be on my table legs and the inlay on top. Instead, I opted to use African Mahogany for the aprons and ebonized walnut (plywood and lumber framed) for the top.
I’ll post the final measured drawings at the end of the next post! I want to emphasize though that, unlike the last acrylic project, this project requires a bit more lumber processing. The apron height needed to be four inches in order for the threaded rods to line up on the legs, and you won’t be able to find 1x stock in four inch widths. Instead, you’ll need to rip the lumber with a table saw, circular saw, or even a hand saw.
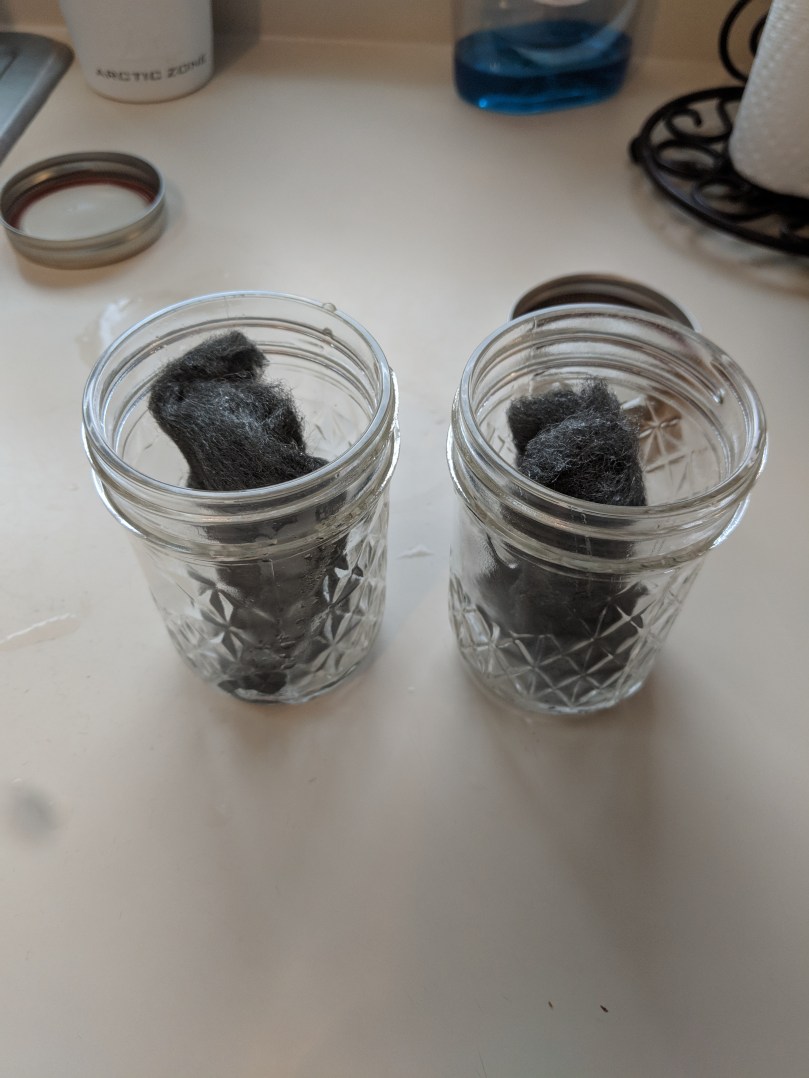
Before you do ANY cutting though, we need to prep the ebonizer. It sounds ominous, but it’s super simple. Take some 0000 steel wool, rinse it with dish soap and water to remove the rust inhibitor. We want rust! Then put it in a jar with some normal white vinegar and let it sit for a week. By doing this now, we make sure they ebonizer is ready once we need it; more to come in the next post!


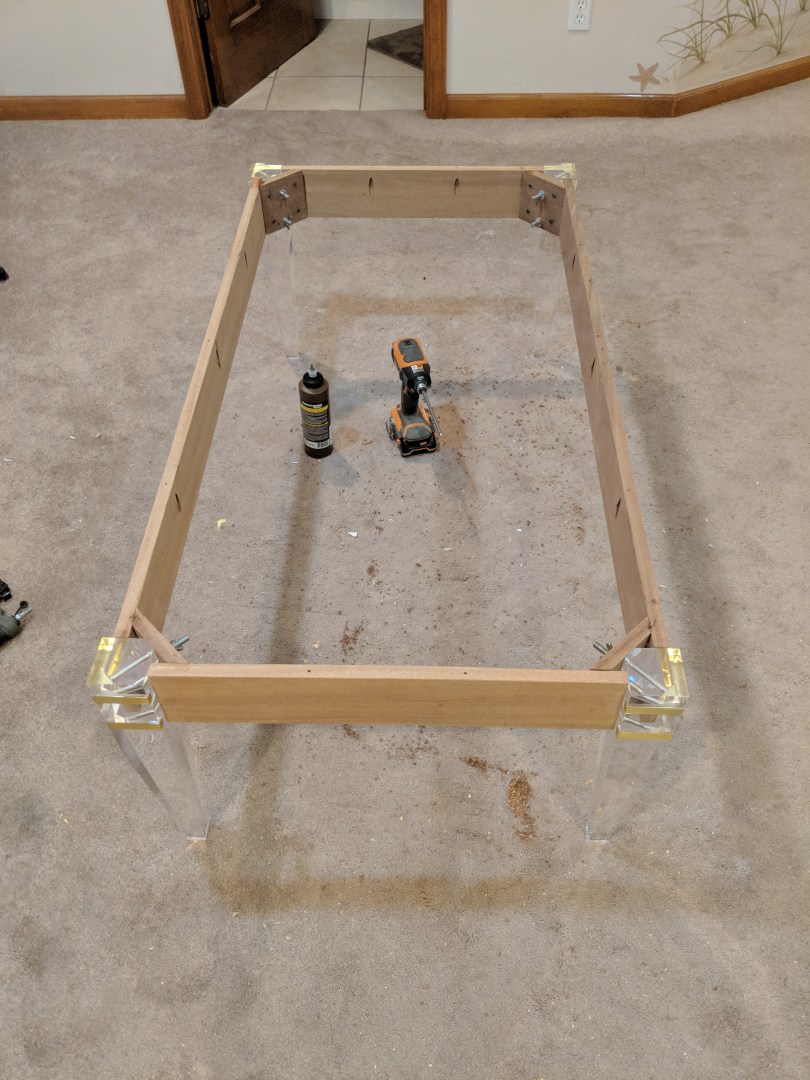
I was able to build the entire table frame using just two boards of mahogany. Both boards were about 12 ft long and about 5 inches wide. Rip them both to 4.25 inches. In my case, the mahogany was only available in S4S at about $5 per board foot. It was pretty darn straight, but I jointed and planed it down to about 3/4″ thickness before ripping to the final 4″ dimension. The customer’s couch was 78″ long, which meant the coffee table should be about 52″ long. I knew I wanted an inch overhang on each side of the legs, meaning the frame should be 50″ long overall. Subtract out 5″ to account for the combined thickness of two legs, and you get a 45″ apron on each long side. Cut that from the mahogany.
The width of the table was a bit more subjective. I looked at a few examples available online, and most were around 60% as wide as they were long. That seemed a little wide for me, so I opted for 28″. It’s completely arbitrary within the confines of what you think looks best. Subtract 2″ overhang, 5″ for legs, and you arrive at 21″ aprons on each of the short sides.

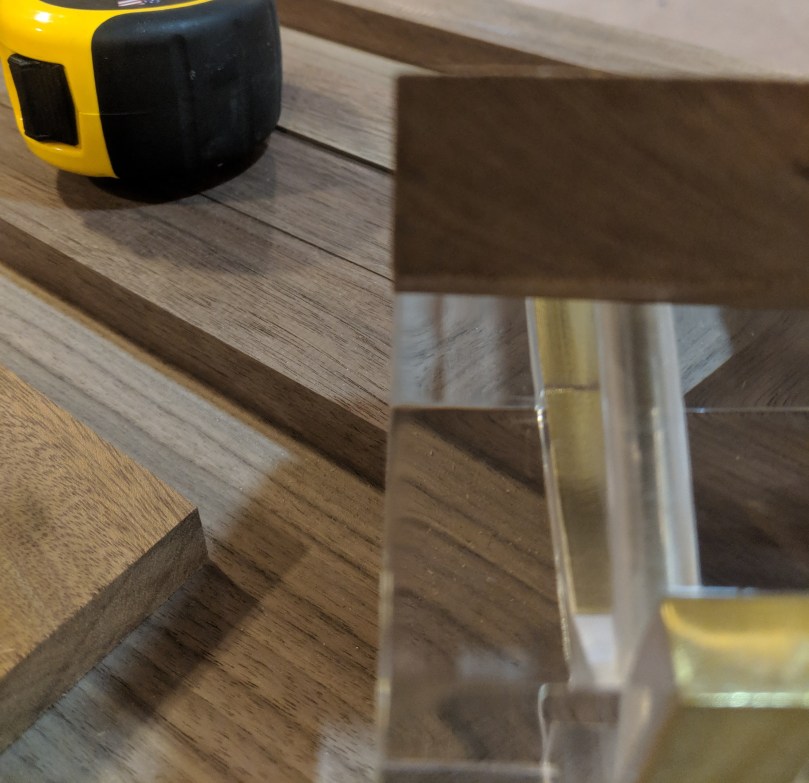
The legs attach to the aprons using corner brackets. Rockler sells these, pre-made, in galvanized steel. For almost any other application that needed corner brackets, I’d buy those in a heartbeat. Since the legs are clear acrylic, though, I don’t want the galvanized steel to be visible when you are looking at the table. That means creating your own corner brackets.
Note: This is by far the most complex part of the project. If you lack the tools, or are simply uneasy about it, I think the Rockler brackets would likely work fine with very little impact on the overall look.
The brackets need to accomplish two things: 1) they need to give the legs a firm place to attach and 2) they need to be firmly attached to each adjacent apron to secure the entire frame together. This means putting a 45 degree miter on each edge of the bracket and putting two holes in the center for the bolts to attach.
I wanted the aprons to align just behind the end of the brass band on each side. It required a decent amount of geometry (hello Pythagoras and 64ths of an inch!) to make sure I got everything where I wanted it to be. To save you the trouble, all you need to know is this: the back end of the bracket (the long face, where the miter points are) needs to be about 5.5″ long to accomplish this. I’ll put the final dimensions in the plan, but my wood came in right at 11/16ths thick instead of a full 3/4″ which is why I’m saying ABOUT 5.5″. You could do this on a miter saw, but using the miter sled on your table saw will give you much better results; less slop.
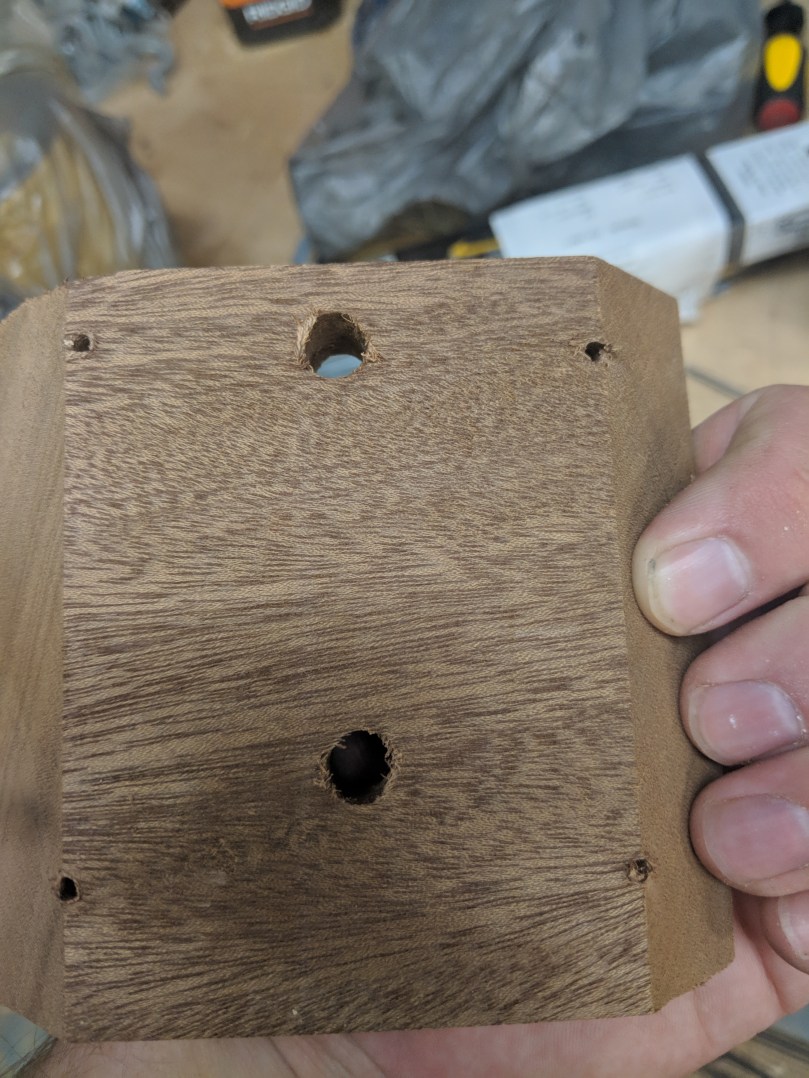
The holes in the center of the bracket need to be 1.25″ and 3.5″ from the top, respectively. The bolts are 5/16″ thick, so I went with 3/8″ holes. The extra 1/16th gives us a bit of wiggle room. If you have a drill press, make sure the table is square and drill away. If you don’t, you’ll need to use a drill guide. It’s essential that they be square and plumb, otherwise the miters won’t contact the aprons correctly.
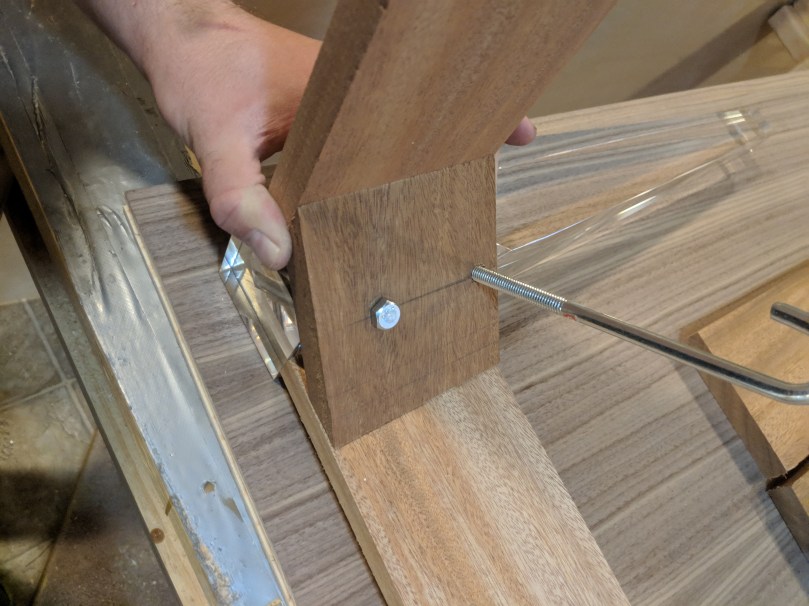
Using a hand drill, make 4 small pilot holes, one inch off each side. You want these to angle the opposite direction of the miter so that the screws will enter the aprons at 90 degrees.

Now you need to create the rods that will attach everything together. I couldn’t find any pre-cut 5/16″ rods in the length we need, so I had to cut my own. I started by inserting the rod all the way, adding 3/4″ for the bracket, and then adding the length of the wingnut, washer, and lock nut. Overall, 2.5″ seems to be a good length. You’ll need to cut them by hand with a hacksaw and file the cut ends to fit. Tip: thread a wingnut on before you cut the rod, then twist the wingnut so that it goes over the threads you just cut. Most of the time, that corrects the threading.

Do a test fit on everything. The brackets may feel a little wobbly; mine did. Two things will help with that. First, we’re going to use glue on the miters. Second, the frame will be attached to the top as well. That should keep everything snug.
I chose to use hide glue for this project for two reasons: 1) I could easily undo it with water if I needed to fix any of the brackets and 2) it’s urea based, not water based, so it won’t cause warping or waves in the inlay we use later. If the idea of a cow hide based glue rubs you the wrong way, you can use regular wood glue; just make sure you fit everything really well first. I’ll address the inlay in the next post.
Drill small pilot holes into the apron being careful not to go through the finished side, glue, and then screw everything together. 1.25″ kreg screws were just right. I also had good results with 1.5″ #8 screws. Just be careful not to over drive them.


Add some pocket screws on the sides. I know, I know: I’ve been a very vocal critic of Kreg screws before, but this is really the perfect application for them. We want a hidden fastener that will be going into a dimensionally stable top (plywood) and will have no shearing force exerted, only pulling force. All three of those things add up to pocket screws!
Placement is relatively arbitrary. I chose 10″ off each leg on the long sides and one in the center. On the short sides, I did 7″ off each side. Completely arbitrary.

 Check for square by measuring the diagonals before the glue dries. Let it sit. We will apply the finish later, once the top is attached and the legs (which will dissolve if the finish touches them) are removed!
