
About a month ago, I was asked by Osborne Wood Products to create a step-by-step tutorial for one of their new products: acrylic table legs.
Naturally, I was very excited to take on the task! They provided me with the legs free of charge, but I received no other compensation. I ended up finding some friends who needed a side table for their living room, and we agreed that I’d build the table for just the cost of the remaining materials.
I had a few goals in mind for this build:
- In the spirit of DIB, I wanted to make this a project that could be done by someone who was moving up from basic DIY skills.
- The acrylic legs were going to be a bit unorthodox, so I wanted the design of the table to draw on the legs in some ways to bring everything together.
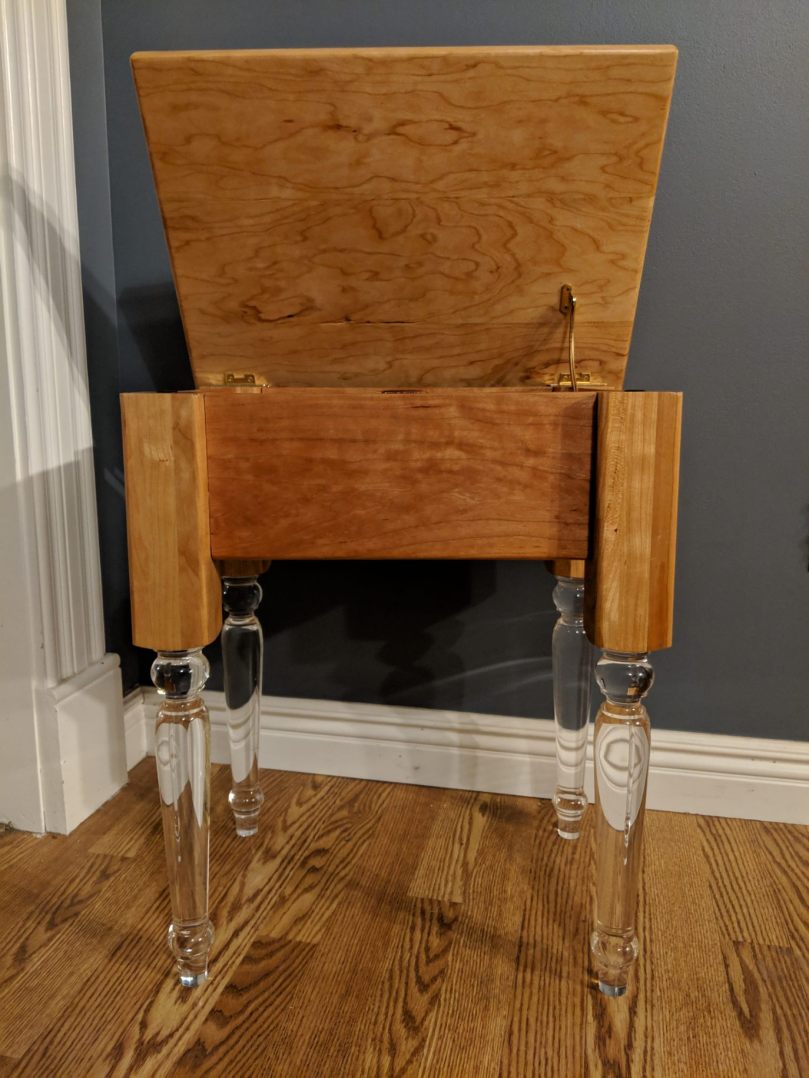
- It needed to be functional for my friend’s living room. This meant a lid that opened rather than a draw. The additional advantage is that this makes it much more DIB friendly; drawers can be a tough thing to master.
With that in mind, here’s the basic sketch-up: cherry side table diagram
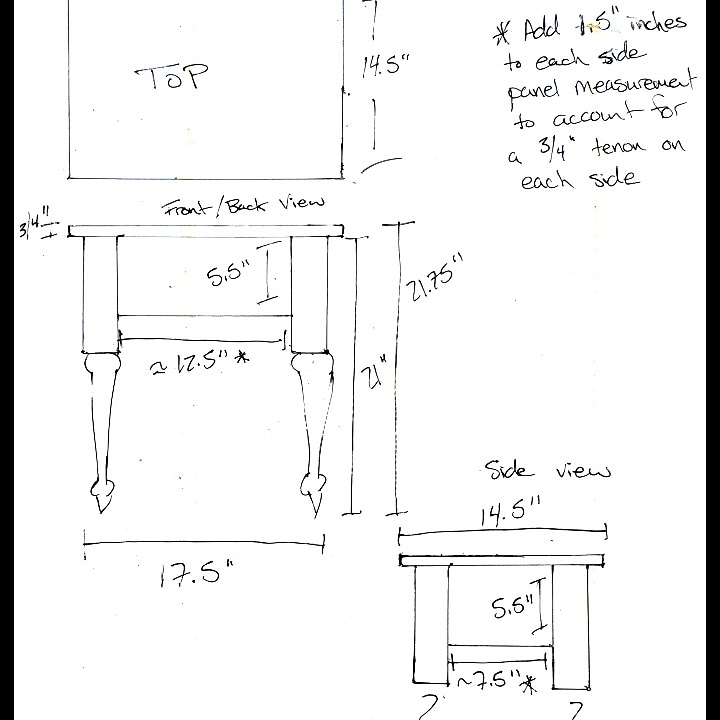
I opted to do the sides (aprons) of the table using what would be called “1×6″ stock, if you were to find it at a home improvement center. I don’t mean construction grade 1×6; these stores will carry craft grade hardwoods in this dimension, most likely red oak and maple. Since I can mill my own lumber, I just went ahead and bought some S2 cherry and milled it to 1×6 stock. In actuality, it’s 0.75″ thick and 5.5” wide. If you’re curious why this these dimensions are different than the label states, revisit my blog post here!
I would have LOVED to have used 1×8 material, because I think the proportions would have come out better. But I couldn’t find any hardwood stock that Home Depot or Lowes carried (and was affordable) in 1×8. Being able to mill to 1×8 isn’t a luxury most DIYers will have, so I stuck with what was common.
Three days after confirming with Osborne, the legs arrived in the mail.
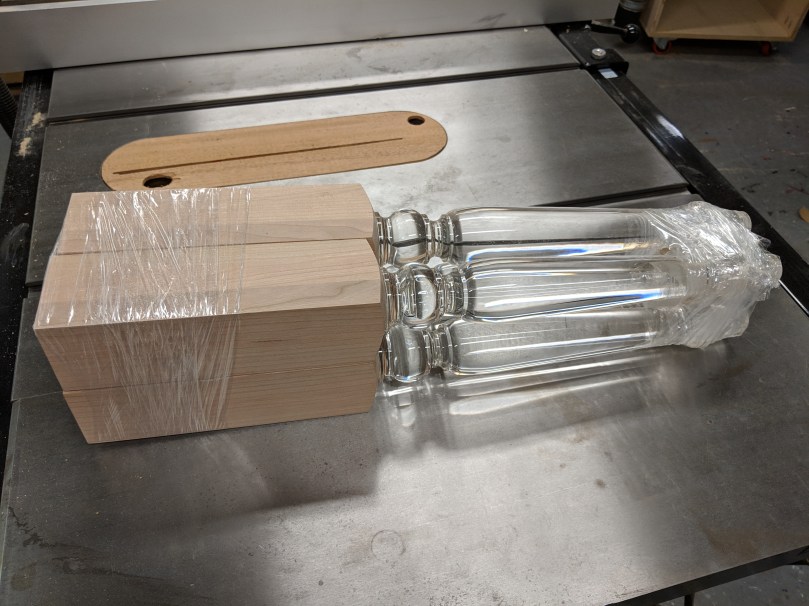
The first thing I did was take them out of their packaging and measure each one. They were all the same length, but there were some varying widths to the wooden parts, at most 1/16th of an inch different from the 2.5″ they were supposed to be. Not a huge deal, just important to know so we can adjust.
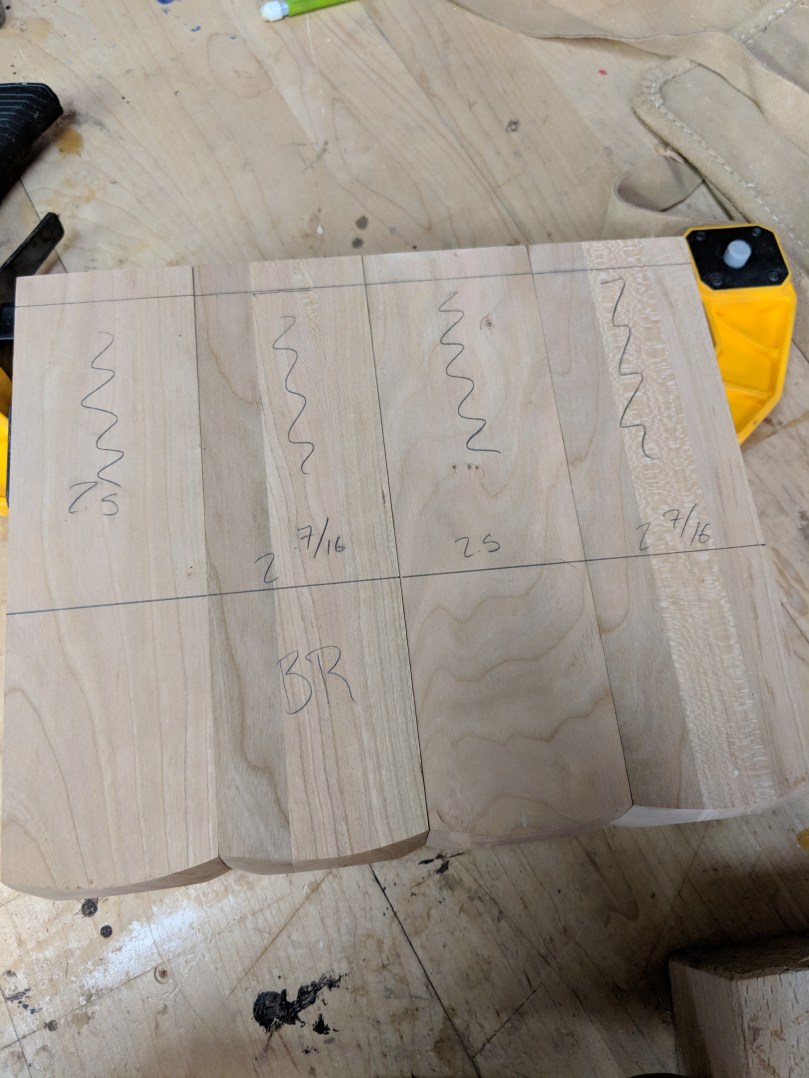
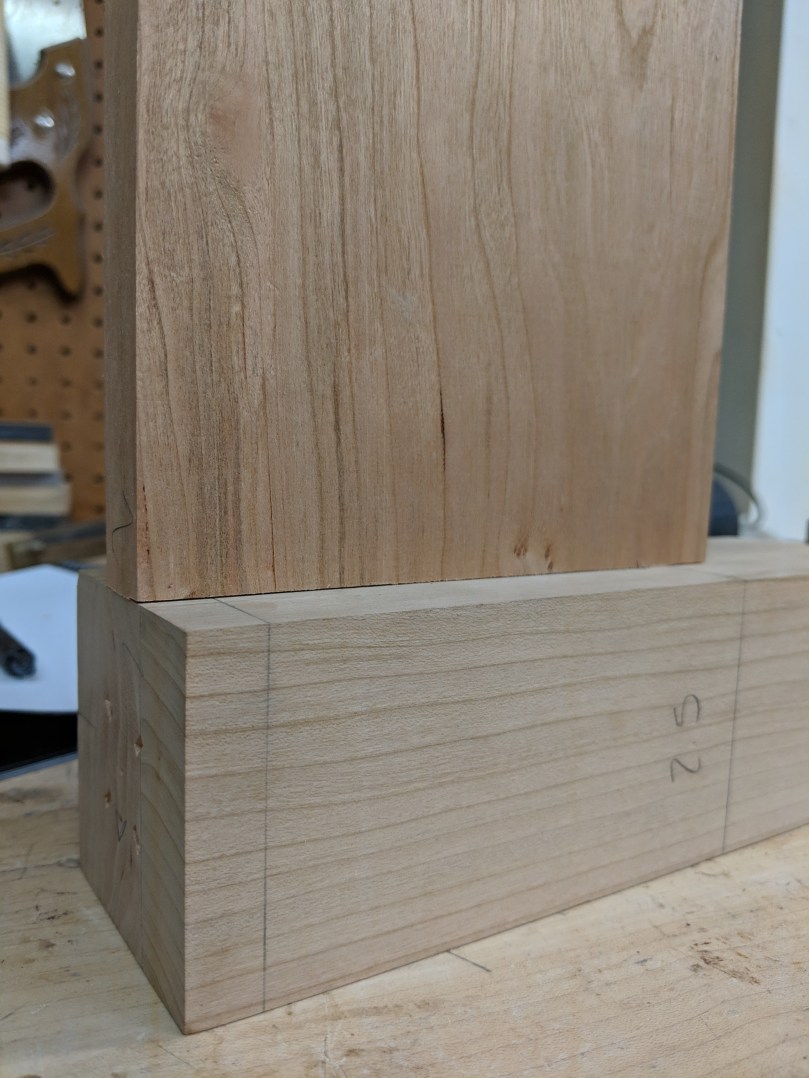
This is a good time to lay them out and figure out which legs will go where. I tried to match them so that the front and back legs would have similar widths. I mark them with a BL for back left, and a FR for front right.

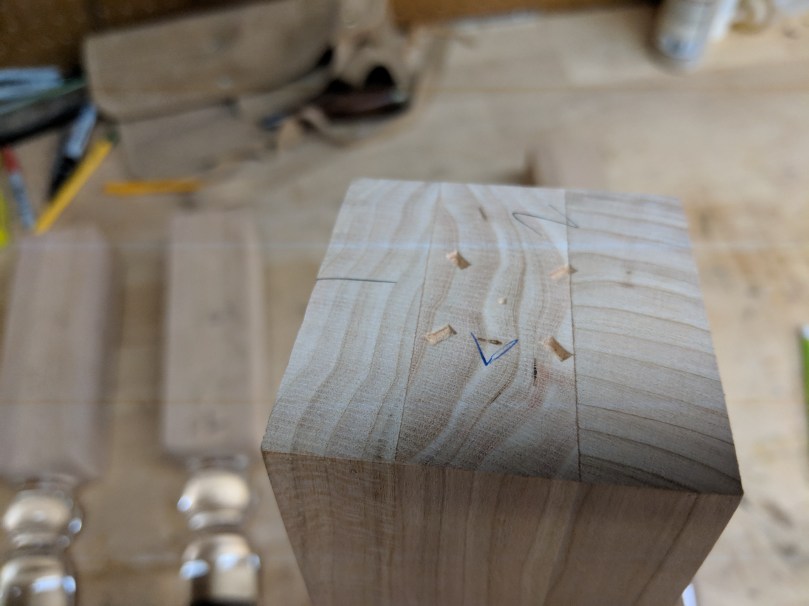
I then made marks for each corner so I could keep reference (see the 1 and 2 marked on here.)
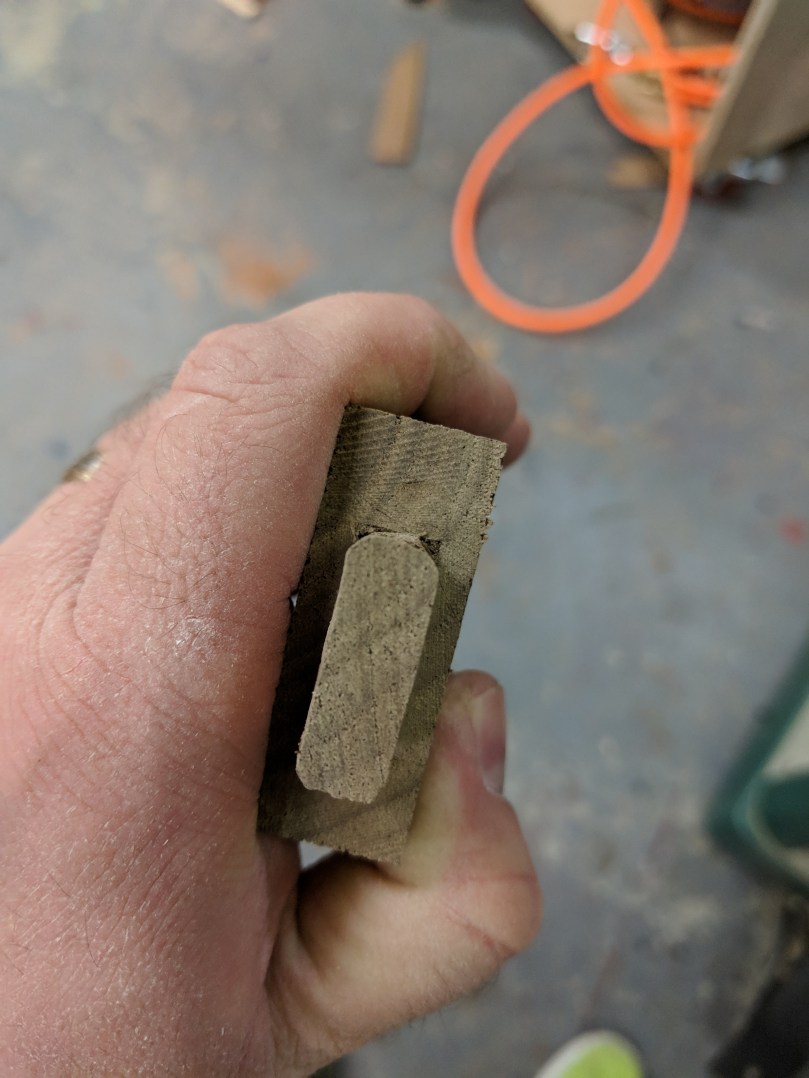
Side note: Those four little impressions must be from the machining process, like a lathe chuck. In hindsight, I should have removed them. What I’d recommend is using a miter saw or table saw to take about 1/16th off the end of each wooden block just to remove these.
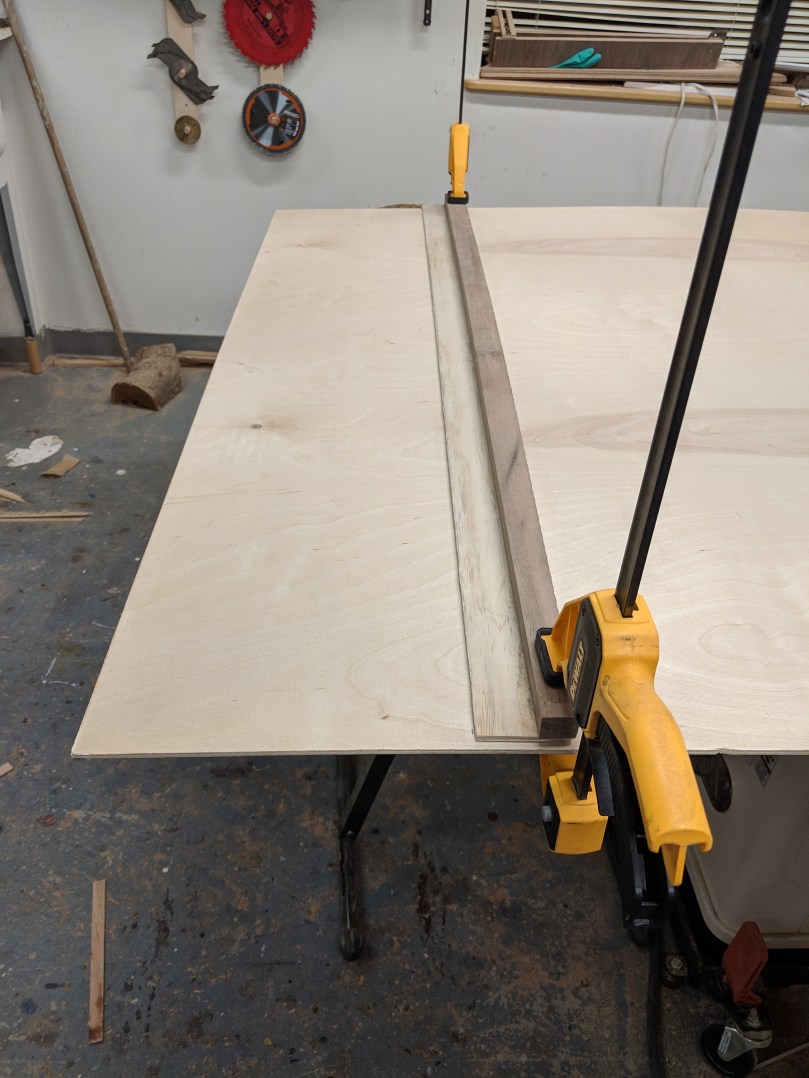
Next, I cut the cherry boards down to the length I needed (see diagram). Remember, you have to add 0.75 inches on each end of the length to account for the tenons we’re going to cut. You can do this on your table saw, like I did. You can also use a miter saw, circular saw (of you use a carpenters square to keep you at a 90 degree cut) or even a hand saw if you’re careful enough.

As an added measure of safety, I measured the legs in adjacent pairs. By doing this, you essentially multiply the error of each individual leg by 2. Basically, it’s easier to notice a 1/16th difference between 2 combined legs than a 1/32nd inch difference on each. For every fraction of an inch this measures under 5″. add that to the length of the side that will connect those two legs. Ex: If FL and FR together measure 4 and 7/8ths inches across, then the front apron needs to actually be 12.5″ plus 1/8th inch variance (plus 1.5″ total for the tenons).

You always want to cut your mortises first. It’s much easier to make a tenon just slightly thick and then trim it to fit a mortise. Much harder to make the mortise narrow and widen to fit the tenon. I opted for a 3/8 inch thick tenon, which means we need a 3/8 width mortise. I also decided to leave 1/2 inch on the width of the board on each side as the “shoulders” for the tenon.
On each side, mark 1/2 inch down and 5 inches down. These are the lines where we want our mortise to stop. You’ll need to mark this line on all four sides of the legs since we’ll be referencing off them.
Side note: This is a good time to unscrew the acrylic legs. Not only are they cumbersome while we’re doing all this, but Osborne tells me that lacquer thinner will melt them, so they need to come off before we apply the finish anyway.
To do this on a router table, you’ll want to use a 3/8″ straight cutting bit. Use a square placed against the fence of your router table, and mark the edges of the bit on some pieces of tape so you know where to start and stop your cut. I use my calipers to make sure I’m as close as physically possible to being centered. It should be 1 and 1/16th from each side, or 1.0625. You can see on my calipers that I’m 0.0125 inches off. There’s no way I can make an adjustment that accurately.
Instead, what we do is run the piece through, flip it around, and then run it through the opposite direction. That guarantees that slot will be centered. This is also why we cut our tenons slightly thick and trim down; we’ll always end up with something slightly larger than a 3/8 mortise.

Start very shallow, maybe 1/8 inch. Slowly work your way up until you’ve reached 3/4″ in depth. It should look something like this:

The other way to do this is with hand tools, if you don’t have access to a dado stack on your saw. Here’s a blog post where I showed how to do that as well!
To cut the tenons, I decided to use the dado set on my table saw. This is essentially two 1/8 inch wide blades put next to each other. I could have done a 0.75″ thick dado cutter, but then I’d have to move down to 1/4 when I cut the grooves in the sides, and I’d rather just do one setup.

Anytime you are crosscutting (where the grain is perpendicular to the blade) on your table saw, you have to use a stop block on your fence. This keeps the wood from binding between the blade and the fence, which can cause a dangerous event called kickback.
Measure 3/4 inch off the stop block to the opposite edge of the blade, then set the height of the blade to just under 3/16ths of an inch. Use your miter gauge to cut out the tenon on a piece of scrap identical in thickness. Here’s a good video:

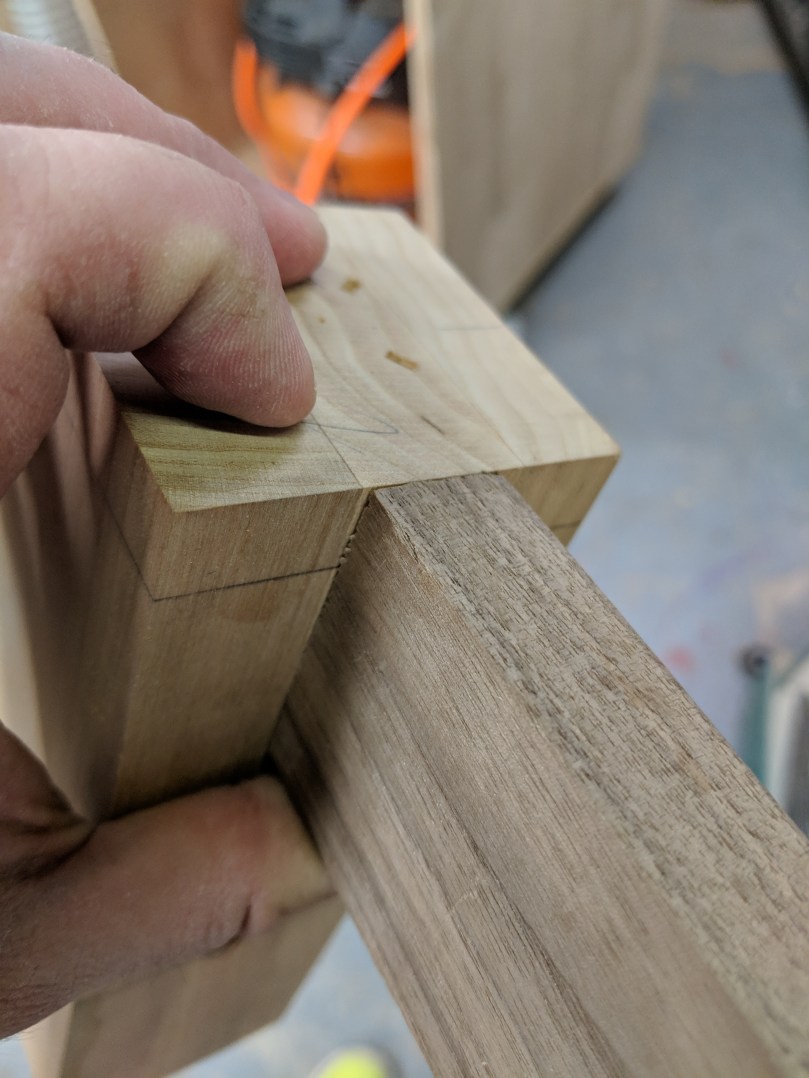
The tenon you’re left with will be square edged, but the mortise has rounded edges. Simply take a chisel or utility knife and knock the corners off your test piece.
Try the fit of your test piece. If it looks good, make all the tenon cuts.
Again, here’s a link to the post where I show how to do this by hand. In that case, you’d use a 3/8″ chisel.
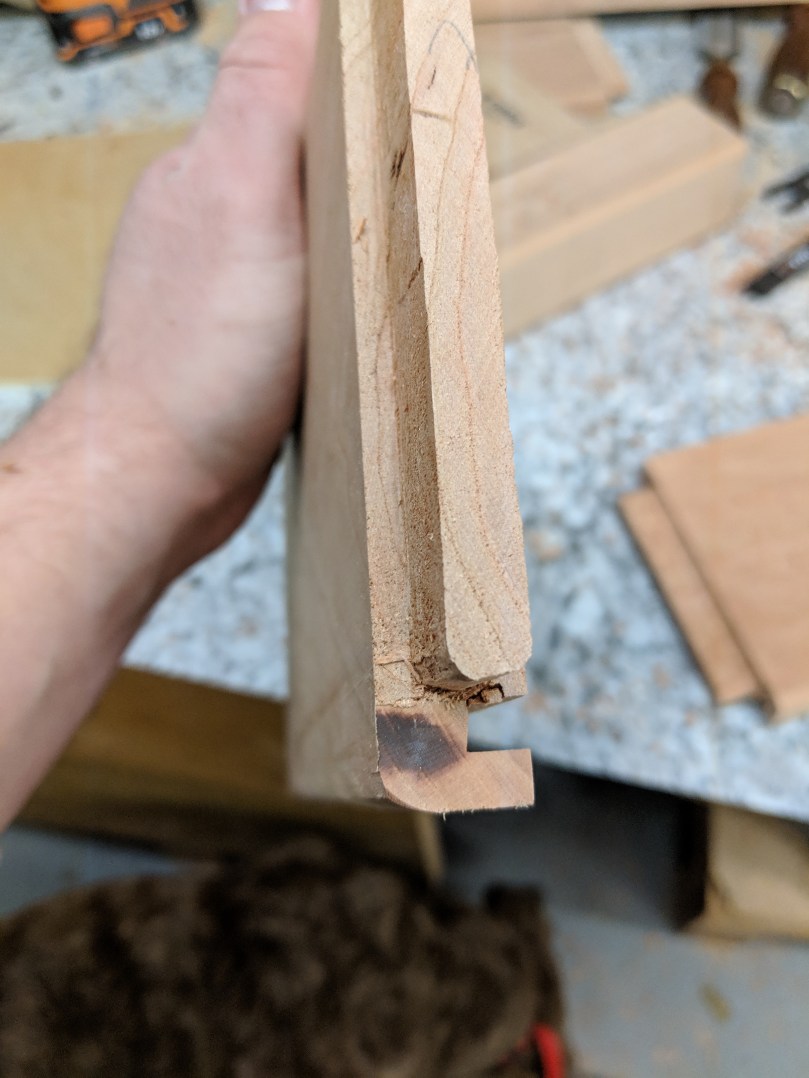
Now you need to make the groove for the bottom drawer that will fit in. I opted to use pre-finished plywood on 1/4 thickness. I think anything larger would be overkill. I made the cut with my dado blade, using a featherboard to hold everything flush (always keep the featherboard in front of the blade to avoid kickback.
You could just as easily do this with a router. If you were going to do this without either of those tools, it would be very difficult. You’d have to use a groove cutting hand plane, or you could mark the lines and hand chisel. This would be a good excuse to borrow a tool or find a shop that can cut this for you.


I decided to echo some of the round elements of the legs in the rest of the construction. That meant using a roundover bit on all the corners and the bottoms of the aprons.


Before you start gluing anything, you really need to mark your tenons and mortises to make sure you remember what goes where. I find it’s best to put them on the end of the tenon and inside the mortise, since they’d get sanded off if you put them on the outside.


Dry fit everything together and then measure for the plywood bottom. Remember to add about half an inch to the total length and width to account for the two, quarter inch deep groves on each side.
Note: To make this easier, don’t roundover the inside corner of the legs. It was really hard to get the rounded profile right, and it didn’t turn out as perfectly as it could have with a square corner.
Cut your plywood off the large sheet, leaving a little bit extra so you can give it a final, more accurate cut on your table saw. If you don’t have a table saw, just do the final dimensions with your circular saw; the groove can hide some of the imperfections.
I used a hand coping saw to cut the corners out. You could also use a scroll saw or powered jigsaw.

Dry fit once more to make sure it fits as you’d like.

Once all the pieces fit, set everything aside until we’re ready to sand.
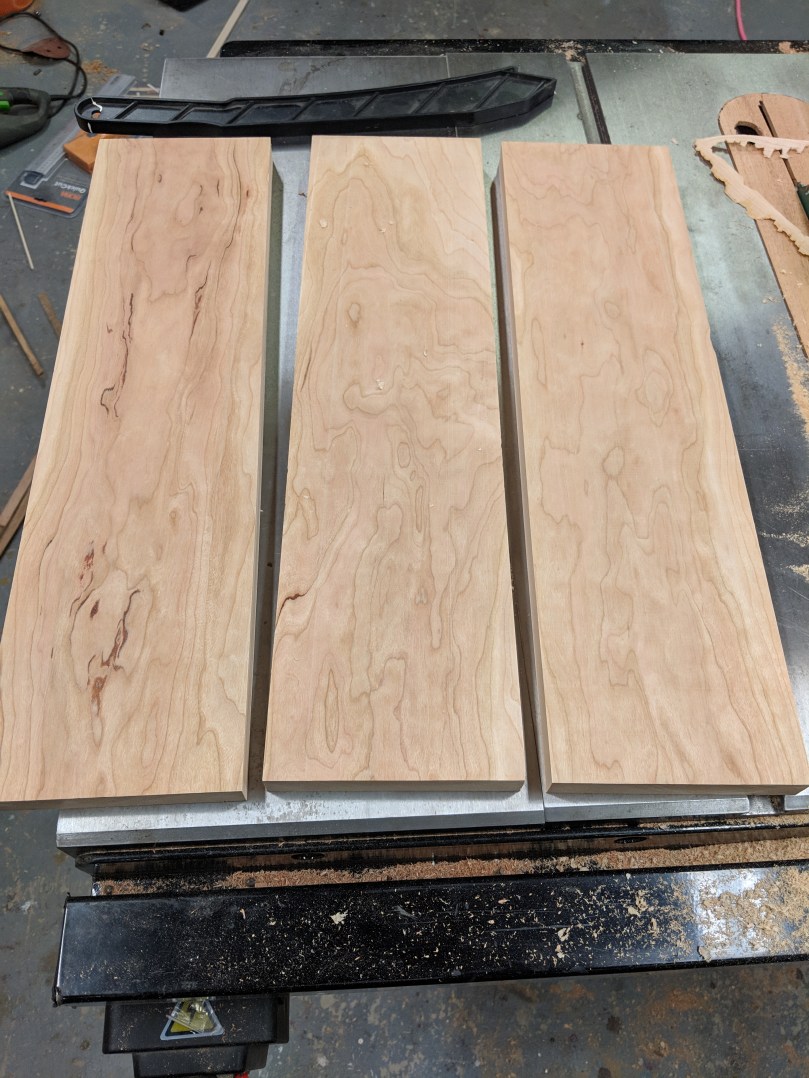
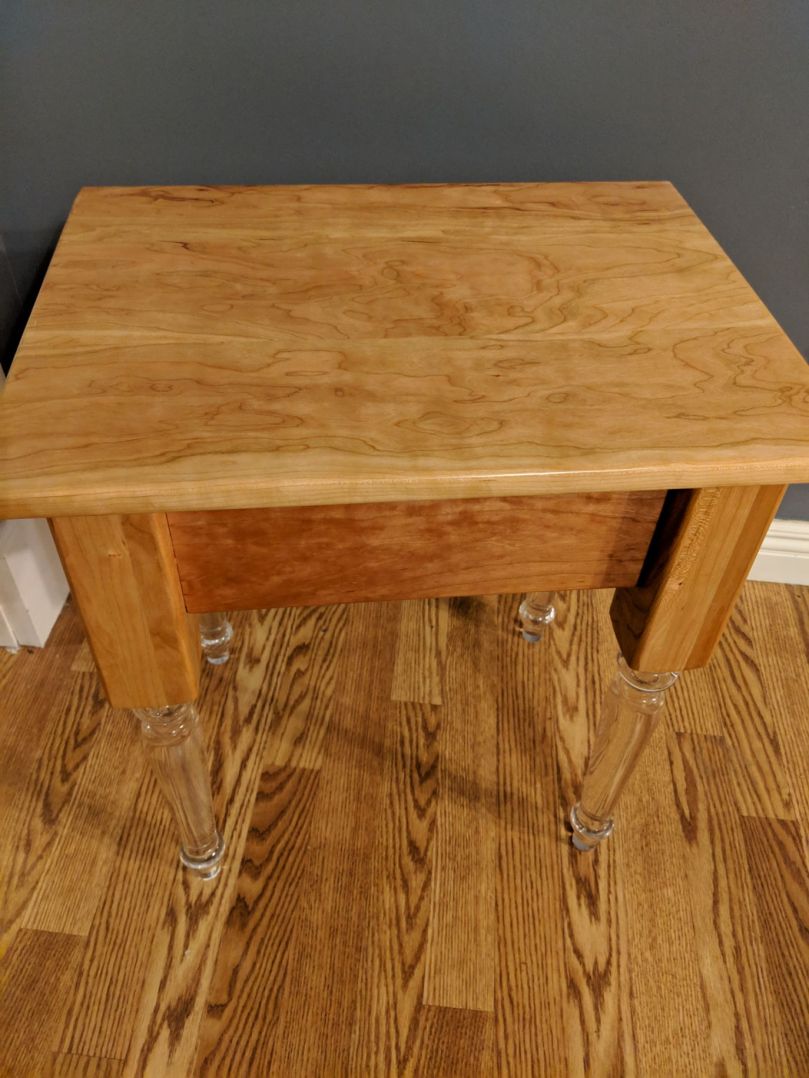
Moving on to the top, I also opted to go with 1×6 material. Here’s why I call this my “wild” cherry side table. Look at that grain! The oil is really going to make this pop.
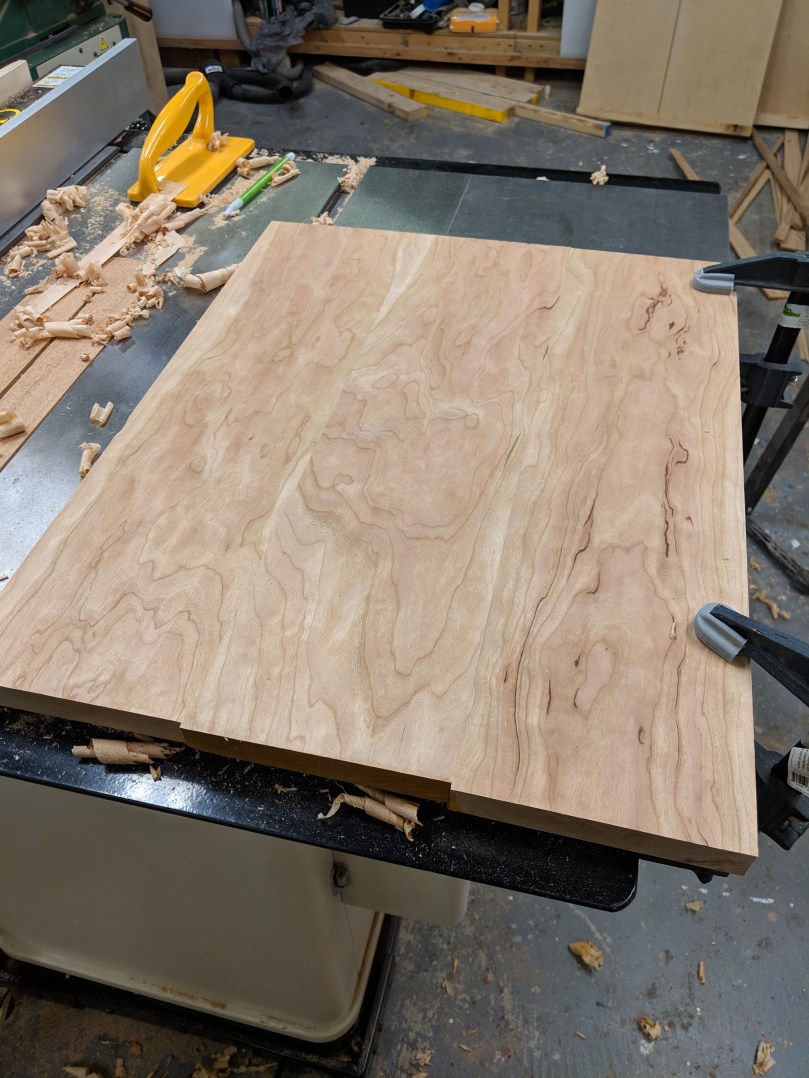
The most important part of this glue-up is making sure the edges are perfectly flat (jointed) and perpendicular to the flat faces. This will ensure that the top is flat(ish) once glued up. Here’s how we’ve done this in previous builds.
My phone deleted the pictures of this piece being clamped and glued, but it’s the same as the process in the previous link. No special joinery or screws needed, just flat edges and glue!
If you’re glue-up came out perfect, skip this next step. But, if like mine, you find it’s a little less than perfect, you’ll need to pull out your hand plane again. I held a long metal ruler over one side of the table to identify the peaks and valleys. Then, I used my hand plane to gently remove those spots. Once I was satisfied with that flatness, I clamped it to the flattest spot in my shop: my table saw top. Then, plane the other side flat and parallel.

Use a table saw, circular saw, or bandsaw to cut to final dimensions.
At this point, you’re in the final stretch! With a powered sander (or a handheld sanding block) start at 120 grit, then go to 150, 220, and 320. The legs from Osborne actually come sanded to 150 already, so I just went to 220 right away on them. 320 is probably overkill for most woods, but cherry can get very blotchy when you finish it, especially if sanded to a low grit. So I went to 320.
For the finish, you have a ton of options available. The least expensive and most user friendly is wipe-on formulated polyurethane; I’ve used this in previous builds. I wanted something that would really penetrate the cherry though, so I went with Minwax “tung oil” varnish. Despite what the name says, there’s no actual tung oil in there; it’s just a wiping varnish. DO NOT buy 100% tung oil for this project; it never dries, and it will not work well in this case.
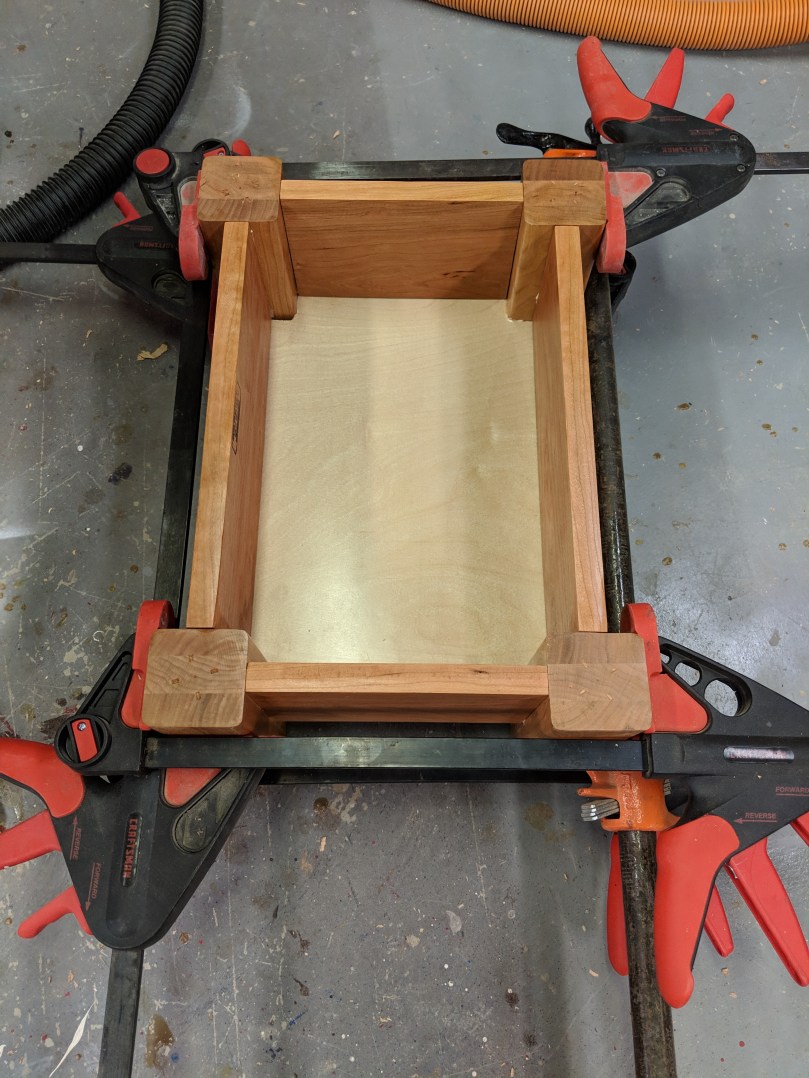
After two coats of the finish had fully dried, I applied wood glue to the tenon and inside of the mortise, assembled everything, and clamped it in place. The most important thing to do is make sure it’s on a flat surface so you make sure it doesn’t wobble. Also, make sure to measure the diagonals; if they’re equal, you know the table is squared.

I opted to use polished brass “non-mortise” hinges. All that means is you don’t have to chisel any wood out to make the hinges sit flush. Here’s a link to the page on Rockler where you can order them; I think Home Depot may carry them as well.
Mark pilot holes, and use a hand screwdriver or battery screwdriver (not a drill!) to put the screws in.

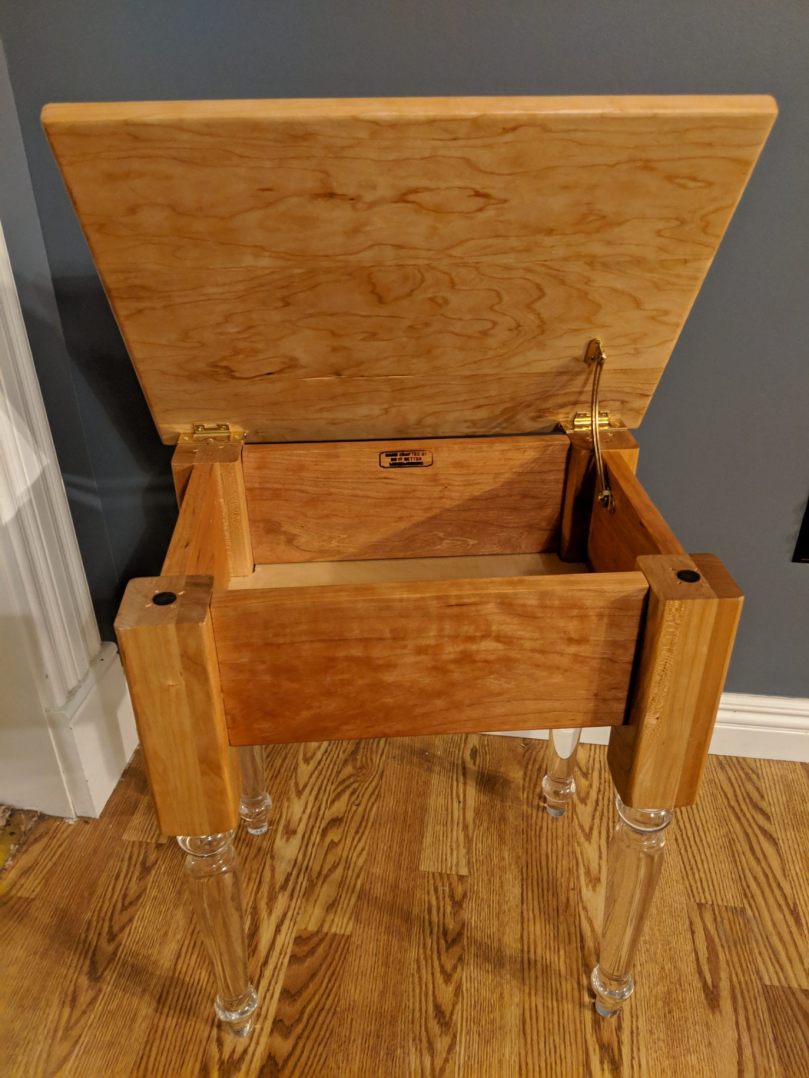
Turn the table top upside down, place the hinges on there so that the back will overhang by one inch. Pilot holes, and screws. I also decided to add one of these brass lid supports to hold the top open. I may add a second, but one seems to hold well.
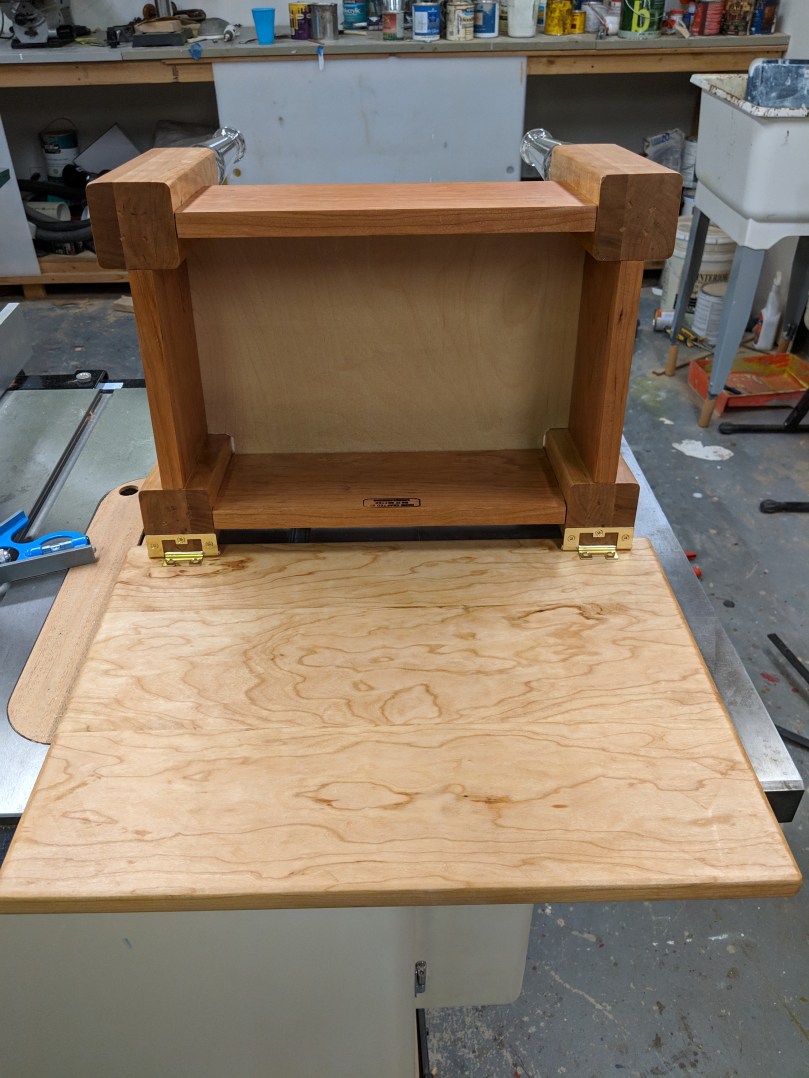
Here’s what it looks like when it’s all done!


[…] You can look back at my King Bed project for instructions on hand cutting mortises, or either of my Lift top “wild” cherry side table for machine-cut mortise […]
LikeLike
[…] If you’ve been following my blog, you likely saw my post a few months back about the collaboration I did with Osborne Woodworking on their new acrylic leg line. If you didn’t, here’s a link! […]
LikeLike