A while back, my brother offhandedly asked me about building him a replica ammunition box for his Civil War reenactments. At the time, he sent me a link to a YouTube video and a written tutorial on how to make these by hand. Here are some pictures of munitions boxes from that period:


And here’s a link to the article I’m referencing for reproducing these.
Here’s a link to a site that sells reproduction crates.
The first thing I want to emphasize is that this article was a great guide for starting out, and the author admits his goal was to create a pseudo-ammo crate that was really double stacked to help hide his modern accouterments. 100% historical reproduction was not his goal. But, it is mine!
Right off the bat, I noticed a few issues with the way the box was built. First, the author mentions that the dimensions for the box should be 14.75″x 10.75″x 6.38″, but that 1×6 stock could be used with only minimal loss in height. Presumably, the author was assuming a 1×6 was truly 6″ tall; as those who follow this blog know, that’s simply not the case these days! A 1×6 board is actually only 5.5″ wide, meaning this replica box would be a full 7/8″ too short. The first thing you need to know about Civil War reenactors is that they’re (more often than not) sticklers for accuracy; I couldn’t see that large of a difference being acceptable.
The second issue I noticed was that the author mentioned the sides needed to be dovetailed together, but then proceeded to use what I guess would be called large finger joints? This is an important distinction, because while a finger joint can be strong in modern joinery, it’s only strong because of the large amount of glue area. Modern glues are very water resistant, but Civil War era glues would have been made from cow hide, and water soluble. Meanwhile, the historically accurate dovetail joint gets all of its strength from geometry and does not rely on glue at all! You can see the trapezoidal shape of the dovetail in the first picture above where the wood has chipped off.
Both the tutorial article and the merchant site both reference the Union Army Ordinance Manuals from the time. So, I figured that’s a good place to start. Here’s a link to the full text on Google Books, but I’ve posted some pictures here too of the relevant sections:
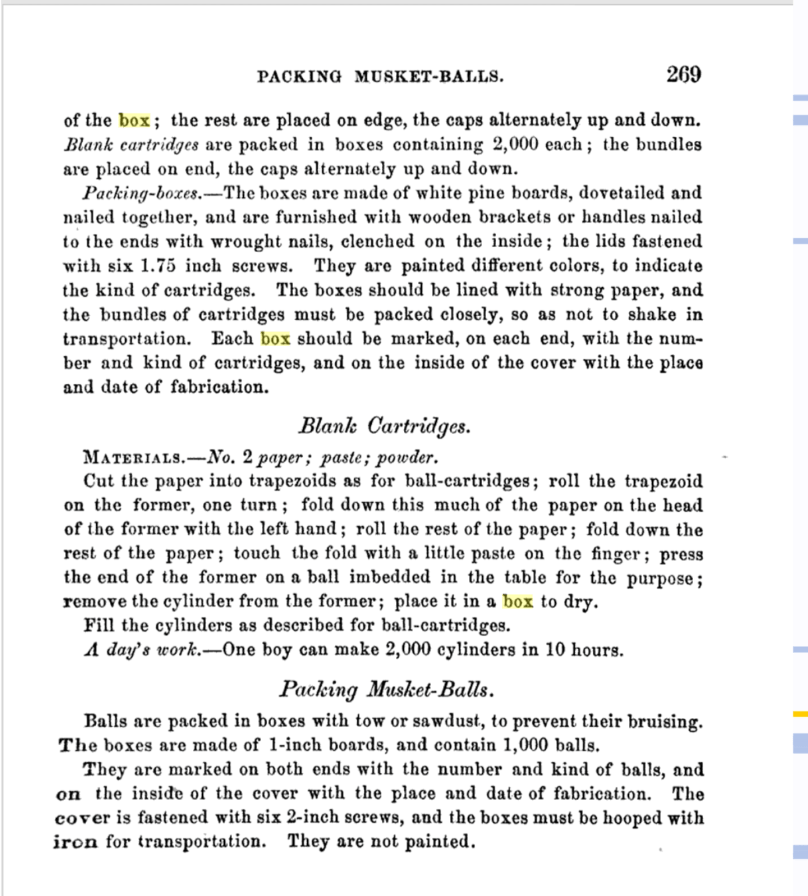

There’s a lot of really great information in these two images, but let’s just break down the essentials:
- White pine boards
- Dimensions for the .58 Caliber box are 14.75″x 10.75″x 6.38″ (6.38 is that same as 6 and 3/8ths, rounded up)
- Should contain 1,000 cartridges (this is from the sentence on the previous page I had to crop out)
- Dovetailed and nailed
- Wooden handles nailed and clenched
- Lids (plural, I take this to mean top and bottom) attached with 1.75″ screws.
In the interest of full historical recreation, I also opted to do this using only hand tools. Even my hand tools are certainly more advanced than what they had at the time (they would have used wooden bodied planes, for example), but they’re still the same in form and function.
Let’s start with the dimensions. The article’s instructions say to cut each piece of wood to those dimensions. However, I found references to the fact that these would have been interior measurements, not exterior. CS Cutlery mentions this in their dimensions (though theirs, curiously, still don’t match the manual…). As a woodworker, these dimensions being interior measurements makes a lot of sense to me. The lumber they were working with was by no means universal in any way, shape, or form. Each piece would have been individually surfaced, by hand. As such, there would be no way to know that each box would contain the same amount of ammo if exterior dimensions were given as each board would be a different thickness.
I was able to double check this using the dimensions for the 10 cartridge bundle listed in the manual as well. Each bundle would be approximately 8.67 cubic inches, for a total volume of 867.1 cubic inches of volume per 1,000 cartridges. A box with exterior dimensions as listed above, with side panels of 0.75″ thick (about the thinnest you could reasonably go) would have interior dimensions of 13.25″ x 9.25″ x 4.88″. This gives only 598.11 cubic inches, whereas the interior measurement method would give 1011.63 cubic inches; plenty of room for 1,000 cartridges and paper lining.
Enough of the historical referencing for now, how about some woodworking?
I chose to start with rough cut lumber, since it seemed a bit liked cheating to tout doing this with “hand tools only” if I had it surfaced before I bought it. This board is about 12.5″ wide, 4/4 rough, and 12′ long white pine. If you aren’t a stickler, you can get pre-surfaced pine at any home improvement center; this would simply be 1x material. I doubt Home Depot or Lowes would carry it in this width though, so go to your local lumber yard like I did (thanks WunderWoods!). What you get at HD would be SPF which means ‘Spruce, Pine, or Fir.” I’ll let your degree of accuracy dictate whether or not you care about that.
Big bonus of using Wunderwoods? St. Louis had a major Union arsenal during the war. All of the white pine they used would have come from this area. Since I know Wunderwoods harvested this locally, is it the progeny of a tree that was at one time cut down during the civil war to also make ammo boxes? I’d like to think so!

This wood ammunition box with lid is for .58 caliber rifle musket ammunition. The crate is stamped “Fabricated St. Louis Arsenal January 1865.” http://www.civilwarvirtualmuseum.org/1861-1862/missouri-enters-the-war/st-louis-arsenal-ammunition-box.php

On a board of rough cut lumber, no matter how good your lumber yard is, there’s no good straight reference edges.
You can do all the dimensioning of these boards with four tool(s): A crosscut saw (this is the one I have), a rip saw, a #5 plane (#4 would also work), and a set of chisels. If you get a two sided Japanese Ryoba saw, you can actually get away with just one saw! A dedicated, Western style rip saw is almost impossible to find these days unless you want to spend at least $80. Antique malls and Craigslist are your best bet, though you’ll need to sharpen it (which is a whole ordeal on it’s own)
I’m going to cross-cut everything at least two inches longer than I need to account for more waste when I square everything up. Since we’re working off interior dimensions, add 1.5″ to that to account for the width of the sides (we’re shooting for about 3/4″ thick sides). Then add 2 inches to that to account for waste. This 12 ft board came up JUST short of doing the box on it’s own, if so make sure you buy more like 14 total feet. Coincidentally, 12.5″ is almost dead on the width we need for the top and bottom, so if you can get that width, do! If you can’t, you’ll need to edge glue two pieces together.
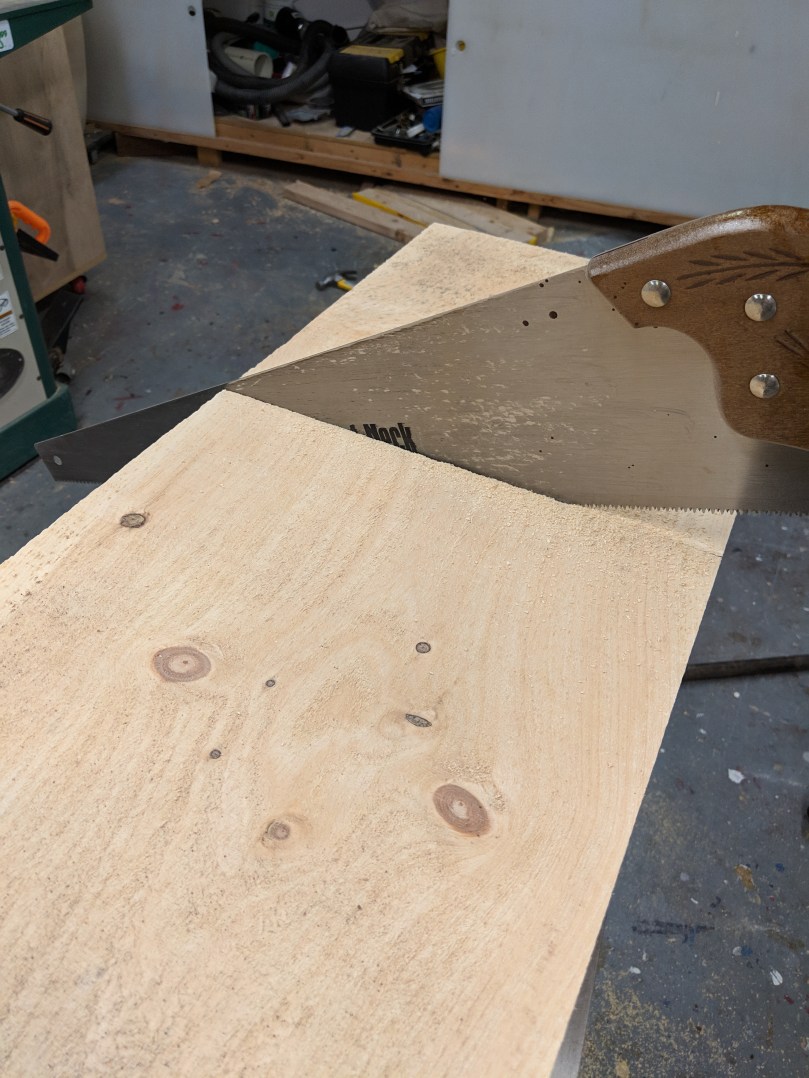
Use a square to make a line off one edge as a saw guide, knowing that it won’t be your final cut
After you get the boards knocked down, you need to get to the proper height; in this case, 6.38″. You COULD try to go right to rip cutting, but you still don’t really have a reference edge, so it might not turn out well. Instead, I put the boards in my vice and plane on edge dead flat and approximately square to the face. That gives you an edge from which you can measure off parallel lines.

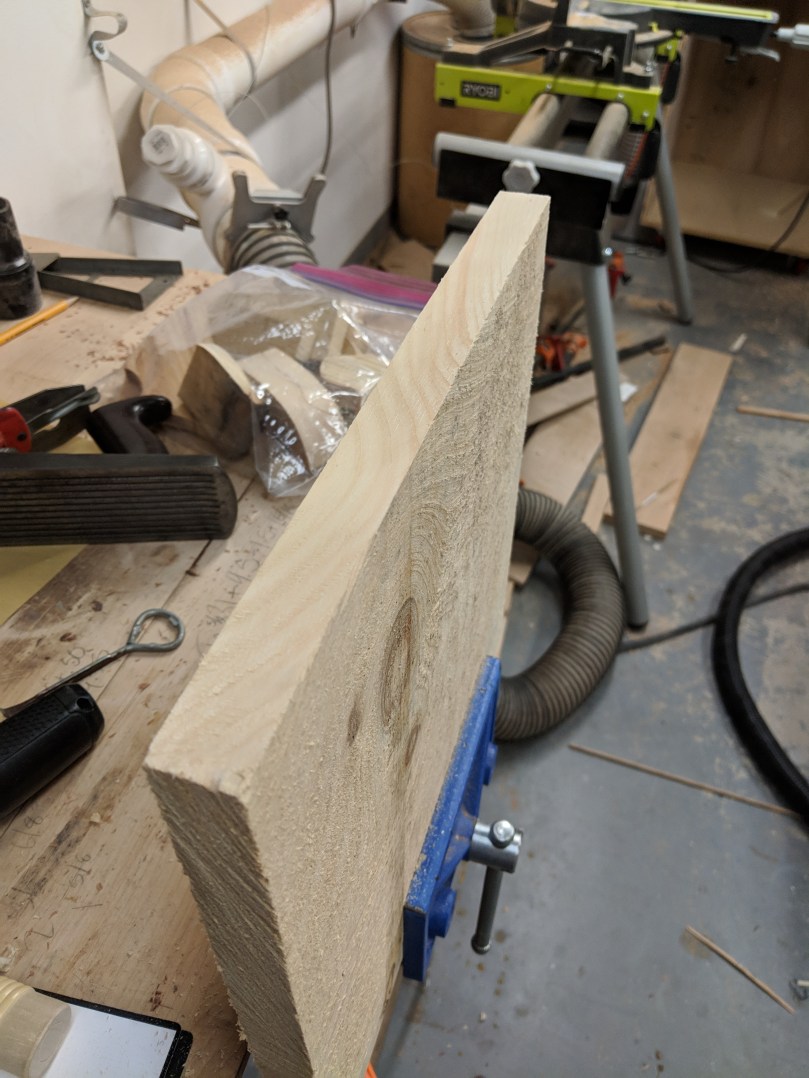
My phone’s camera was on the fritz, so I lost a few pictures; you should be able to follow just via text. Off that edge you just planed, mark a line the length of the board, parallel and 6.5″ from the flat edge. Use your rip saw to cut just on the outside of that line; that will leave room for final planing.
Now that you’re almost at the width you need, you’ll need to surface both faces flat and parallel to each other. If you have a woodworkers bench, you can use the various clamps and vices on there to hold the board. I just have a regular work bench, so I needed to make bench hooks to help hold the piece while I plane it.

Here’s the process I followed:
- Plane one face, checking for flat with a ruler or, in my case, a perfectly flat surface like a cast iron table saw top. Make sure it’s also square to that first edge you planed.
- Plane the other edge square to that face, making sure not to go past the 6.38″ line.
- Plane the final face, using both edges to check for square. If your edges are square to the first face, and the second face is square to the edges, both faces will be parallel.


After surfacing your first board, repeat with the other three, using the first as a reference for thickness.

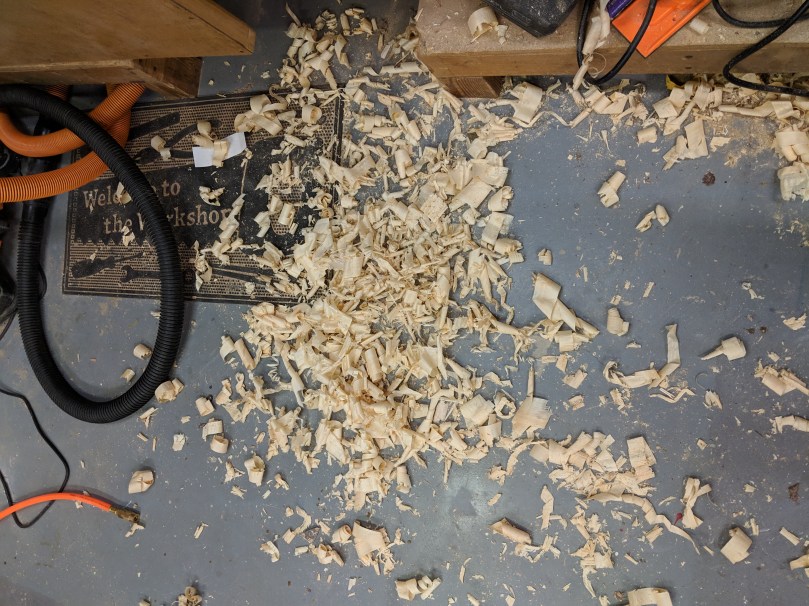
This is maybe a quarter of the shavings I made
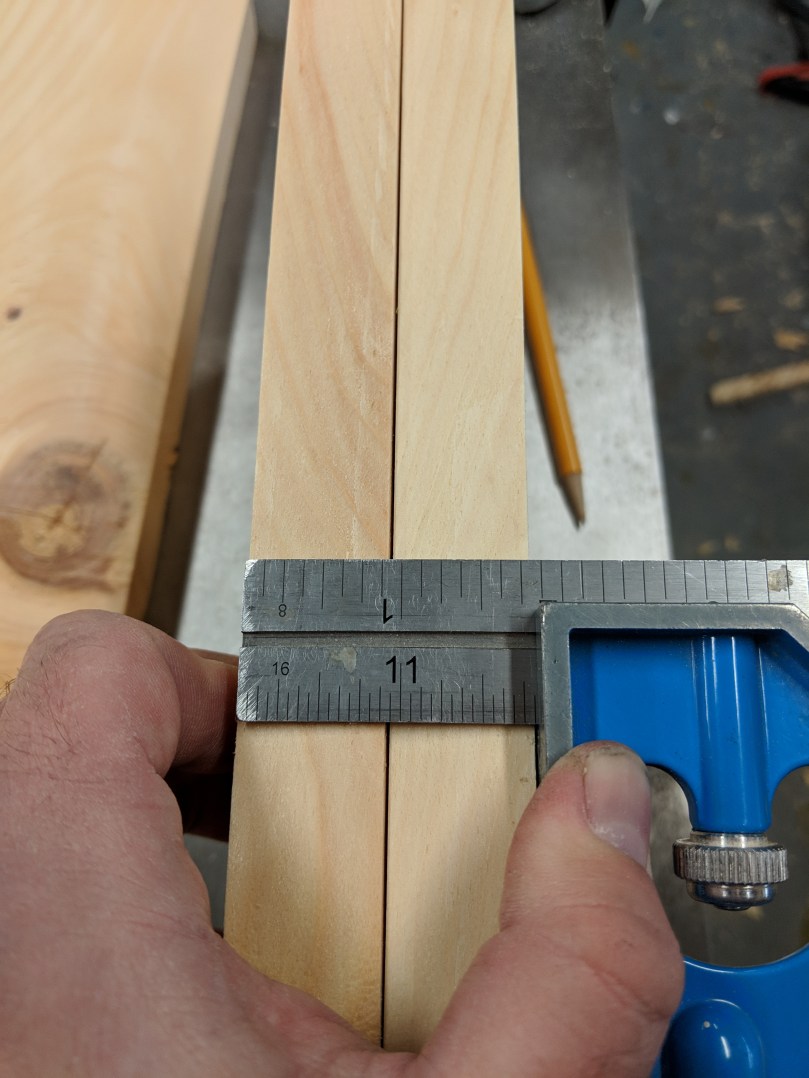
Now we need to know how thick our sides will be so we can measure the final length of the boards. The best way to do this is put each pair of opposite sides together, measure the total thickness, and then add this to the adjacent length (width) depending on which set you’re measuring. In this picture, my long sides measure about 1 and 13/16ths thick. So, my short sides (10.75″ interior width) need to actually be 10.75+1 & 13/16th long. This is to account for the dovetails (this will make more sense soon).
Using your square, cut a perpendicular line off one side of each board. Then, measure the length you need off that edge, and crosscut the other side to your final dimensions. Use your hand plane to get the width down to 6.38″ if you haven’t done so already.

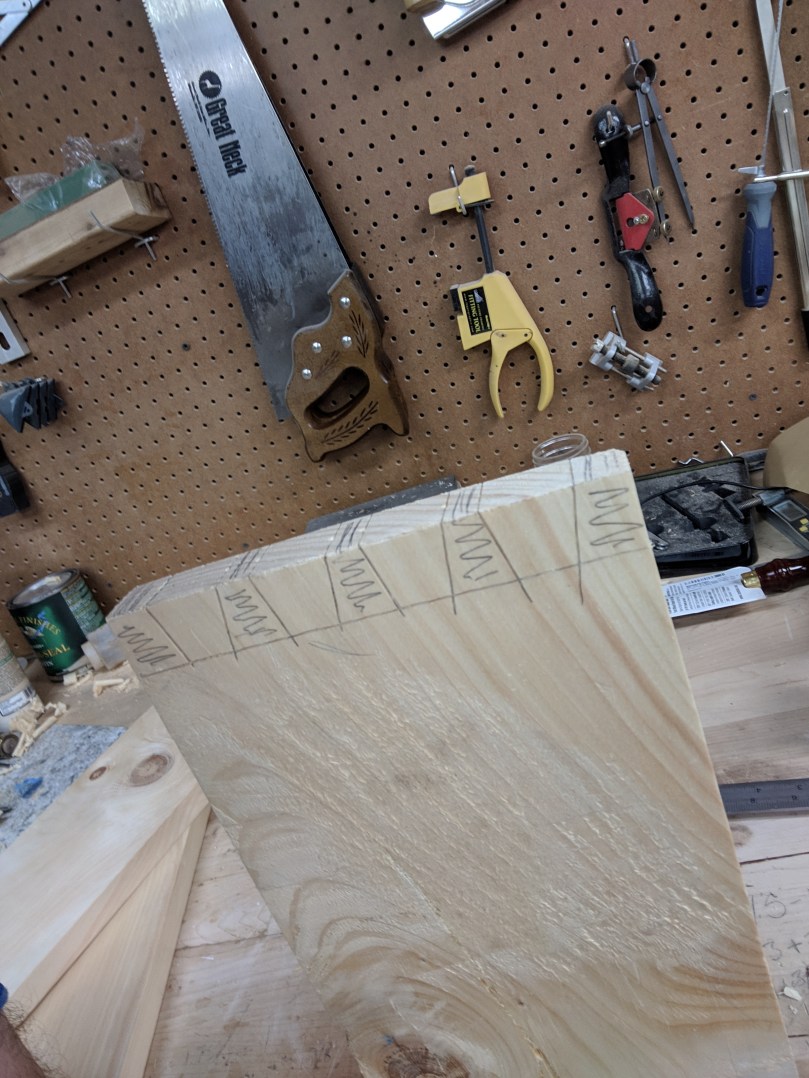
I use the “dividers” method for laying out my dovetails. Here’s a video of that process for you.

I’m gonna level with you; I’m not great at dovetails, at least not great enough to pretend I can instruct you how to do them. Here’s a video from Paul Sellers on how to make them. Here’s a link to an inexpensive dovetail saw. You can mark the dovetails using only a combination square, but a dovetail guide, marking wheel, and marking knife make this easier. I got all three as a kit from Woodcraft around Christmas for $25. The cut lines made by the knife and wheel help guide the saw blade.
Dovetails are difficult on hardwood. They’re really, really difficult on a soft wood like white pine. Don’t beat yourself up too much, I’m telling myself it adds to the historical character.
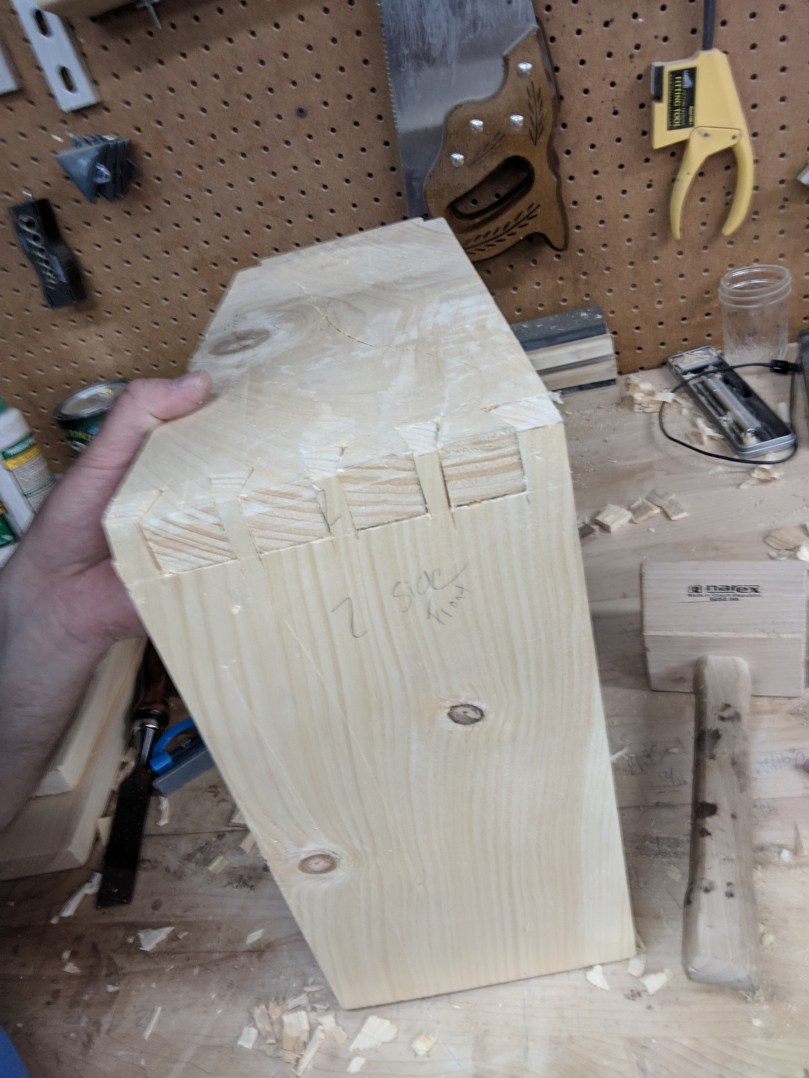
I found examples of munitions boxes from that period that had the dovetail “tails” on either the long or short boards. I chose the long boards, the geometry of the tail providing a strong force to keep the box from pulling apart if one were to drag it by the handles.
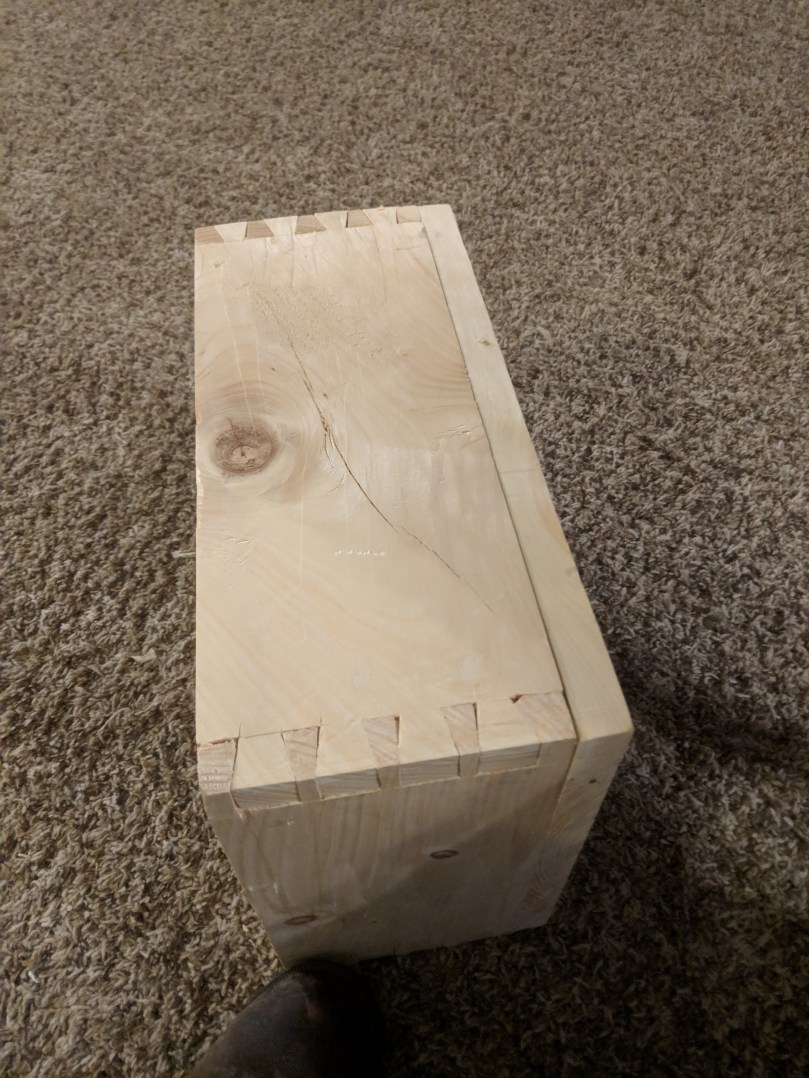
Here’s a pic of the rough fit for the box bottom/lid. Mine was the exact width needed by pure chance. Surface this just like you did the other boards.

Time to add the screws. The manual specifies 6 screws per lid. Presumably, both the top and bottom lid would have been screwed on, only to be opened at the battlefield or camp. There didn’t need to be a mechanism for closing and reopening these boxes frequently.
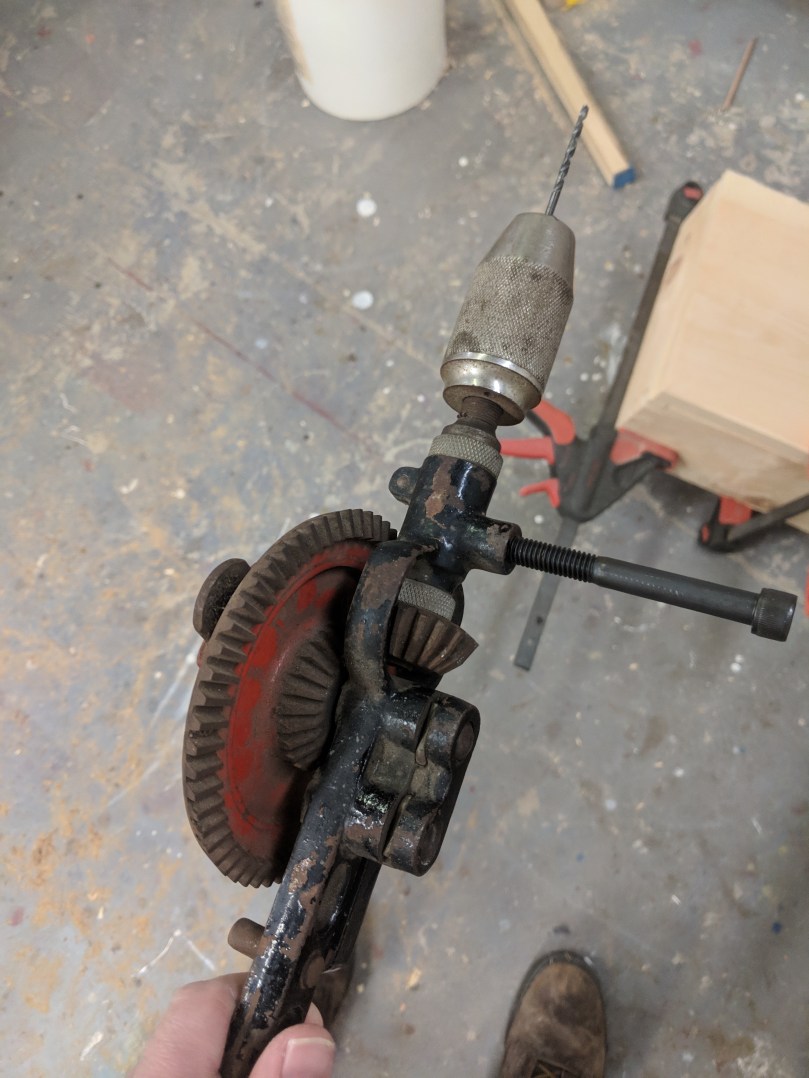
For the sake of “hand tools only” I went and bought this old egg beater drill off Facebook Marketplace. It was about $15 and, though it didn’t come with bits, readily accepted a normal brad tip drill bit. A brace and bit setup would likely be more accurate, but my brace only has auger bits, which would be too large.
The screws used at the time would have been slotted, or “flat head” screws, since the Phillips head wasn’t invented until around the 1930s. While they COULD have been brass (as some use in their box construction) I find it unlikely, given the added expense, and whatever you find at your hardware store will likely be zinc coated. The only option I could find was Kennedy Hardware. They carry flat head, slotted, steel wood screws in a bunch of different lengths. Unfortunately, not in 1.75″ (when I was looking). So, I settled for 1.5″; will the reenactors forgive me? Too early to know. (Note: They have No. 12 screws in 1.75″, but those are almost 1/4 inch in diameter, which I was sure was far too large). Before you screw anything together, measure the diagonals. If they’re equal, all your corners are square.
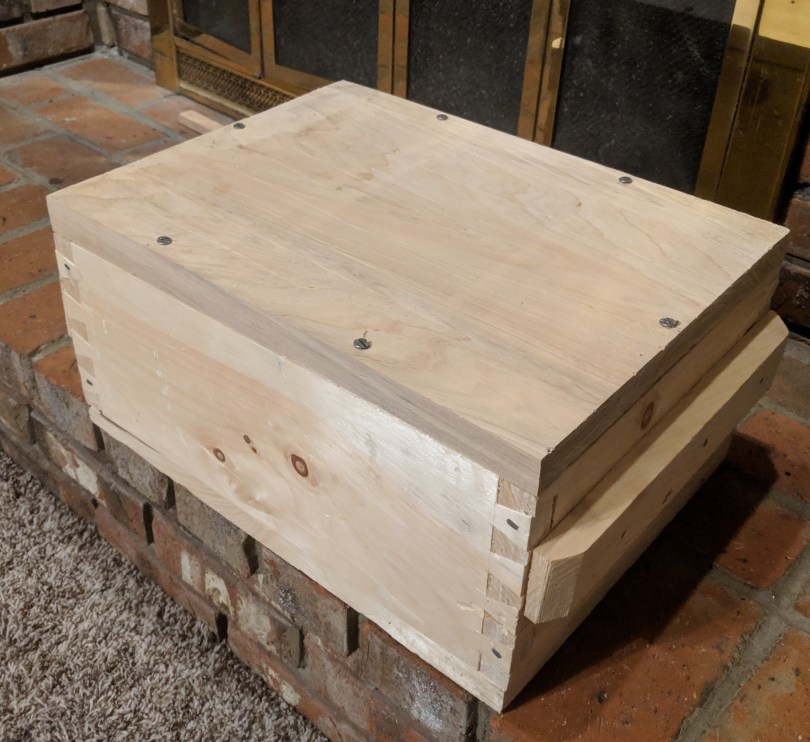
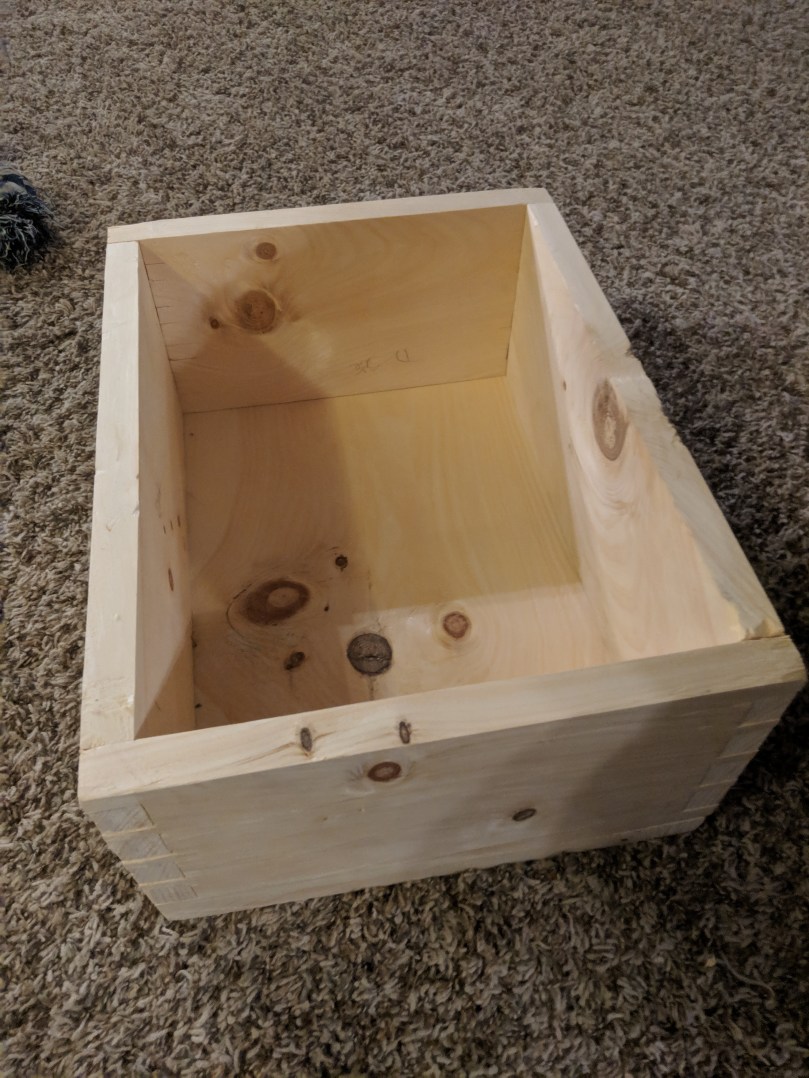
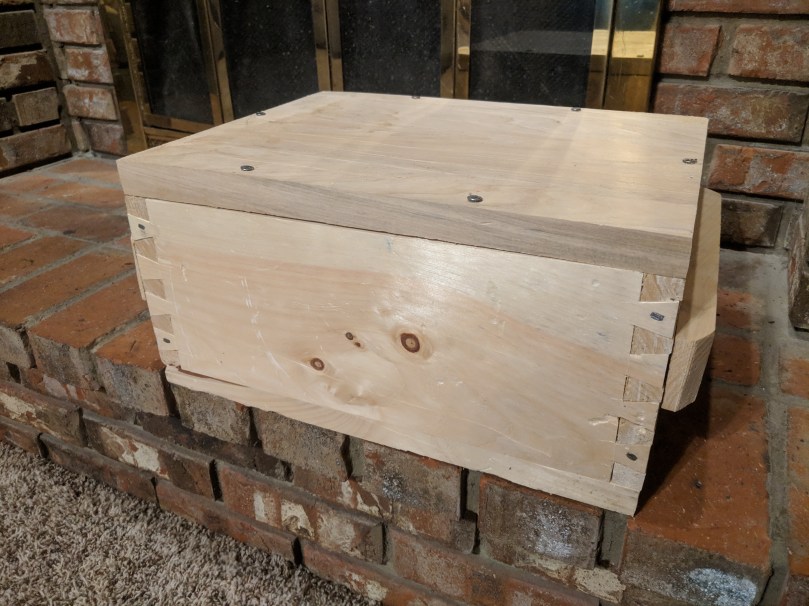
Here’s a look at everything with the bottom attached. Since I am making this as accurate as possible, I will probably ship it to my brother with the top attached too. I’ll also include two little strips of wood and some cut nails so my brother can put them on the inside of the lid, if he likes, to make it more usable for storage during reenactments (see the plans above). Not accurate, but more practical; his call in the end. ATTACHING THE TOP LID SHOULD BE THE LAST STEP YOU DO.

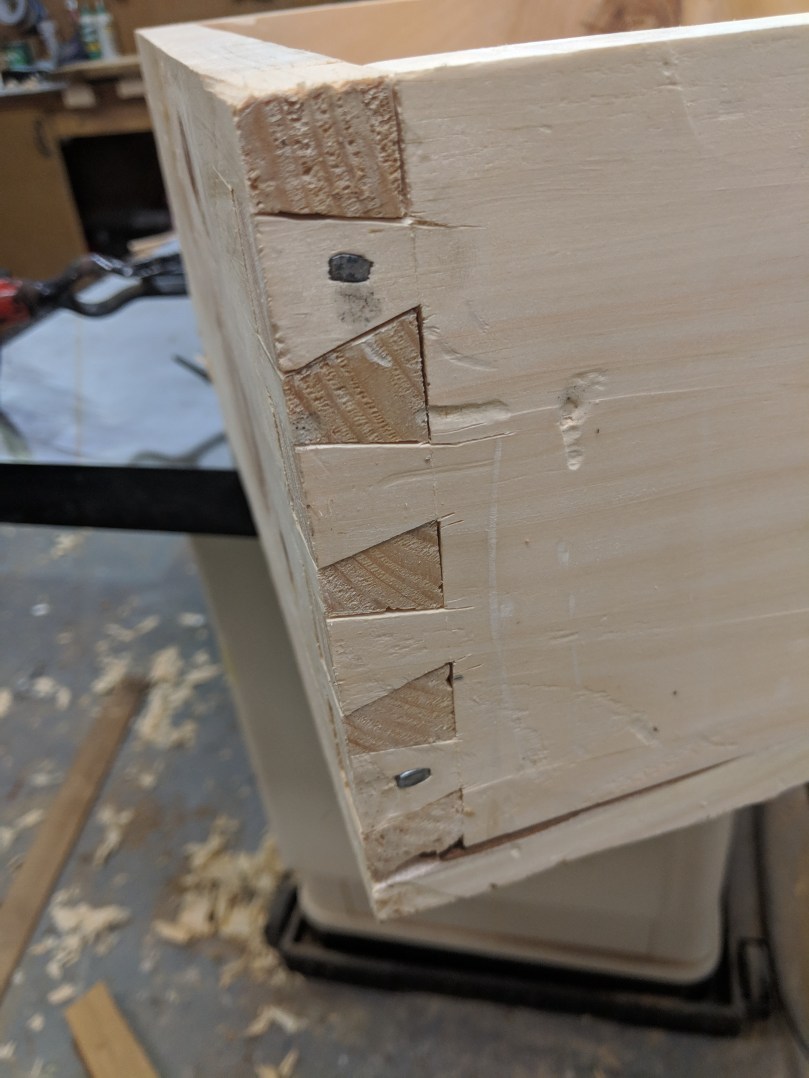
Some gaps on the dovetails, but just as strong. Once painted, you’ll never be able to tell.
The ordinance manual also specifies the dovetails should be nailed. The way a dovetail works, it is very strong in one direction, but separates easily in the other. In the case of this box, it would be very hard to pull the short sides off the box, but relatively easy to pull the long sides off. By driving cut nails into the “tails” of the joint, we ensure the tails will not pull out. Modern wire nails would do a very poor job accomplishing this, as they have very little gripping power. But cut nails are wedge shaped, which compresses the wood as the nail is driven. Here’s an excellent video explaining the advantages of cut nails. Make sure to drill a small pilot hole with these.
I’m going off the original image, above, for my plans. In that image there are handles on the sides, but no rope in the handles. The ordinance manual doesn’t specify rope; an omission that I think points very strongly toward there not being any, given the specificity in all other aspects.
Use the scraps you’ve cut off to make these handles. By looking at the image we can see the handles are about 1/4 of the box height (call it 2 inches), as long as the side, and sit about 2 inches from the top. Use your plane to taper the ends down, then drive some 2 inch long cut nails (3 total) into the handle and through the box. I chose to drill a small pilot hole to aid in this, and prevent the wood from splitting. I purchased mine from House of Antique Hardware. Again, get the plain steel ones, not the galvanized ones.

After the nails are driven through, there should be about 3/8 inch that pokes through the inside. This is where we “clench” the nails. All that means is you hammer the tip sideways until it’s flat. Now that handle will never come off.

Attach the top and that’s it, folks! The manual specifies different paint colors depending on the ammo. This box would get an olive green paint. The manual even includes mixing instructions, but I’d urge caution given the use of turpentine and boiled linseed oil. Premixed, canned paint was not invented until 1866; if you decide to purchase a paint, rather than mix your own, powdered milk paint (not pre-made) would be period appropriate. I’m leaving it raw for my brother to decide what he wants to do with it.


I hope this is a valuable resource for all the reenactors and woodworkers out there! If you have questions on building the box, please feel free to email me. If there’s anything you think I did wrong in trying to reproduce this box, please let me know!
Update: here’s a link to my etsy store!
https://www.etsy.com/listing/679483392/civil-war-ammunition-crate-1862
If you really want a historically accurate box like this, but don’t have the desire to build one, shoot me an email and we can talk about commissioning a few pieces. dibwoodworkingllc@gmail.com

Great article with good instructions. My only comment is the reference to milk paint. Oil based pigments were readily available, these were thinned and mixed with turpentine to make brushable paint. The colors referenced in the Ordnance Manual are of this type. Modern paint in these base colors can be mixed to produce a reasonable facsimiles of the original colors.
LikeLike