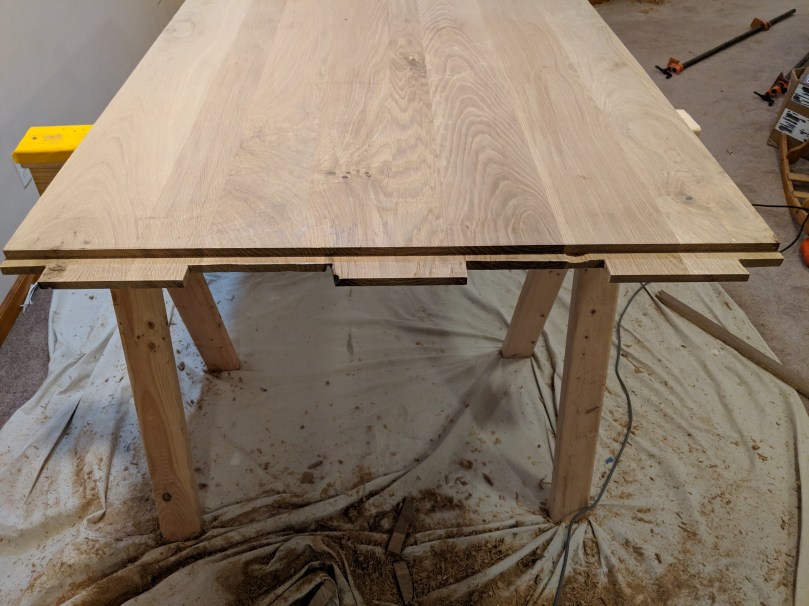
Well, we’re finally getting toward the end of this project; or at least it feels like it. However, this part was by far the most intimidating part of the process for me. It took a lot of skills that I’ve never tried before.
I sent the two pieces I made in the previous post off to a local lumber yard that let me use their drum sanding services. For a fee, they took those pieces and sanded them down to an even 1.5″ thick on each one. Once I got them home, I glued the two pieced together the same way we did in the last post. Before you glue, though, take this opportunity to start your final dimensions of the table. Take one of the two pieces, measure from what will be the glue line out 20″. Use a straight edge guide and cut this out with your circular saw. Now, one of your boards is exactly 20″ wide and both sides are parallel. After you glue, you can use that side you just cut as a reference for cutting the other side at 40″. Then, square up the ends at 94″. Why 94″? The final length is going to be 96″. We will two 3″ breadboards on each end (explained later). However, each breadboard will be attached to a 2″ tenon. So we need 94″ total.
Confession time? My table is a quarter inch narrower than it should be. I’ve always said I won’t hide my mistakes! The MDF edge guide I used flexed in the center of the table length while I was cutting and took more off the center than it did the ends. So, having learned my lesson, I reset the straight edge of fix this, but this time I added a clamp in the center of the guide too. When I got halfway down the table, I moved the clamp behind my saw so I could finish the cut. Learn from my mistakes!
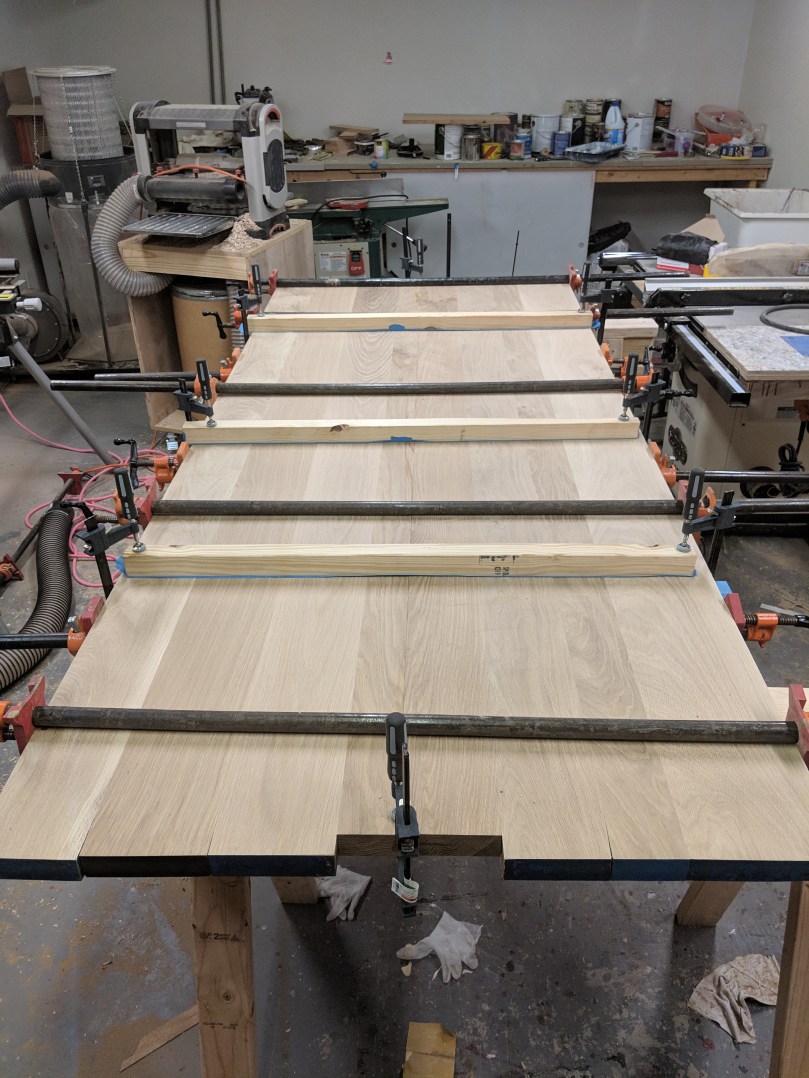
Even though the top two pieces should have basically been exactly the same thickness, I did have a slightly raised glue joint on one end. I was able to clean this up with my hand plane.
NOTE: I did not sharpen my plane before I used it (actually, for a long time before I used it). BIG mistake. I ended up gouging a few spots, and had to belt sand them out. Sharp tools are a godsend, dull ones make everything harder. Lesson learned.

On the ends of the tables we’re going to be using breadboards. Here’s a GREAT article on what they are, and why they’re necessary. Essentially, the table top is going to want to expand and contract from side to side as the seasons change. As the pieces expand at different rates and in different ways, the table could warp or cup. The solution it to fasten to boards on the ends to hold everything flat.
Here’s the kicker: if you don’t do that properly, you could ruin the table. If you just use screws to attach the pieces (as many, MANY DIY furniture blogs would have you do) you’ll actually keep the table from expanding and contracting. This will, inevitably, cause cracks and damage to the table. The solution? A tongue and groove joint with haunched tenons!
I did a pretty poor job documenting the pictures as Don and I worked on this, but here’s the steps:
- Cut a board that is about 2 inches longer than the width of your table. Plane it to the exact thickness of the table.
- Mark out your mortises/tenons. I chose three tenons, each 7 inches in length. The space between each tenon was also 7 inches. This left 2.5″ on each side for the haunches.
- Add about 1/8 inch on each side of where your tenons are marked. This will allow the tenons to move as the table expands.
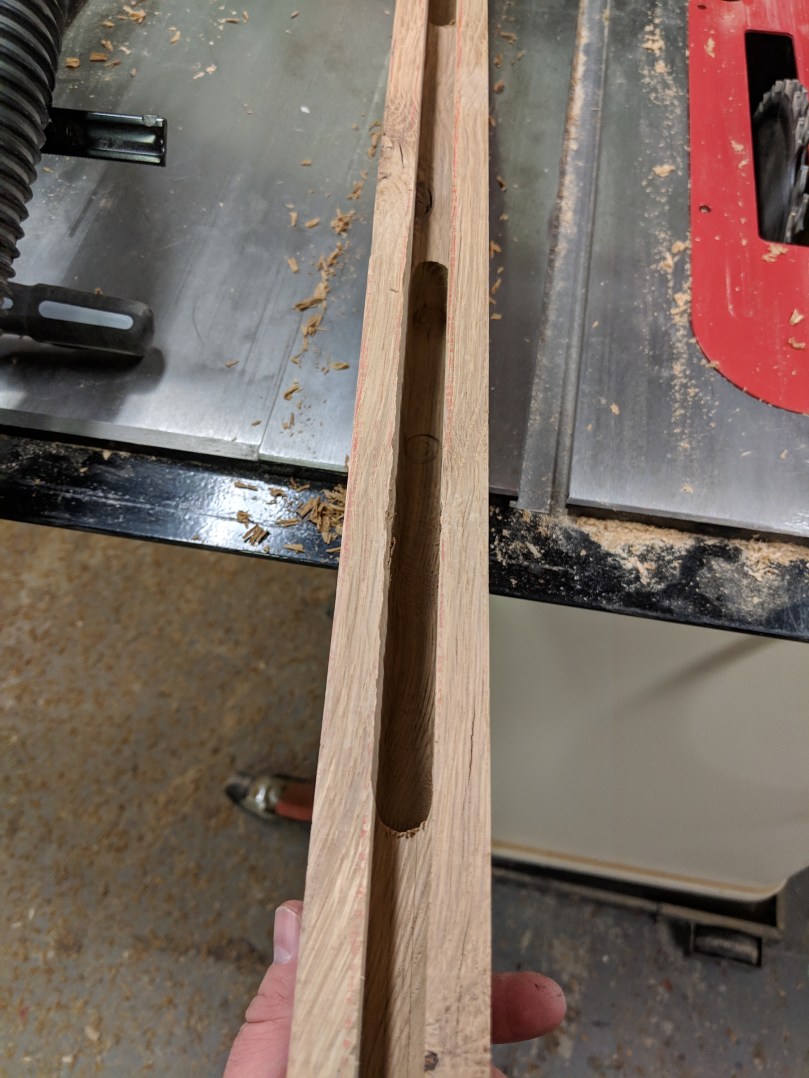
- Using a dado blade or router bit, make a groove in each breadboard. Because my table was 1.5″ thick, I opted for a half inch groove. I went about 3/4 inch deep to balance strength and aesthetics.
- About 1/8 inch at a time, plunge out the mortises with your router. We did it on a table by marking out the mortises and slowly lowering the piece onto a half inch spiral bit.
Set a guide on your table so that it will take 2 inches off each side. A really handy trick I found was to use scrap pieces as the spacers between two pieces of plywood. Glue them together so the spacers are exactly as wide as the table. After the glue dries, joint one edge of the plywood pieces so they’re dead straight. When you clamp this guide to the table, you’ll ensure that the shoulder of each side of the tenon matches up on each side!

Mark and cut out the tenons.
Leave a little extra and fine tune as needed.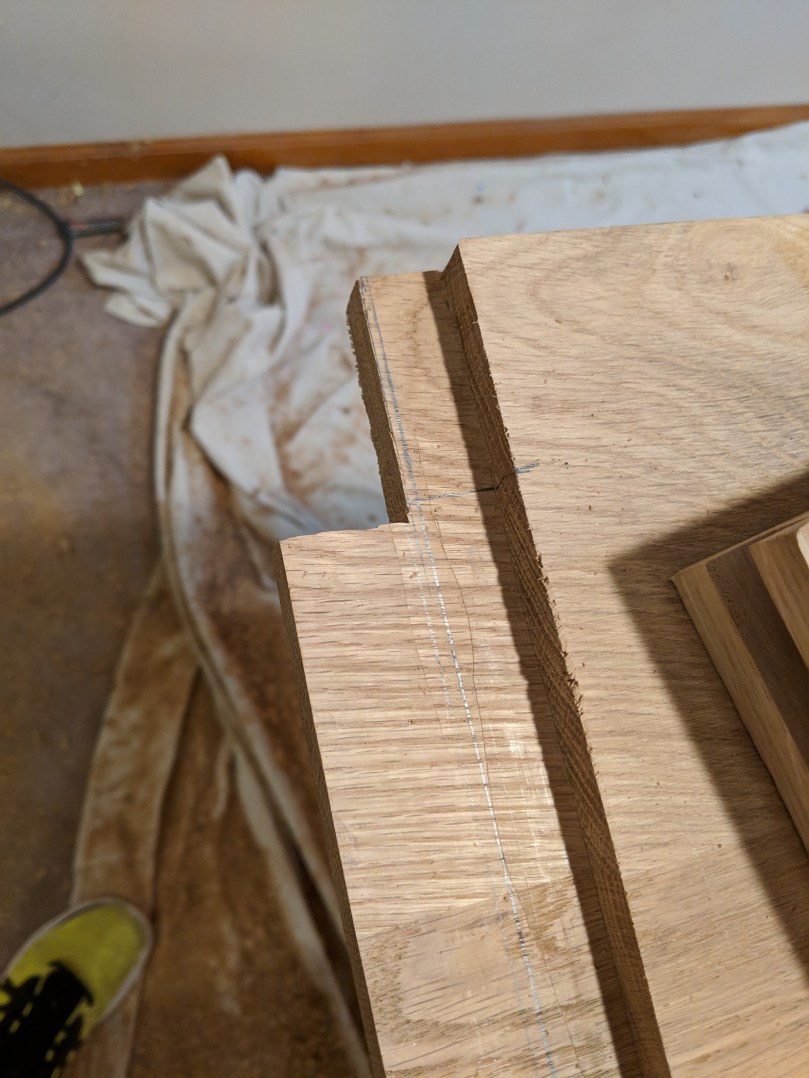
It doesn’t have to be pretty, but it should be tight. I used my block plane and chisels to tune everything up.
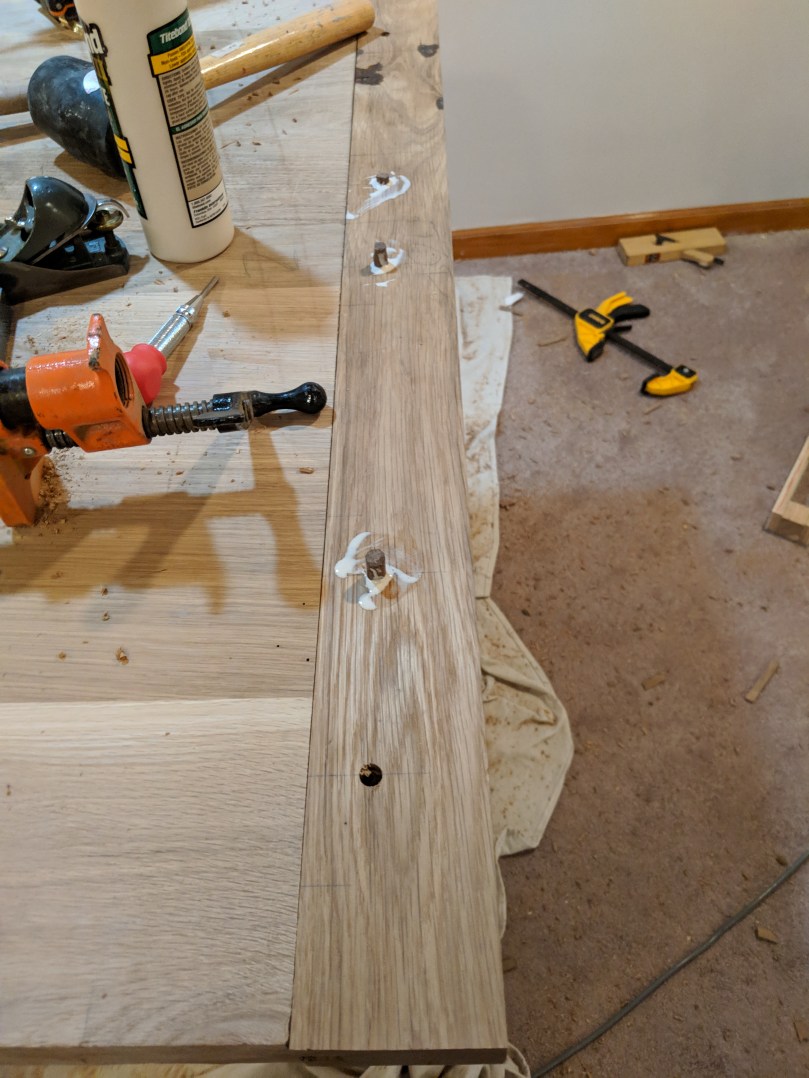
Mark two hole locations on each breadboard where the tenon will enter the mortise. I went 1.5″ in from each side of the tenon, and 1″ deep off the shoulder of the breadboard. It’s all aesthetics, really. I decided to use walnut dowels, 3/8″ thick to drawbore everything. The walnut will add a really nice contrast. You could use any hardwood, really.
Here’s the really important part: ONLY ADD GLUE TO THE CENTER TENON. You want the other tenons to be able to move back and forth and float. Now, in my picture below, you’re probably noticing I have glue on the outside dowels, right? Well, what I did was drive them most of the way in, apply a tiny bit of glue to the dowel, and then tap it in about another 1/4 inch. That means the glue is only sticking the dowel to the breadboard, not the tenon.
Cut off the dowels with a flush cut saw, clean up with a chisel and sand.
Now that you’ve seen my pictures, I cannot emphasize enough how much you need to watch this video. There were a few steps I didn’t document well, such as elongating the dowel holes on the outside tenons. Watch the video! That’s my cop-out for the day.
