
It’s been a while since I posted anything to the blog! Most of my DIY tips and ideas have been focused on small little tips on Instagram (@dibwoodworking), and I have been swamped with my custom work (www.edelweisswood.com).
However, it’s time for another awesome collaboration with Osborne Wood Products! It’s always fun to collaborate with them to highlight a new product, and this lift hardware is definitely something I haven’t worked with before. As in previous times, they provided me the legs for this build and the lift hardware for free in exchange for me writing the instructions to install them. I built this one on spec this time, without a client lined up, so this one will likely get sold at a slight profit (but a discount to full price to make up for the materials I was provided). Just in the interest of full disclosure!

The table legs are the Osborne Lakeland Coffee Table legs in Cherry; the legs have a shaker look to them, and cherry is a classic shaker style wood, so it seemed to be a good fit. We’ve done enough of these builds together that I won’t have to spend too much time going through the details on the general construction of the table. Dimensions are 40″ x 24″ for the table top. From leg-to-leg, these dimensions are 37″ x 22″. Look back at my puzzle table post in regards to making the aprons, with mortise and tenon construction.
Because the brackets are so deep, the aprons need to be a full 4.5″ wide. Use 3/4 inch stock for the aprons. Glue everything together overnight, checking to make sure the frame is square by measuring the diagonals.

Build the table by gluing up together boards of 3/4″ thick stock (aka 4/4). Using a circular saw with and edge guide, or a track saw, cut the table top to final dimensions. Round over the edges slightly, and sand the table top; start with 80 grit, then move through 120, 150, and then 220 grit. Do the same with the table frame throughly; the legs came pre-sanded at 150, but you’ll need to get the aprons to 150 as well before everything gets sanded to 220.
Why are we doing all of this sanding before final assembly? Well, because the table top is attached to the frame by the lift brackets, and the hardware is difficult to finish around, it’s best to finish everything ahead of time.
I chose to use a spray lacquer from Mohawk Finishes called Duracoat; it gives a really nice sheen, and deepens the color of the cherry nicely as well. Cherry has a strong tendency to blotch when it is exposed to oil finishes; over time, the blotching will even out as the cherry darkens, but I prefer to use a spray lacquer initially to minimize the blotching up front.
Now, the main reason I am doing this write-up is for the instructions on using the lift brackets, so let’s start in! I found the best way to place these was to start by cutting a board that we will use as a “cleat” to attach the hardware to the inside of the aprons of the table. The reason we’re doing this is to allow us to make sure the brackets sit exactly flush to the top of the frame, and parallel to the table frame as well. My brackets had just a slight tilt off parallel to them, so this was necessary to make sure the lift action was perfectly parallel.
Make the cleat only as deep as the main portion of the bracket itself (1 and 7/8 inches). The bracket is 11.75 inches long, but to make sure these is enough room for the bracket to tilt backward when it opens, we will want to leave an inch of clearance behind. The best way to accomplish that is to cut the cleat 12.75″ long, which gives you a consistent one inch spacer to help place it.


Temporarily attach the brackets to the cleat using 5/8 inch #6 screws; two should be plenty. This will allow us to clamp the bracket and cleat in place for alignment.

Turn the table upside down, and place the frame on the table top so that it is evenly centered vertically and horizontally. Clamp the table top down firmly; we don’t want it to move as we attach the brackets in place.
Place the back of the cleat against the back side of the leg, making sure the part that attaches to the table sits flush to the table top. One of the nice things about the Osborne brackets is that the holes for attaching the top are elongated, which allows the wood to move if you use a solid surface table top. The bad part? The holes are quite wide, so wide that I couldn’t find any screws at Lowes with a wide enough head that it won’t just go through the hole. The best solution I could find was to take a 5/8 inch long, #6 screw with a round, flat head and a couple of washers; a #6 washer and a #8 washer. The #6 washer wasn’t quite wide enough to cover the hole, but the #8 was. The two stacked together worked perfectly. Attach all three to the table top before moving on to the side that attaches the aprons.

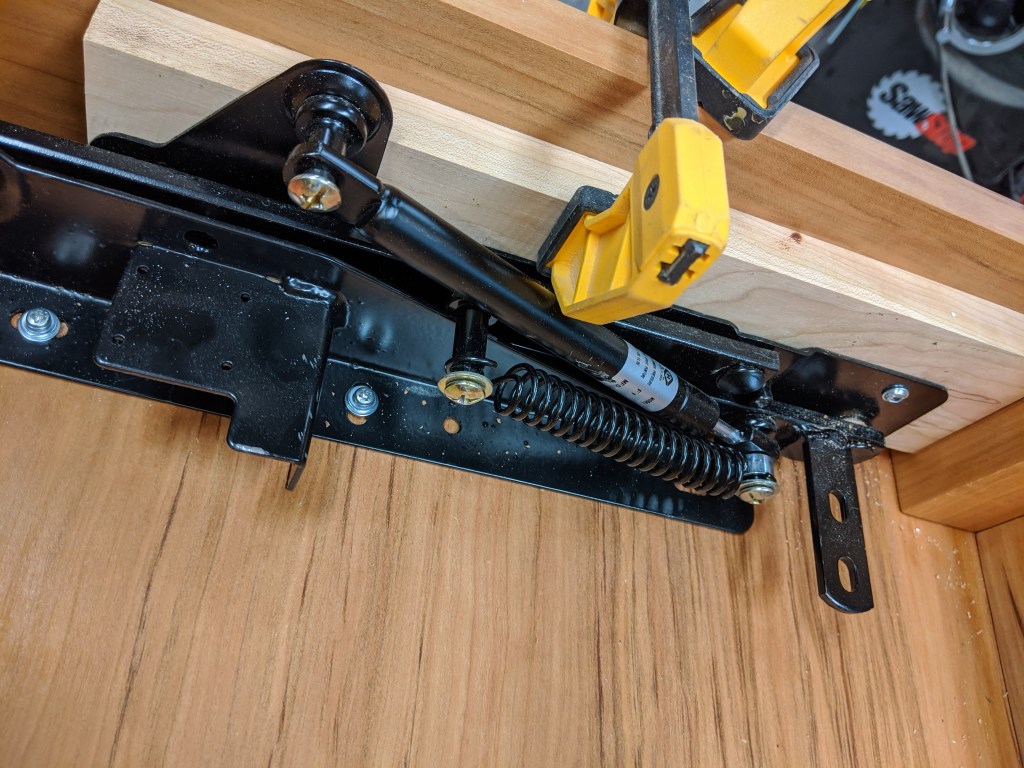
With the table in this position, you’ll only have easy access to two of the holes that attach the bracket to the apron; that’s plenty to hold it in place to get access to the last two. Drill a pilot hole, and use a flat headed screw 1.25″ long to secure the bracket to the apron, passing through the cleat on the way through.
Once each bracket is attached with two screws, you can lift the apron and frame up, and place the final two screws.
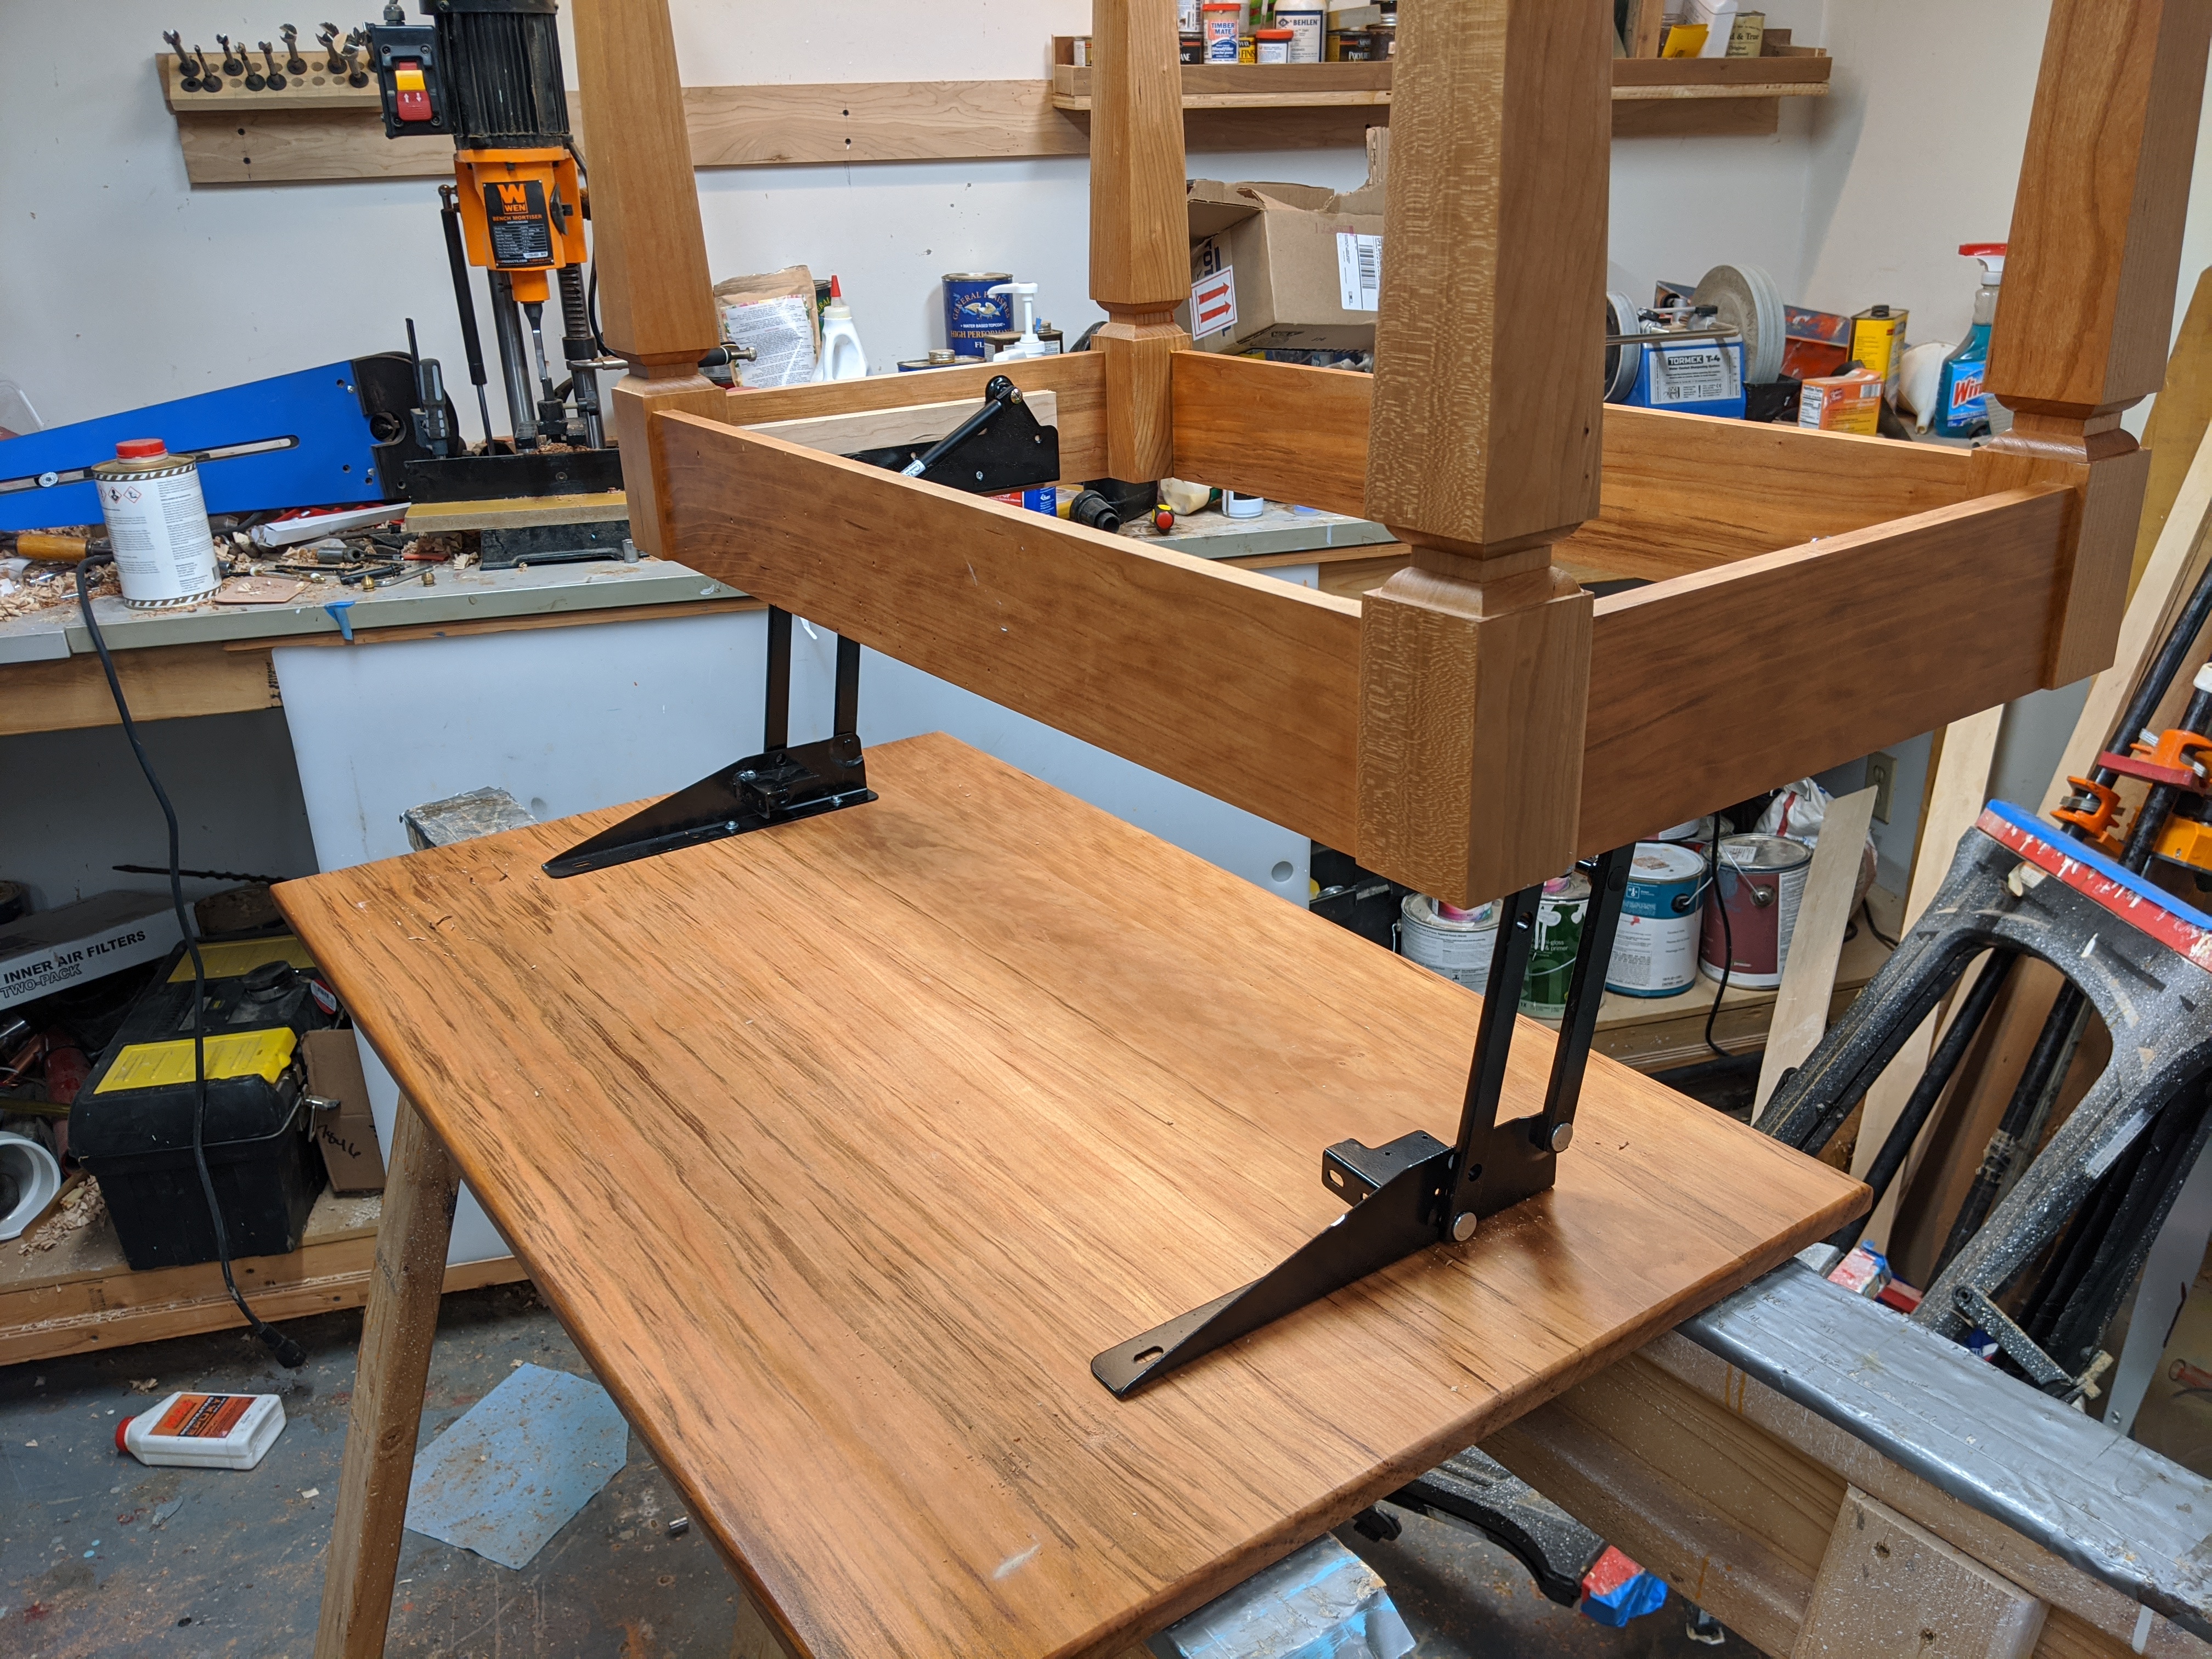
The brackets run smoothly and with a fair amount of ease, but I don’t want to risk and racking forces throwing the frame out or causing any issues. Normally, the frame and apron would be attached to each other, and there wouldn’t be much need for corner brackets. In this case, I decided to add some using pocket screws. I don’t normally prefer pocket screws for furniture joinery, but this is a perfect situation for it.
Cut some pieces with 45 degree miters on each edge side, and then place them in the pocket jig as such to cut the pocket screws.

Put one in each corner of the table, using the bottom side of the brackets as your guide.

That’s it! Your table is now ready to go. Give it a test run; it has a great, soft close action and gives a nice height for working from a couch.

[…] If you are working from home and need an easy desk in your living space, we are excited to share our Table Lift Hardware Kit, Osborne Part 500712BL. Our friend John at Do It Better Woodworking sent us some photos of the lift table that he built using the hardware, as well as a great video. For full instructions and detailed photos on building this very unique and functional table, see John’s blog at dibwoodworking.com. […]
LikeLike
Great project. Question regarding the brackets. The product on the Osborn site shows crossbars running between the brackets while your build looks like two brackets without any crossbar. What gives? Appreciate any insight. Thanks!!
LikeLike
Good question! I didn’t know they’d done that. My guess is it’s to make sure they’re aligned properly, it doesn’t look like it would alter the functionality
LikeLike