
We’re almost there, just time to put the finishing touches on. The first thing I did was connect the headboard, footboard, and siderails just to make sure everything worked as planned. I had to use a flat head screwdriver on a couple of the metal brackets to bend them out a bit more, but otherwise everything worked really well.
Adding the center support, at this point, is easy. Measure from the top of the siderail to the top edge of your poplar board; that’s tells you how low your center support needs to be. Mine was 1.75″ from the top. Since my siderails were 20″ off the floor, I know that my center support needs to be 18.25″ up from the floor.
These center support brackets from Rockler worked really well, with slight modification. The screws included are woefully inadequate. I purchased some 1″ #6 wood screws instead, which work with the bracket without interfering with the connections. #8 were too big.

The bracket accepts 2x material, so I took a yellow pine 2×6 I had sitting around and ripped it down to match the width here. Mark 14.25″ up from the bottom of the footboard (since the footboard sits 4″ off the ground) and attach it on center. You can see an extra set of holes on mine…well, I mistakenly measured from the top of the headboard to the top of my slat spacers (pictured below) the first time. Learn from my mistakes!
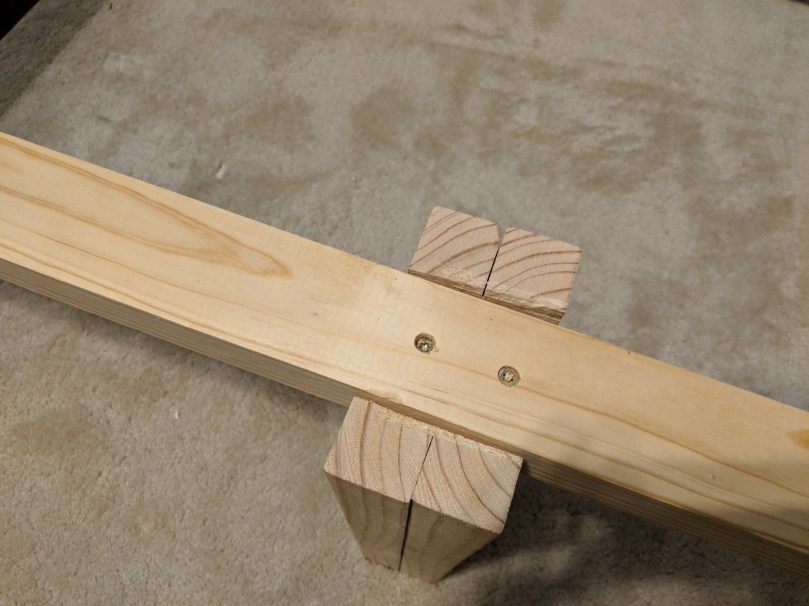
Once that’s together, you want to create two support legs to go under your center support. Use whatever you have in your shop. I decided to take some more yellow pine, screw two pieces together to add some thickness, and then notch in a spot for the center rail. The measurement for the leg height should be the same as how high your center bracket is; 18.25″.


Now, purchase around 13 1×4 boards and use these as support slats. No special wood here, just Home Depot “white wood” which means either spruce, pine, or fir generally. The board pictured above is poplar; I used it because I had extra. Cut these to match the width between rails (77″ in my case) and then glue in some spacers between them to make sure they don’t move.


Lay all the slats on the bed like so:

If you were using a box spring, you wouldn’t likely need the extra slats, just the center support.
And here’s the finished product!

I have so many people to thank for help on this project, not least of which my wife and children for giving me time to work on it when I needed to. And for the rest of my family. all those tools you’ve been giving me as gifts for years were put to good use!
Alder lumber was purchased from St. Charles Hardwoods. The plywood was from U-Pick Hardwood Lumber, who was the only one that could do such a small order of half inch alder plywood in my area. BIG thanks to the Reddit r/woodworking community who really helped me plan a lot of these joints and fielded many questions.

This bed frame looks sturdy and well-built.
LikeLike
Going on 7 years, and moving homes, with no issue!
LikeLike