While I’m working on my first furniture build, I thought I’d provide a short overview of a recent project I did for those who visit this site. This is a folding bookstand, crafted from a single piece of walnut using only hand tools. It was designed by Andre Roubo in the 18th century, but I came across it on an episode of Roy Underhill’s show “The Woodwright’s Shop.”
I started with a piece of 8/4 walnut, which is about 1.75 inches thick. I cut it to be about 16 inches long, and it came right at 9 inches wide which was perfect. I needed it to be about 1 inch, and though the lumber yard offered to plane it down for me, I opted to rip it myself since I could save the 3/4 of an inch for some future use. You could buy 5/4 lumber here (which is about an inch thick) and save yourself some trouble, but I really liked the figure on this piece so I opted to rip it down.
Slow and steady was the key to a straight rip. The saw I was using marketed itself as a rip cut and crosscut saw: that was not necessarily true. It’s definitely a crosscut saw, and this took forever. I upgraded to a cheap Japanese rip saw for the rest of it, and that went substantially better.
Next I had to plane the wood flat. Since this piece came from the crotch of the tree, the grain was beautifully figured. That also meant, though, that it was very challenging to plane. This is my grandfather’s Stanley #5 jack plane. You can find these at antique malls for around $25 and there are tutorials online (Paul Sellers’ is very good) about sharpening the blades using sandpaper.

Next, I had to cut out the section from the top that would create a small shelf piece. I measured 6 inches from the bottom to mark the lower half of the hinges, marked the hinges, then added about 3 inches for the shelf. Roy’s video can explain this better than I can. Roubo accomplishes this by creating two bookstand at a time out if one longer board, which Roy also explains in great detail.
Now for the fun part: carving the knuckle joints. I had a really handy acordian style tool that my wife gave me which marks out even intervals across the board, but Roy’s video shows how to do this with just a compass. I wish I’d gotten more pictures of the layout process, but this is my first blog so cut me some slack. The important thing is that you use an odd number of knuckles and clearly mark the parts which need to be carved out on each side.

To get the lines between the knuckles cut out, I used Roy’s suggestion and took a cut off hacksaw blade. I’m not going to lie, it was tedious. What ended up working a lot better was drilling the pilot holes, filing a coping saw blade down to a point, and finagling it in there until I could get the full blade through. Then, I used two pairs of pliers to pull the blade back and forth to cut the line out.
Next, I used a coping saw to cut the ogee out using Roy’s design. It was really easy on the bottom, but I couldn’t figure out how he did the top so I just improvised. If you’re not super dedicated to using just hand tools for this, use a jig saw.
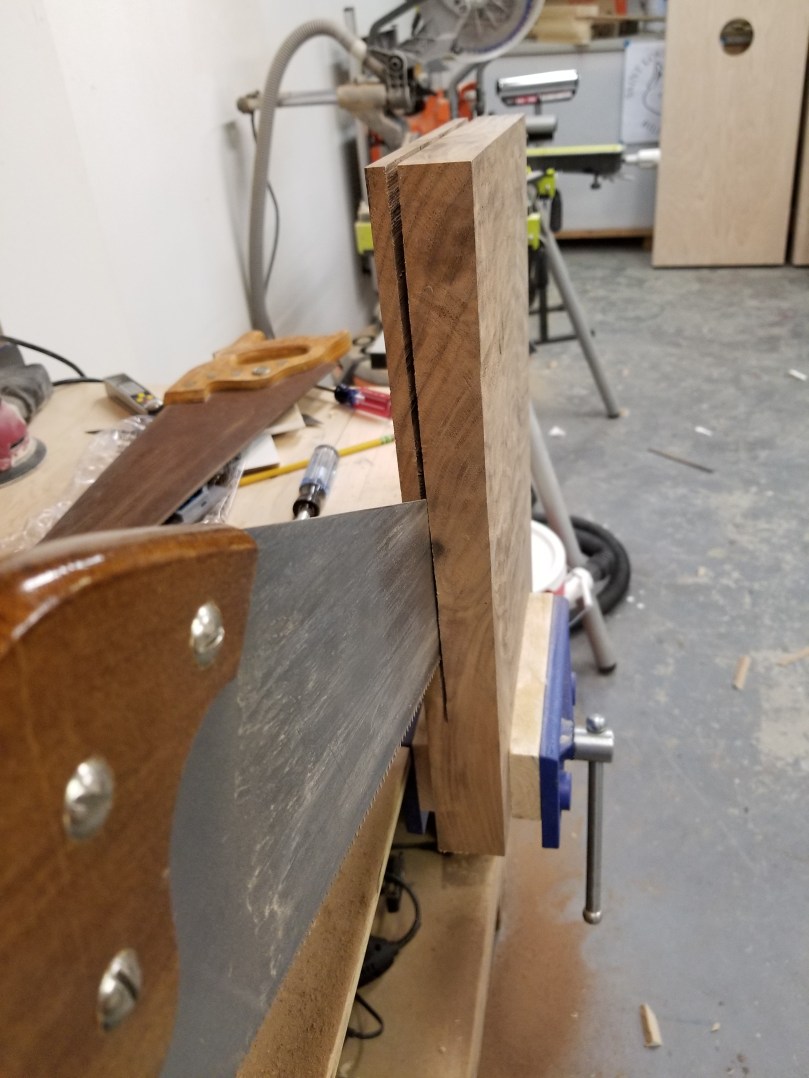
Then it was time to rip the boards down to the knuckles and see if I could get it to open. See Japanese saw, pictured below. Harbor freight sells a Japanese saw called a Ryoba that actually has a well reviewed rip and crosscut blade on it, which I wish I’d know before buying this for twice the price.

It took a lot of tuning to get this to open. Some of the knuckles needed to be cleaned out more, in some places I needed to rip further. I had a couple unfortunate spots where the wood chipped off, a good lesson to learn for next time.
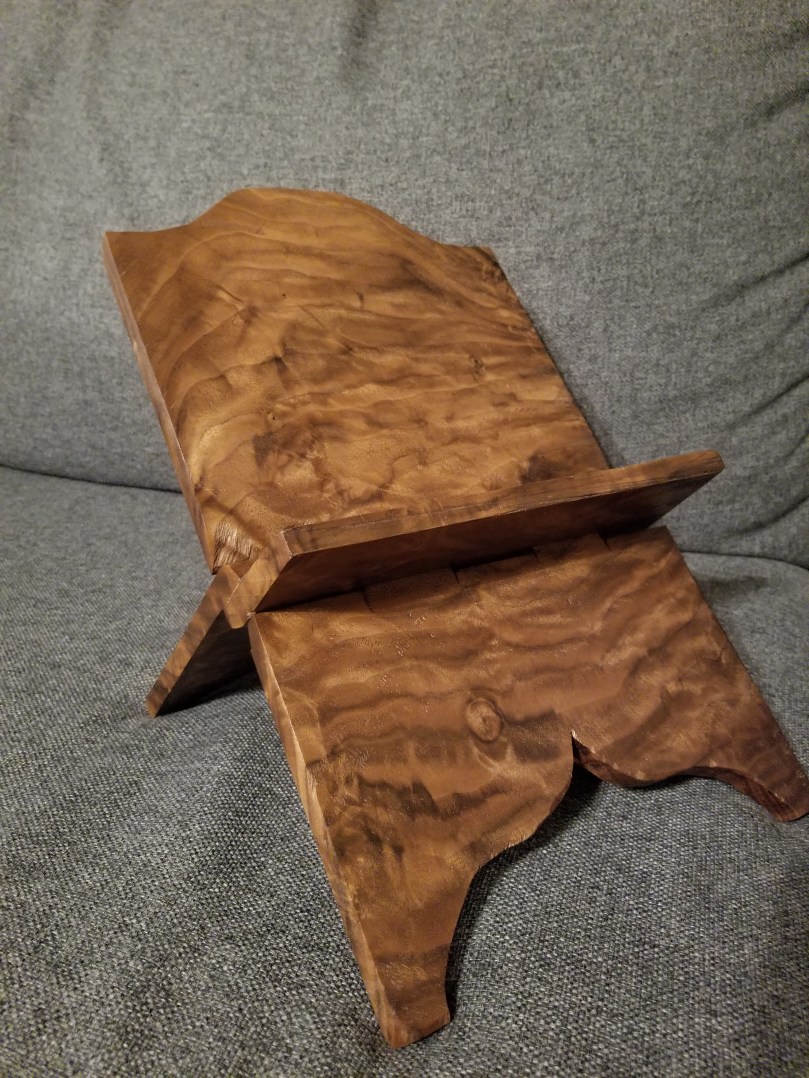
Here’s the finished product. I sanded at 120 then 220 grit after planing some of the saw marks off. I did use a power sander here, cause I’m not THAT dedicated to hand tools for this. I then wet sanded with tung oil varnish at 400 and 600 grit, and finished with spray on shellac. Still needs a final sand and one more coat, but my wife loved it!